Assembly of the Fluid Section
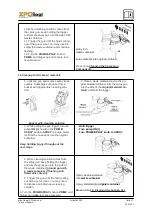
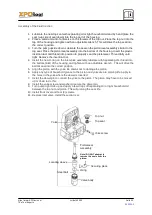
1. Lubricate the new top seal with separating oil or light household oil and by hand place the
seal (cup side of seal down) into the top port of the housing.
2. Place a small amount of anti-seize on the threads of the top nut. Place the top nut into the
top of the housing and tighten with an adjustable wrench. This will drive the top seal into
the correct position.
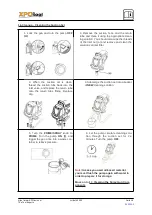
3. Turn the pump upside down. Lubricate the seal on the piston/seal assembly similar to the
top seal. Place the piston/seal assembly into the bottom of the housing. Insert the plastic
insertion tool and thread into position to properly seat the piston/seal. Thread fully until
tight. Remove the insertion tool.
4.
Install the new O-ring on the inlet valve assembly, lubricate with Separating Oil, thread into
the bottom.(inlet) of the housing, and tighten with an adjustable wrench. This will drive the
bottom seal into the correct position.
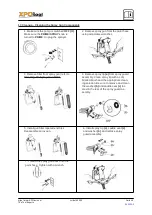
5.
Align the piston with the yoke. Be careful not to damage the piston.
6.
Apply any type of household grease to the piston and yoke area to prolong life. Apply to
the holes in the yoke where the dowel is inserted.
7.
Install the dowel pin to connect the yoke to the piston. The piston may have to be moved
up or down to do this.
8.
Install the yoke screw and washer to secure the dowel pin.
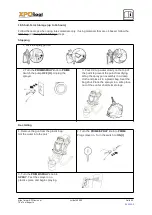
9.
Turn pump right side up and apply a few drops of Separating Oil or light household oil
between the top nut and piston. This will prolong the seal life.
10.
Install front cover and four (4) screws.
11.
Replace inlet valve. Install the suction set.
https://www.XPOtool.com
Artikel 63003
Seite 23
The Tool Experts
04 2021
-1
Piston/seal
Assembly
Note! DO NOT attempt to
remove the seals from the
piston.
Locating sleeve
Yoke
Yoke screw
Top nut
Top seal
Valve body
Securing piece
Steel ball
O-ring


