background image


13 | 

P a g e  


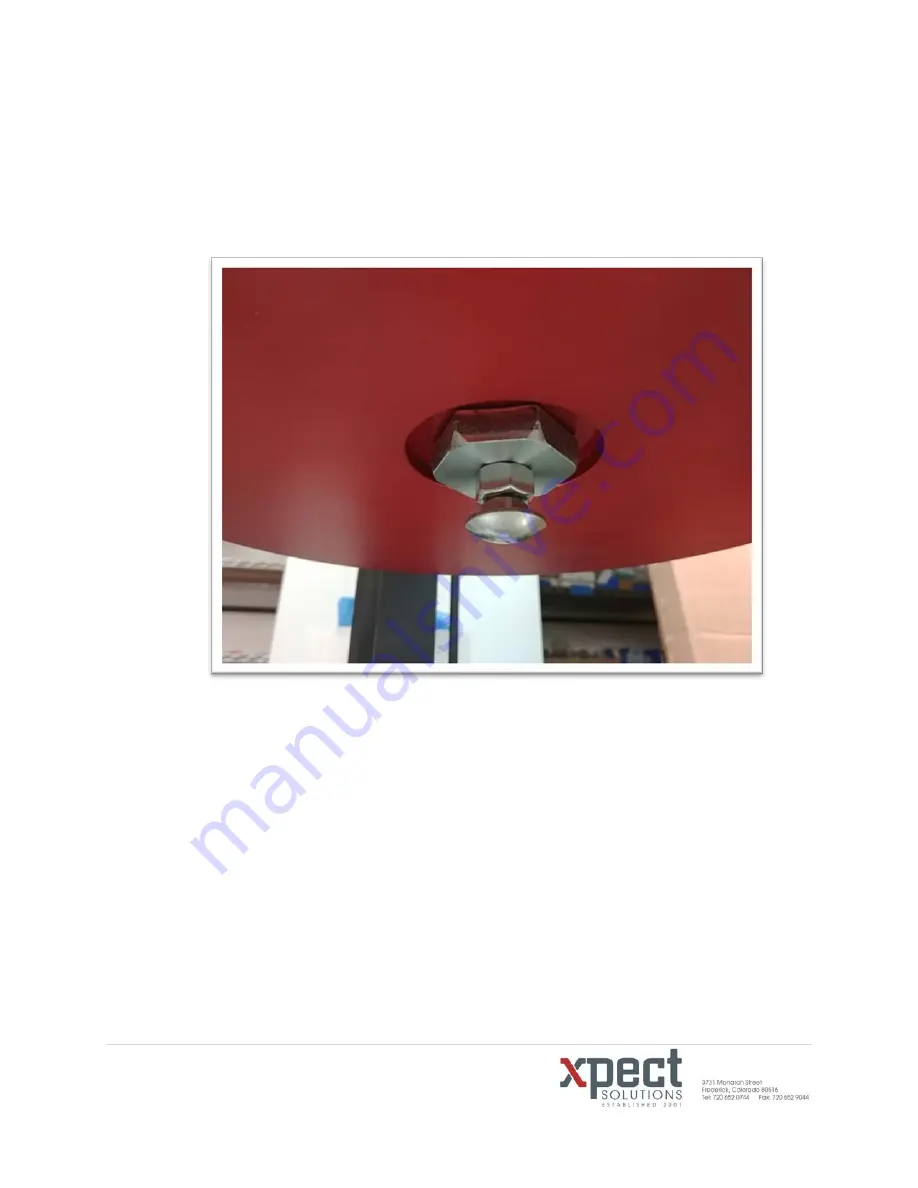
Burper 

Each Press has the option for a Burper to be installed. Installation and adjustment are an 
easy as threading a bolt into the provided threads and setting the height to allow the 
Burper to NOT puncture the Bucket Lid while pressing the lid on. 


(Burper as seen from below) 


Summary of Contents for Inc Lid Press

Page 1: ...1 P a g e Operation and Setup Manual for Xpect Solutions Inc Lid Press Machinery ...

Page 2: ...2 P a g e Operation and Setup Manual for Xpect Solutions Inc Lid Press Machinery Includes instructions for Small Pail Tabletop Lid Press Tabletop Lid Press Stand Up Lid Press ...

Page 3: ...3 P a g e 5 Gallon Bucket Stand up Fixed Stainless Steel model ...

Page 4: ...ersonnel that will use or work in the area of the machine read the following Operation Manual and Setup Manual for Xpect Solutions Inc Lid Press Machinery This Manual We recommend that Management complete the following items prior to using Xpect Solutions Inc Lid Press Machinery Conduct a meeting with all personnel to review discuss and answer questions regarding safety capacities limitations and ...

Page 5: ...uirements Air Requirements Each Press is required to have an air supply connected to the Quick Connect Fitting located on the back of the Lid Press CAUTION When air is applied to the regulator the Press Disk could potentially MOVE from the down position to the raised position Additionally when air is REMOVED the Disk could potentially lower from the raised position to the lower position Be sure no...

Page 6: ...ACT same time to lower the Press Head Buttons are located on each side of the 2 hand control in the center of the yellow ends The Press Head will stay lowered until the buttons are released at which point the Press Head will raise automatically It is recommended to press and hold the button for 3 seconds while the press head is in the extended position to assure a complete tight lid 2 Hand Control...

Page 7: ...ntial pinch points at different areas Pinch Point Stickers have been placed at areas around the machine to indicate the hazard area Correct 2 Hand Operation of the Machine will assure hands are in the proper place during operation of the press Press Disk with Pinch Point Stickers ...

Page 8: ...8 P a g e CAUTION Potential Pinch Points Areas are Between the Press Plate and the Bucket Lid Potential Pinch Point Between the Press Plate and the Cylinder Body Potential Pinch Point ...

Page 9: ...nc but from time to time adjustments are required to be made to assure the proper closure of Lid to Pail Pail Stop The Pail Stop is the location at the base or midpoint of the vertical I beam Its purpose is to act as a backstop and positioning guide for the bucket to keep it centered under the press head Pail Stop ...

Page 10: ...ess Head Press and hold the 2 Hand Control The Press Disk should lower while the 2 hand control is pressed While in this position visually inspect the top edge of the pail on the lower edge of the Press Disk There should be 1 8 clearance between the circumference of the pail and Press Disk View this clearance from multiple angles to assure the clearance is equal Some Lid and Pail combinations requ...

Page 11: ...nected to the Press place an empty bucket with A FULLY PRESSED LID under the Press Head Remove the Main Air Line from the Air Regulator from the back of the machine Locate the Control Valve which is located on the side of the vertical I Beam With air removed from the press swap tubes A and B so you have inserted Tube A into Port B and Tube B into Port A Control Valve ...

Page 12: ...he Press Disk should immediately extend extending the Press Plate down onto the closed pail and pushing the entire Press head assembly up in the slots If the Head does not move up the bolts they are too snug You will need to loosen them more View the gap between the Press Head and the top of the pail If required use a plastic mallet to adjust the Press Head bracket up down left or right to positio...

Page 13: ...on for a Burper to be installed Installation and adjustment are an easy as threading a bolt into the provided threads and setting the height to allow the Burper to NOT puncture the Bucket Lid while pressing the lid on Burper as seen from below ...

Page 14: ... fast release of air from the Air Cylinder during the closure cycle No adjustments are typically necessary The check valve will open when air is applied to the machine and close when air is removed from the machine This prevents movement of the air cylinder when NO air is applied to the press Quick Exhaust and Check Valve ...

Page 15: ...s are run on one machine and size conversion is required from the larger pails size to the smaller pail size Pail Adapters are equipped with 4 threaded bolts which are inserted up through 4 holes in the Press Plate They are then fastened with wing nuts for operation Pail Adapter ...

Page 16: ...16 P a g e For Service or Operation Questions ...

Reviews: