


RANGE HOOD - User instructions
HOTTE DE CUISINE - Notice d’utilisation
CAMPANA EXTRACTORA - Manual de utilización
USA
F
E
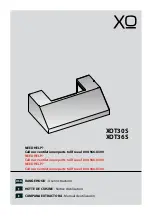
XOT30S
XOT36S
NEED HELP?
Call our ventilation experts toll free al 800-966-8300
NEED HELP?
Call our ventilation experts toll free al 800-966-8300
NEED HELP?
Call our ventilation experts toll free al 800-966-8300


