


11 /
17
X
X
N
N
E
E
T
T
N
N
e
e
t
t
w
w
o
o
r
r
k
k
B
B
o
o
x
x
C
C
a
a
m
m
e
e
r
r
a
a
I
I
n
n
s
s
t
t
a
a
l
l
l
l
G
G
u
u
i
i
d
d
e
e
3
3
.
.
2
2
.
.
I
I
n
n
s
s
t
t
a
a
l
l
l
l
i
i
n
n
g
g
I
I
P
P
-
-
I
I
n
n
s
s
t
t
a
a
l
l
l
l
e
e
r
r
S
S
o
o
f
f
t
t
w
w
a
a
r
r
e
e
a
a
n
n
d
d
C
C
o
o
n
n
f
f
i
i
g
g
u
u
r
r
i
i
n
n
g
g
I
I
P
P
a
a
d
d
d
d
r
r
e
e
s
s
s
s
3
3
.
.
2
2
.
.
1
1
.
.
A
A
b
b
o
o
u
u
t
t
I
I
P
P
-
-
I
I
n
n
s
s
t
t
a
a
l
l
l
l
e
e
r
r
A unique IP address has to be configured in order to connect network camera and monitoring PC to a
network. IP-Installer software provided in the Installation CD (included in the package and also available to
download from our website http://
www.cnbtec.com
) will configure IP address easily.
If your network have
a DHCP server that automatically assigns IP addresses to network cameras. If your network does not have a
DHCP server, the default IP address of the device is 192.168.123.100. Refer to IP Installer user’s manual for
detail.
3
3
.
.
2
2
.
.
2
2
.
.
C
C
o
o
n
n
f
f
i
i
g
g
u
u
r
r
i
i
n
n
g
g
I
I
P
P
A
A
d
d
d
d
r
r
e
e
s
s
s
s
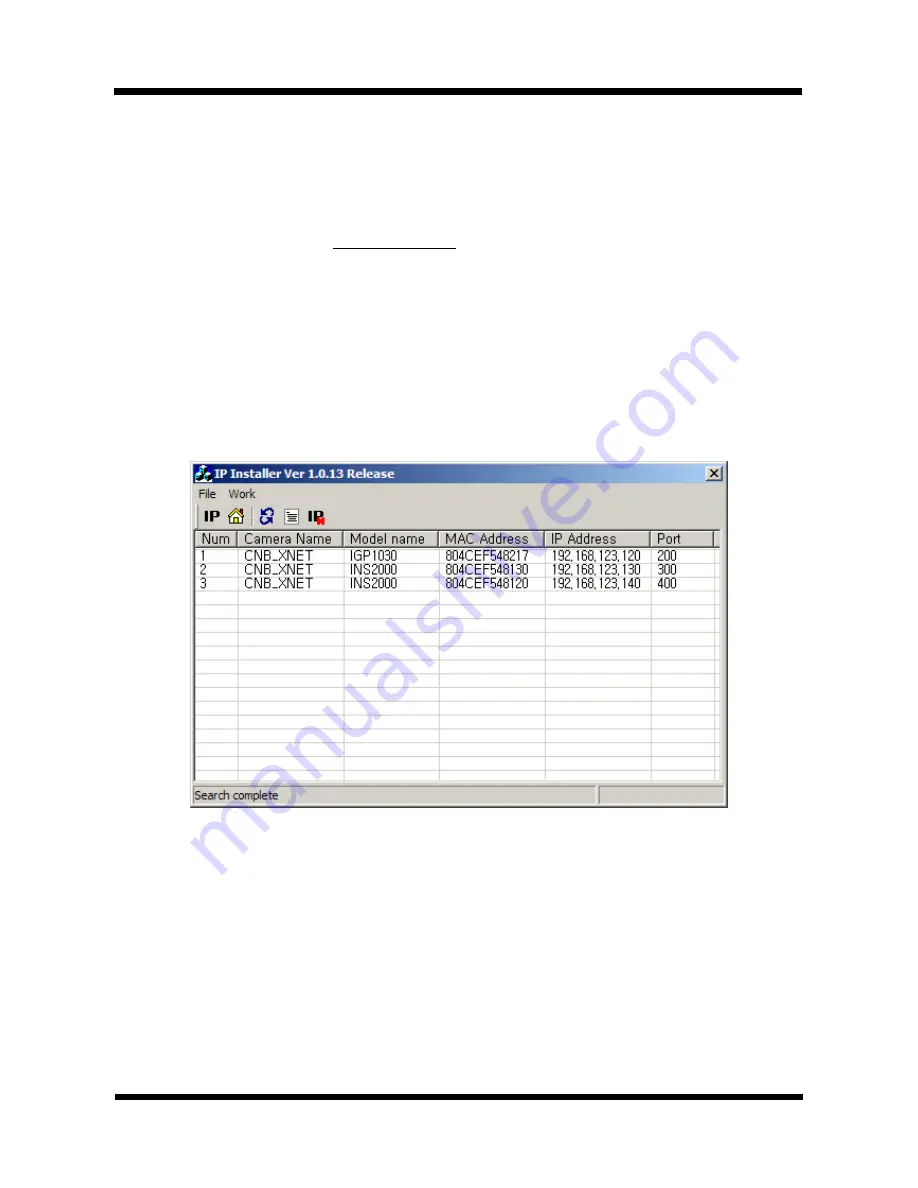
A. The following box will appear when you start the IP-installer software.
Figure 3-1. IP Installer Start box


