v
e
h
ic
le
in
s
ta
lla
ti
o
n
11
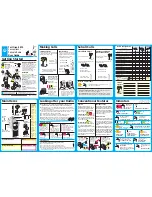
Vehicle installation
Every vehicle is different; for your safety, follow all instructions carefully. Consult a
professional installer if you have questions.
1. To begin, first decide which method of installation is best for your vehicle:
XM SureConnect:
You can listen to your Xpress
EZ
through your car stereo by using
Xpress
EZ
’s built-in FM modulator and the XM SureConnect. Simply find an unused FM
frequency on the stereo and set your Xpress
EZ
to transmit on that same frequency. See
your XM SureConnect installation guide.
FM Direct Adapter:
If you choose to use the FM Direct Adapter (sold separately) to
transmit XM audio through your car stereo, we recommend professional installation.
Cassette Adapter:
Use the cassette adapter (sold separately) if your vehicle’s audio
system has a built in cassette player. The cassette adapter will provide the best audio
quality.
Audio input:
Some vehicles come with an audio input jack. If your vehicle has this
type of input you can simply use a mini audio cable (sold separately).
2. Once you have chosen your method of installation, next you can mount your
Xpress
EZ
.
3. Next decide the best location for your XM antenna. Mount this antenna to the
roof or trunk of the vehicle. During installation, make sure you are outdoors and the
antenna is not obstructed by tall buildings.
4. Finally you will connect all of the plugs to the car cradle and lock your Xpress
EZ
into
place. Once in place you can activate your Xpress
EZ
.
Now that you have all of the parts you need, you are ready to begin installing your
Xpress
EZ
.
Summary of Contents for XpressEZ
Page 1: ...user guide XMCK 5...
Page 10: ...vehicle installation 10 1 vehicle installation...
Page 18: ...2 activation activation 18...
Page 20: ...3 using your XpressEZ using your Xpress EZ 20...
Page 29: ...5 Customer Support customer support 29...
Page 36: ...6 Warranty warranty 36...
Page 39: ...warranty 39 Notes...


