XK-CHROME-DM Dash Mount XKchrome Dual Mode Controller
Install Instructions
1.
Test controller before mounting:
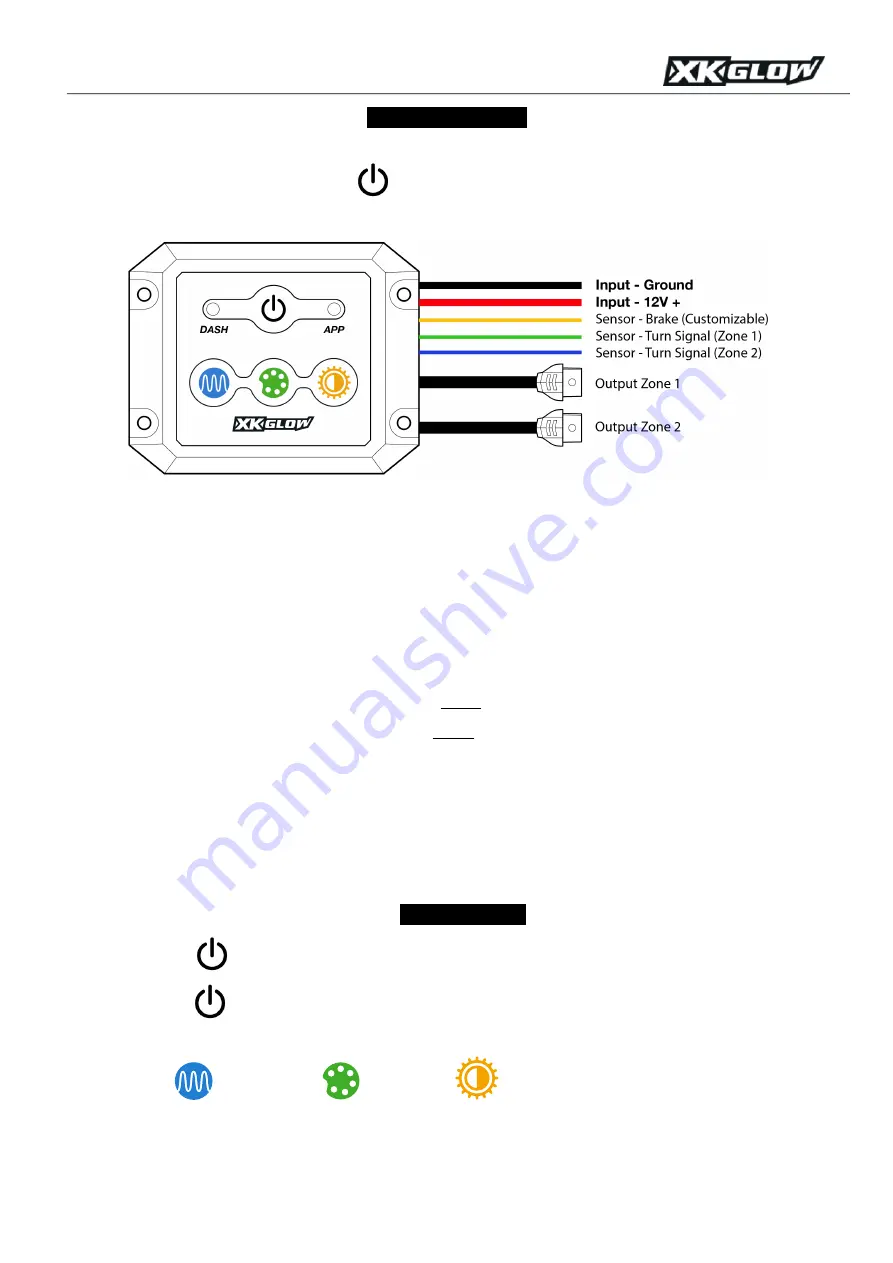
As shown below, connect the 2 input wires to the battery. The black is the ground wire
and the red is the positive 12V wire. Push
button and the DASH or APP indicator will power on. If the controller
does not power on, please contact us for troubleshooting.
2.
Connect the lights with controllers.
3.
Optional: Connect sensor wires:
•
YELLOW wire:
When this wire gets 12V power, both light zones turn red. This is typically tapped into 12V
brake wire. However, the triggered color can be customized to other colors or even animated themes in
the app device setting page.
•
If you separate the light zones symmetrically on your vehicle, each zone can be synced with turn signal and blinks
amber by tapping the GREEN and BLUE sensor wires to the vehicle turn signal 12V wires.
i.
GREEN wire:
When this wire gest 12V power, zone 1 turns amber.
ii.
BLUE wire:
When this wire gest 12V power, zone 2 turns amber.
4.
Secure all wires and connectors:
Use zip ties and wire clips to neatly mount and hide any loose wires. Use double sided
tape to hold male and female plugs together. Make sure wires are not touching anything hot or located on moving parts.
Locate the ON/OFF switch in a convenient location. Securely mount the controller to the mounting surface.
5.
Connect to 12V DC power:
Firmly connect the wire terminals to the positive and negative poles of the battery. Power on,
download the
XKchrome
App, and enjoy!
6. Control Modes
•
Short press
to turn on the system and switch between Dash Mode and App Mode.
•
Long press
to turn off the system.
•
Dash mode button functions:
o
Change pattern.
Change Color.
. Change brightness.
o
The last running color and patterns will be saved as default in dash mode.


