background image

2 Method of replacing parts due to machine
malfunction

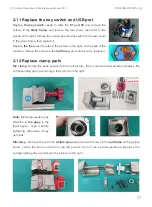
2.1 Replace the battery

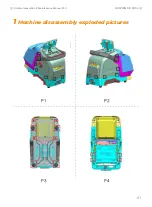
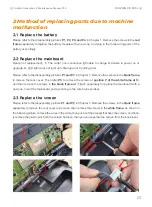
Please refer to the disassembly pictures 

P1, P2, P3, and P4

 in Chapter 1. Remove the screws in the 

red 

frame

 separately to replace the battery module with a new one, and plug in the three wiring ports of the 

battery accordingly.

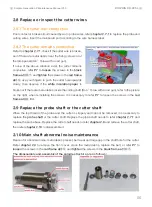
2.2 Replace the mainboard

Reason  of  replacement:

1.

  The  cutter  non-conductive 

2.

Unable  to  charge 

3.

Unable  to  power  on  or 

upgrade. 

4.

 LED light does not light up 5.Startup error 6.cutting error.

Please refer to the disassembly pictures 

P1 and P2

 in Chapter 1. Remove the screws in the 

black frame


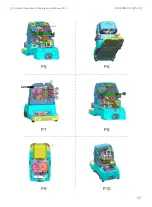
to remove the rear cover. Then refer 

P5

 to remove the screws at 

position Z of the white frame at ⑩

and then remove the screws in 

the black frame at ① to ⑤ 

separately to replace the mainboard with a 

new one. Insert the mainboard port according to the wire harness label.

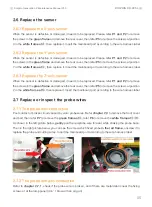
2.3 Replace the screen

Please refer to the disassembly pictures 

P1 and P2

 in Chapter 1. Remove the screws in the 

black frame


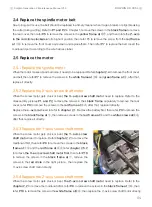
separately to remove the rear cover and screen, then remove the screws in the 

white frame

, as shown in 

the following picture, remove the wires in the circle, then push out the bracket that fixes the screen, and final-

ly remove the plastic pins from the screen harness, then you can separate the screen from the back rover.

03

Dolphin Generation 2 Maintenance Manual V1.0

DOLPHIN XP-005L

Summary of Contents for Dolphin Generation 2 XP-005L

Page 1: ...Dolphin Generation 2 Maintenance Manual V1 0 Note This manual is applicable to models with serial number KM10 KM11 of Dolphin Generation model...

Page 2: ...P1 P2 P3 P4 1 Machine disassembly exploded pictures 01 Dolphin Generation 2 Maintenance Manual V1 0 DOLPHIN XP 005L...

Page 3: ...P5 P6 P7 P8 P9 P10 02 Dolphin Generation 2 Maintenance Manual V1 0 DOLPHIN XP 005L...

Page 4: ...e black frame to remove the rear cover Then refer P5 to remove the screws at position Z of the white frame at and then remove the screws in the black frame at to separately to replace the mainboard wi...

Page 5: ...rews in their black frame separately to remove the rear cover refer P8 to remove the screws in the red frame at after that replace it directly Replace the x axis rail need to refer to chapter 2 1 Remo...

Page 6: ...screws in the green frame and remove the rear cover then refer P5 to remove the screws at position Z in the white frame at then replace it Insert the mainboard port according to the wire harness label...

Page 7: ...metal debris inside the cutting shaft Don t blow with an air gun refer to the picture on the right when reinstalling the screws it is necessary to refer P7 to loosen the screws in the red frame at fi...

Page 8: ...f the machine remove the screws in the red frame and rotate it out to replace it 2 12 Replace clamp parts M2 clamp Rotate the knob outward on the left picture then it can be disassembled Replace the c...

Page 9: ...Shenzhen Xhorse Electronics Co Ltd Address 2801 2805 2901 2905 Block A Building 6 Shenzhen International Innovation Valley Dashi 1st Road Xili community Nanshan District Shenzhen...

Reviews: