Scanning
at the WorkCentre
®
7232/7242
Simple Scanning:
1. Load the document into the Document Handler.
2. Touch the All Services button on the Control Panel.
3. Touch the Network Scanning icon.
4. Select the appropriate Template on the Touch Screen.
5. Select the appropriate Settings on the Touch Screen.
6. Press the Start button on the Control Panel.
Scanning Options:
General Settings – Color Scanning
The Auto Detect option allows the machine to determine
the color content of your document. The Color option
enables the machine to use all four toner colors. The
Grayscale option enables the machine to print only black
and gray tones. The Black & White option enables the
machine to use only black toner.
General Settings - 2 Sided Scanning
You can specify your original documents as 1 Sided, 2
Sided, or 2 Sided(Rotate Side 2).
General Settings - Original Type
You can specify your original documents as Photo & Text,
Text, or Photo.
General Settings - Scan Presets
You can specify your scanning presets for Sharing &
Printing, for Archival Record, for OCR, for High Quality
Printing, Simple Scan, or Custom.
Advanced Settings
The Advanced Settings tab options allow you to access
the Photographs, Image Options, Image Enhancement,
and Shadow Suppression settings.
Layout Adjustment
The Layout Adjustment tab options allow you to access
the Resolution, Original Orientation, Original Size, Edge
Erase, Book Scanning, and Reduce/Enlarge settings.
Filing Options
The Filing Options tab options allow you to access the
Quality/File Size, File Name, File Format, Meta Data, File
Name Conflict, Password, and Login Name settings.
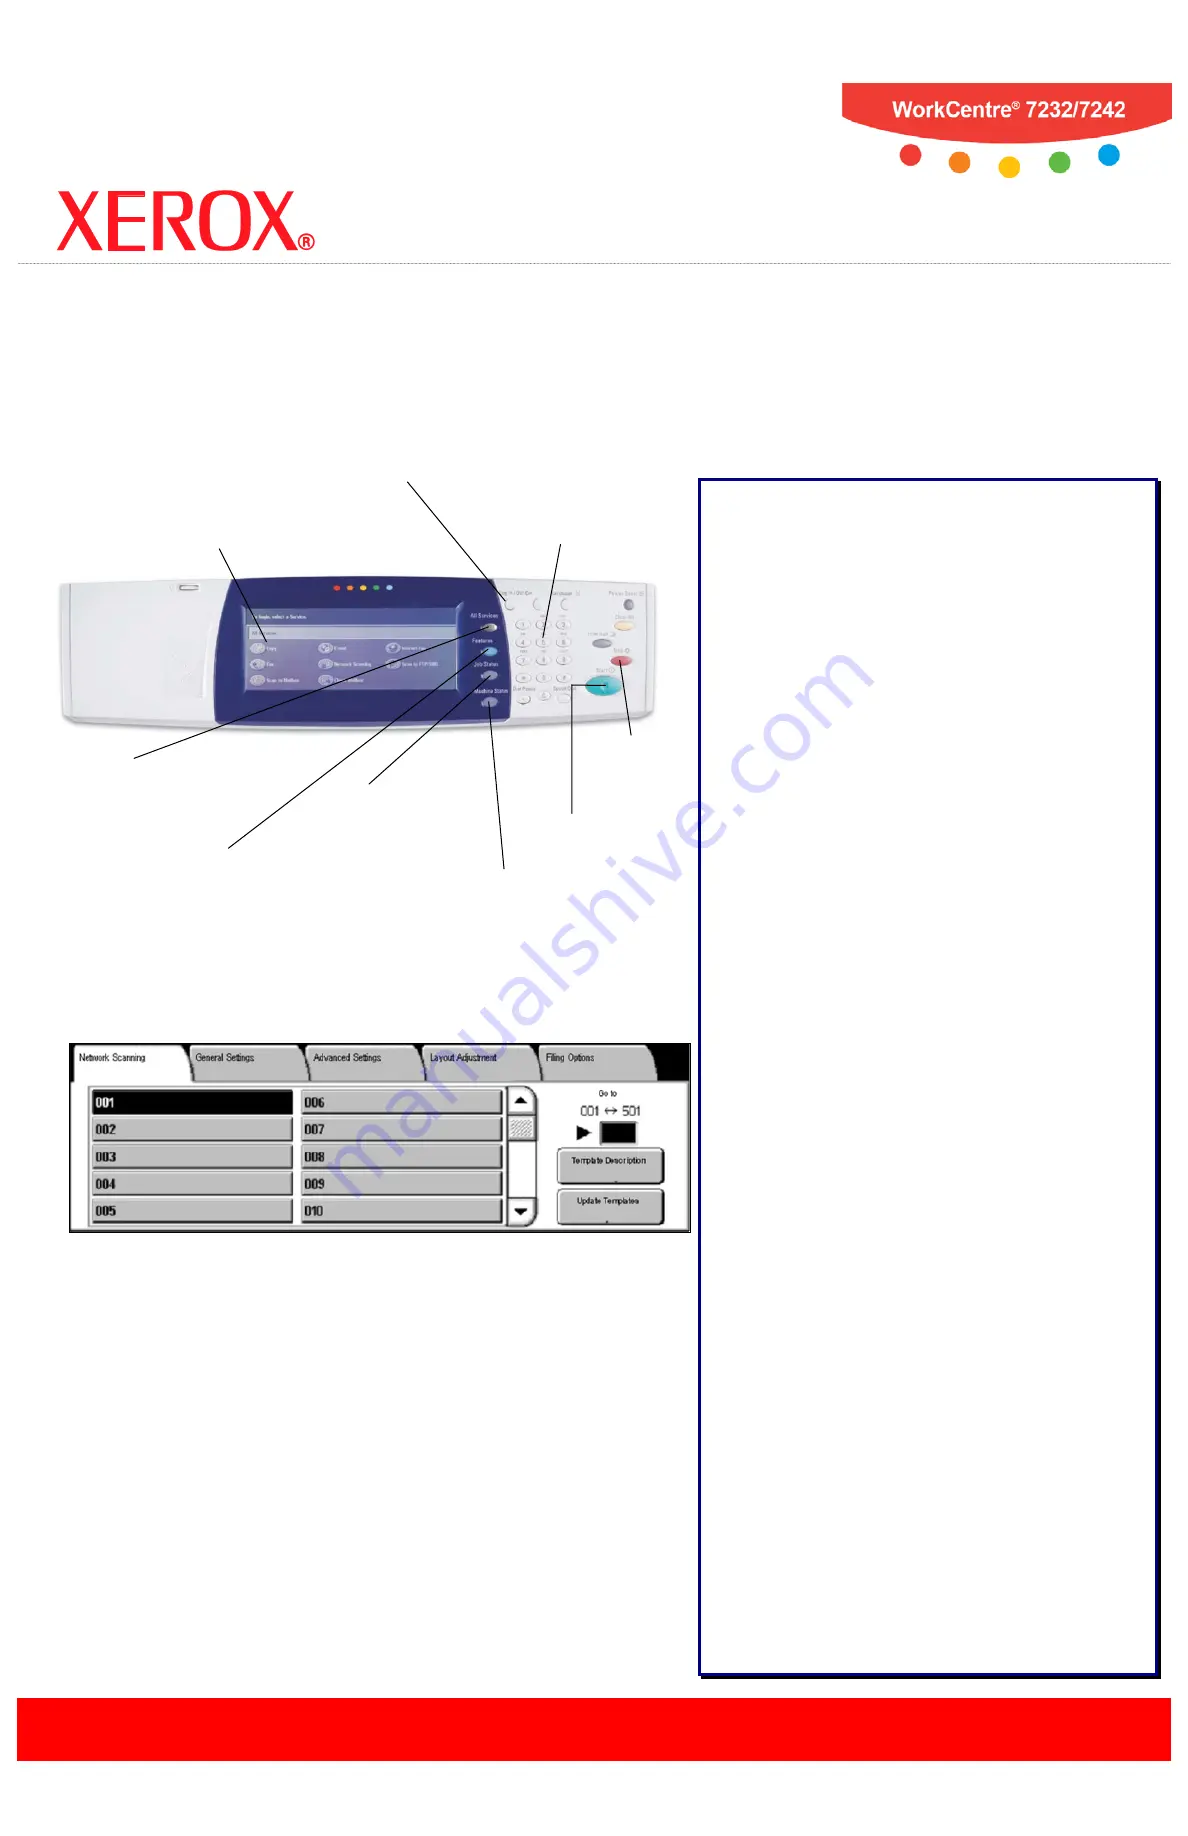
About Templates…
To successfully complete a network scanning job you
must select a template from the list. Templates are used
for scanning jobs at the machine - they define the
parameters of each scan job. Information such as the
final destination of the job (the repository) and the image
quality settings are defined within the template, along with
the template name. Template names are displayed on the
Network Scanning tab.
You can select an existing template “as is” or use Internet
Services to create a brand new template.
All Services Button
Displays the All
Services screen on the
touch screen.
Touch Screen
Allows you to select
all programming
features.
Job Status Button
Displays job progress
information on the
touch screen.
Machine Status Button
Displays the current status
of the machine on the
touch screen.
Stop Button
Stops the
Scan job.
Log In/Out Button
Provides password-
protected access to the
System Administrator
Menu.
Number Keypad
Allows you to enter the
required Template Number.
Start Button
Starts the
Scan job.
Features Button
Displays job features
on the touch screen.
DEFAULT
@Template A


