

©2013 Xerox Corporation. All rights reserved. Xerox® and the sphere of connectivity design, DocuColor® and FreeFlow® are trademarks of or licensed to Xerox Corporation in the
United States and/or other countries.
702P01226
Step 2: Power Up
1.
Power on the printer and monitor.
2.
Press the Power On button on the server.
3.
When the Reconfiguration screen appears, select the appropriate printer model, and press
“Install.”
4.
The platform is configured for a basic DHCP network and is set
up automatically. See the “FreeFlow Print Server Installation
Guide” for additional networking configurations and optional
choices, such as Gateway and Client Driver Installation. Your
FreeFlow Print Server comes with all of its software preloaded
and with a valid temporary license. Please retain the blank
license CD to backup the license later.
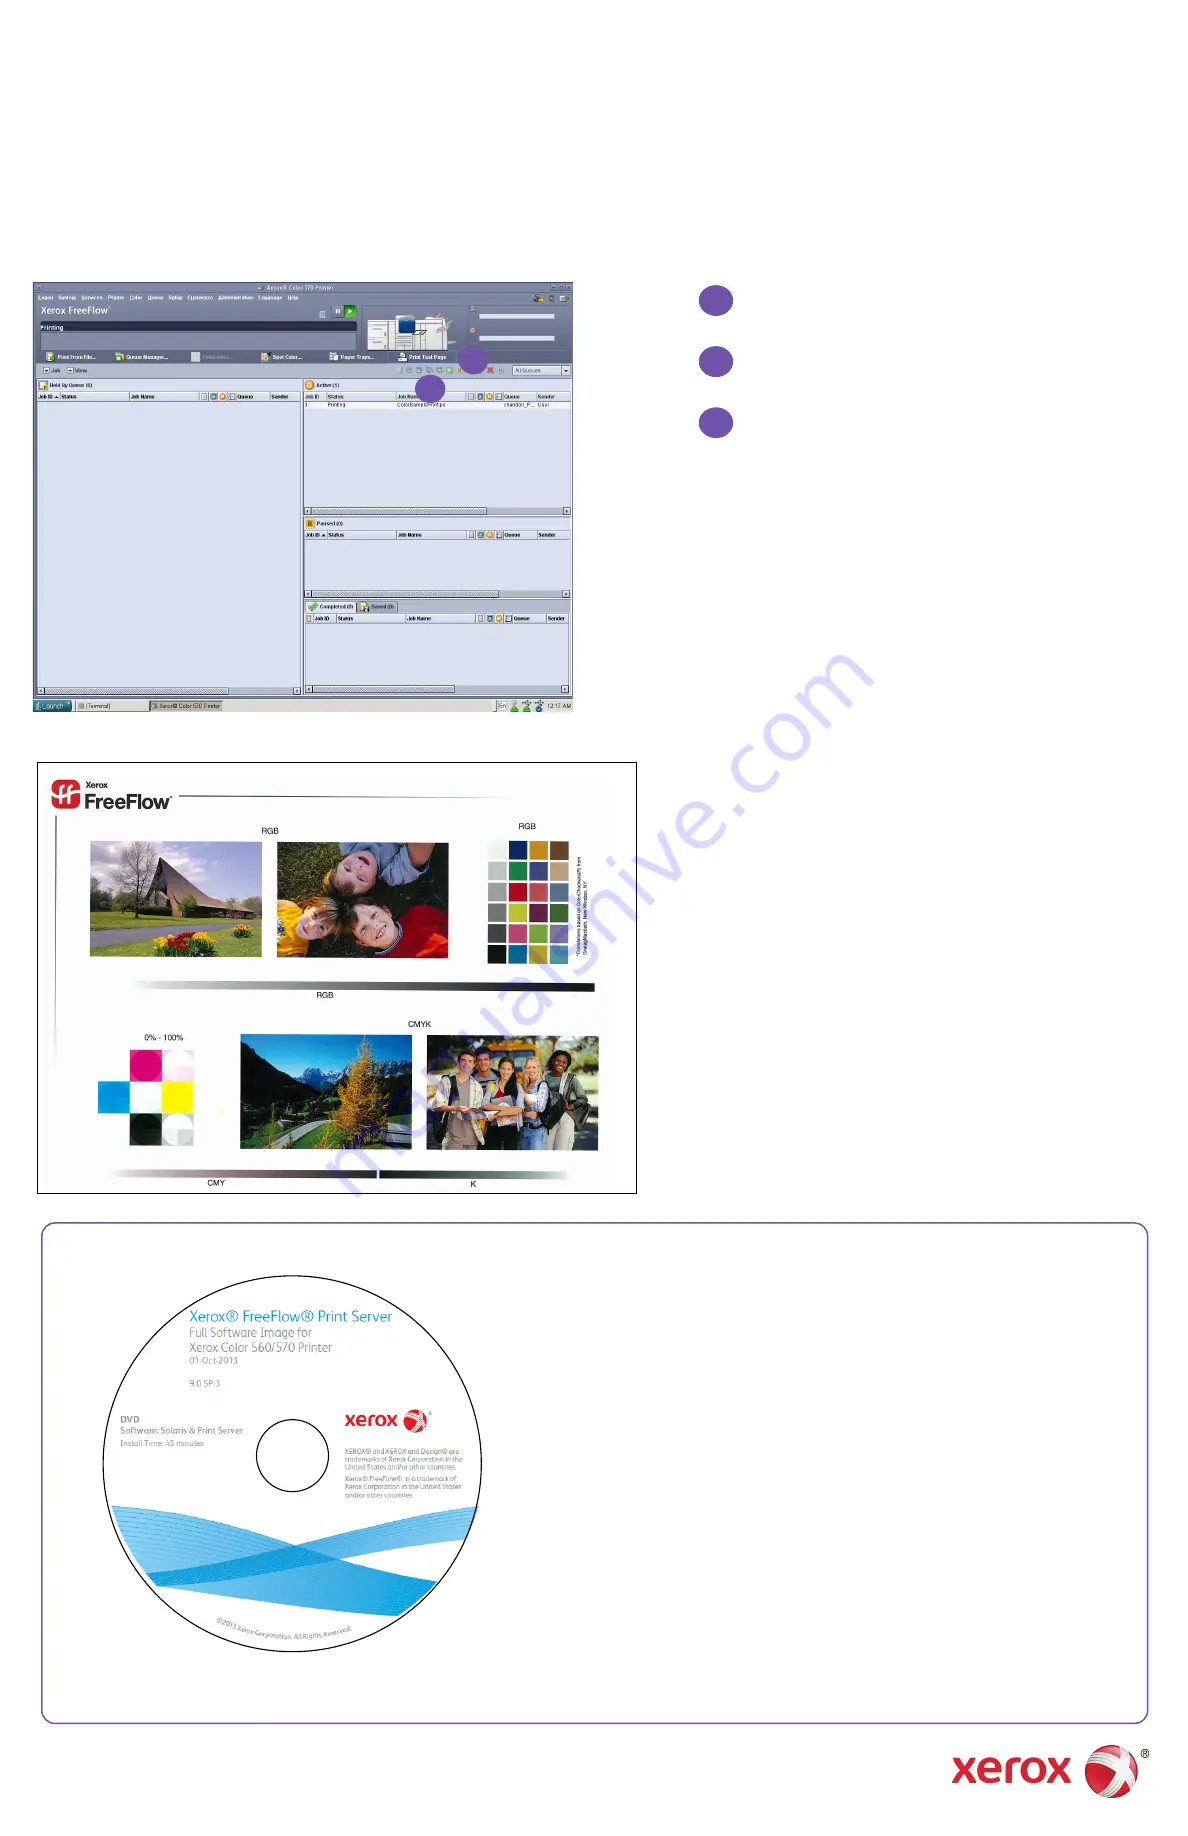
Step 3: Print Test
Ensure that the paper tray is loaded.
Select “Print Test Page ”
The “ColorSamplePrint.ps” print job automatically begins
to print.
Step 4: Completion
1.
Visually inspect prints for significant defects. Calibration is
required to fine tune the system.
2.
The basic FreeFlow
®
Print Server installation is now complete.
3.
Please see the complete Software Kit for the supporting
software, print drivers, and documentation.
3
3
3
3
2
2
2
2
Quick Load Software DVD
(This section is for informational purposes only.)
Complete Software DVD Installation Steps
Unique options, variations and details can be found
in the Xerox FreeFlow Print Server Installation Guide.
The DVD loads all software: The OS, Xerox FreeFlow
Print Server Color and 7 languages—all-in-one.
1. Make sure you have the license available for
this release on USB or CD-ROM. Insert the
X86 FreeFlow Print Server for Full Software
Image DVD into the drive. Power on and the
system will boot from the DVD drive for
about 7 minutes.
2. Select interface to
Select interface to
Select interface to
Select interface to b
b
b
bge
ge
ge
ge0
0
0
0....
3. Follow the prompts for network settings.
4. Double-click the appropriate selection for
Country or Region.
5. Select the Time Zone, and then press <Next>.
6. The Confirm Information screen is displayed.
Ensure that the information is correct and
then click <Confirm>. The Solaris Install
JumpStart window opens.
7. The Partition/Dataset Configuration screen
appears. It is strongly recommended to leave
the box checked (default).
8. The software loads automatically from the
DVD for about 40 minutes. Once the “Press
enter to reboot this DFE” prompt appears,
press <Enter>. The server will power down
briefly, and then power on automatically.
9. Press the Eject button and remove the Full
System Image disc after the system boots
into the initial BIOS screen. If the disc is not
ejected, the software installation will
repeat. If this occurs, press and hold the
Power button to power off the server. Press
the Power button to power on the server,
and then eject the disc.
10. The Console login prompt appears for
about 4 minutes. Do not type any input.
Wait approximately 5 minutes.
11. The Xerox FreeFlow Print Server
Configuration Utility appears. Select the
correct printer model.
12. The Change System Passwords screen
appears. Enter new system passwords.
13. Use License Manager and add the version
license file. Then restart the Xerox Free
Flow Print Server. Security is preset.
Please reference the complete Xerox FreeFlow
Print Server Installation Guide for variations,
options, and additional detailed information.
Figure 1 – An example of a DVD label
Solaris OS, Xerox FreeFlow Print Server Software and Color Supplemental software is
available on one easy-to-load DVD.
1
1
1
1
3
3
3
3
2
2
2
2


