


48 • Chapter 5
5-2
Removing a SIMM
Follow this procedure should you need to remove the memory SIMM.
1
Turn the printer power OFF and unplug the printer power cord.
2
Disconnect all cables from the back of the printer.
3
Open the front cover and remove the image cartridge. Refer to
“Replacing the Image Cartridge” on page 41).
4
Push down on the tray and stacker extenders until both are
recessed into the printer body.
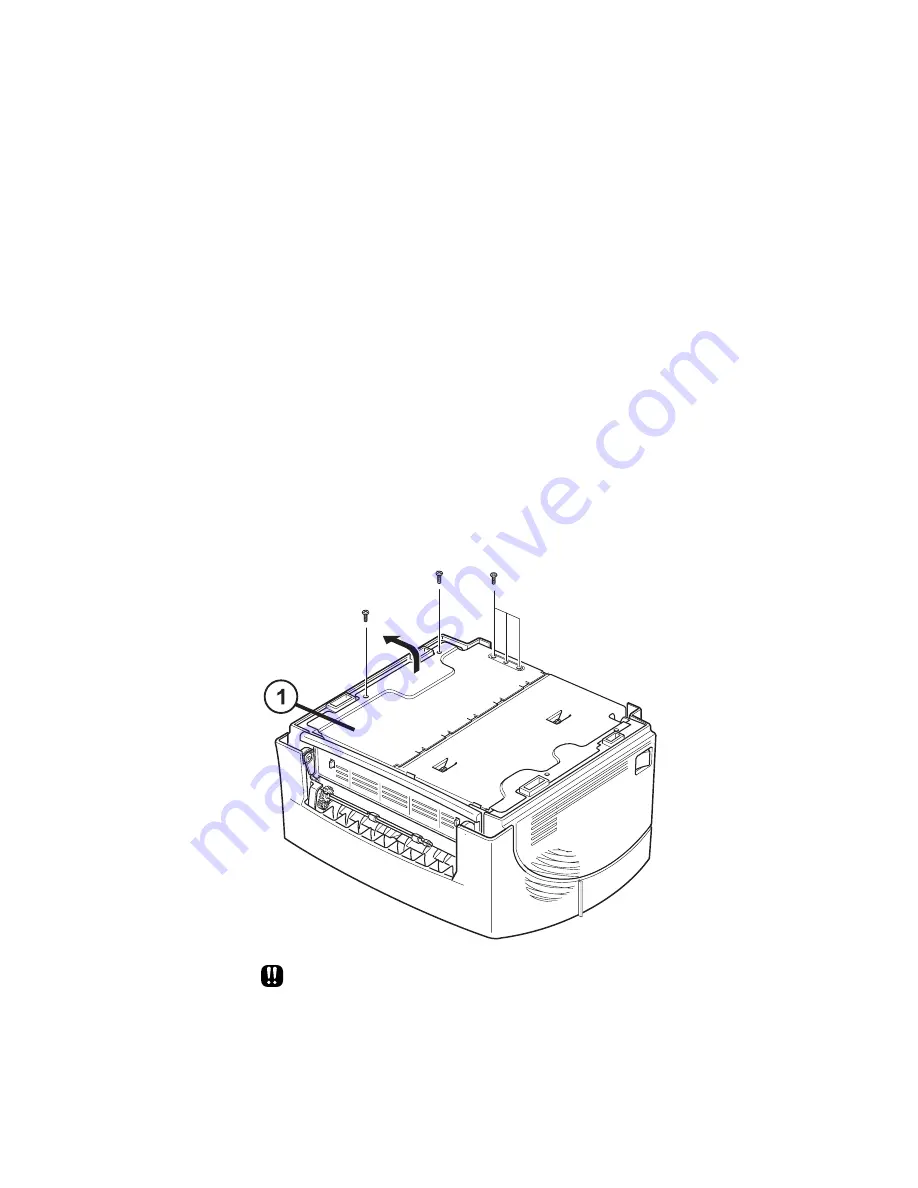
5
Turn the printer upside down, remove the screws where shown
below, and remove that half of the bottom panel (1).
The printer’s control board and the SIMM are sensitive to static
electricity. Before installing the SIMM, discharge static electricity
from your body by touching something metal, such as the metal
back plate on any device plugged into a grounded power source.
If you walk around before completing the installation, again
discharge any static electricity.
Summary of Contents for DocuPrint P8E
Page 1: ...Ax DocuPrint P8e Personal Laser Printer User Guide Final Draft...
Page 2: ......
Page 12: ...viii...
Page 13: ...Setting Up Your Printer 1 1 1Setting Up Your Printer...
Page 27: ...Printing 15 2 2Printing...
Page 41: ...Troubleshooting 29 3 3Troubleshooting...
Page 50: ...38 Chapter 3...
Page 51: ...Maintenance 39 4 4Maintenance...
Page 56: ...44 Chapter 4...
Page 57: ...Adding Memory 45 5 5Adding Memory...
Page 62: ...50 Chapter 5...
Page 63: ...Specifications 51 A 6Specifications...
Page 66: ...54 Appendix A...
Page 68: ...56 Appendix B...
Page 69: ...CE Declaration 57...
Page 70: ...58 Appendix B...


