background image

4 Machine Status

80

Ma
ch
in

e St

at

u

s

4

„

Fax Comments List

You can check the registered comments to be used on cover notes.
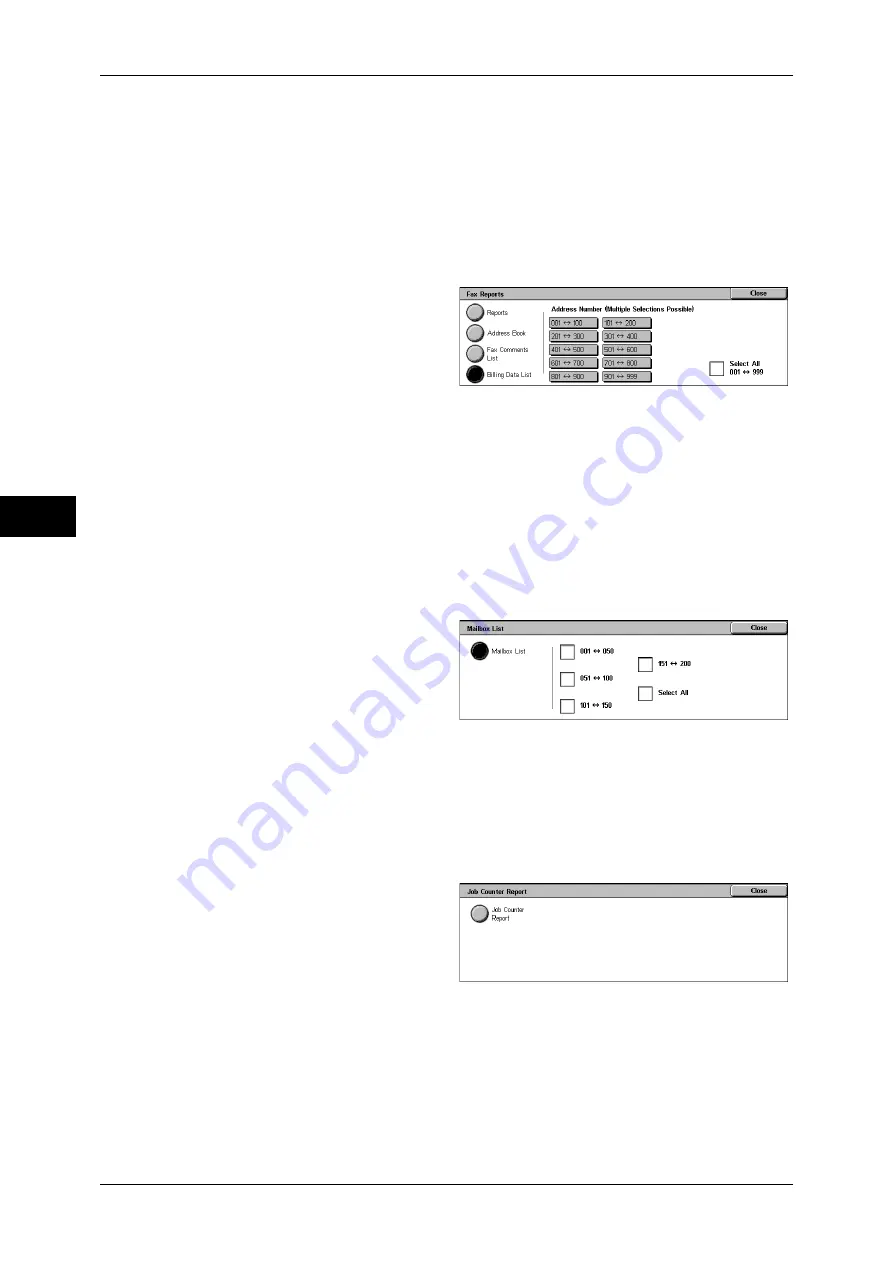
„

Billing Data List

You can check the status of the billing data.

Note

[Billing Data List] appears when the auditron mode for the fax service is enabled.

If you select [Billing Data List], the following screen for specifying a range of address 

numbers is displayed. Select a range of numbers, and press the <Start> button.

z

Select All
You can print the list of all billing data.

Mailbox List

Prints the list of mailbox settings and the procedure for saving documents to mailboxes.

Note

[Mailbox List] appears when the System Administration mode is selected.

1

Select [Mailbox List].

Note

To display the [Mailbox List] screen, select the <Machine Status> button, and then select 
[Machine Information] > [Print Reports] > [Mailbox List].

2

Select a range of mailbox numbers 
to be printed.

3

Press the <Start> button.

Job Counter Report

Prints the counter report for each feature.

Note

[Job Counter Report] appears only when the System Administration mode is selected.

1

Select [Job Counter Report].

Note

To display the [Job Counter Report] screen, select the <Machine Status> button, and then 
select [Machine Information] > [Print Reports] > [Job Counter Report].

2

Select [Job Counter Report].

3

Press the <Start> button.

Auditron Reports

You can print an auditron report by user. Note that the content on the screen differs 

depending on whether the Account Administration feature is enabled.

Note

[Auditron Reports] appears when the System Administration mode is selected.

Summary of Contents for DocuCentre-III C4100

Page 1: ...DocuCentre III C4100 C3100 Administrator Guide...

Page 2: ...Xerox Corporation and Fuji Xerox Co Ltd All Xerox and Fuji Xerox product names are either registered trademarks or trademarks of Xerox Corporation and Fuji Xerox Co Ltd The data saved in the hard disk...

Page 3: ...5 Bypass 30 Tandem Tray Module TTM 31 HCF B1 Tray 6 32 Changing the Paper Size for the Trays 34 Changing the Paper Settings 36 3 Maintenance 39 Replacing Consumables 40 Replacing the Toner Cartridges...

Page 4: ...ite Hard Disk 83 Print Mode 83 Fax Receiving Mode 86 Faults 87 Supplies 88 Billing Information 89 Billing Information 89 User Account Billing Information 89 5 Tools 91 System Settings Procedure 92 Ste...

Page 5: ...3 Security Settings 147 Other Settings 150 Print Service Settings 151 Allocate Memory 151 Delete Form 153 Other Settings 153 Scan Service Settings 157 First Tab 157 Scan Defaults 157 Scan to PC Defaul...

Page 6: ...Settings 211 Job Status Default 211 Overwrite Hard Disk 212 6 CentreWare Internet Services Settings 215 Installation of CentreWare Internet Services 216 Preparations 216 Configuration on the Machine...

Page 7: ...tion on the Computer 240 CentreWare Internet Services Setting Items 240 8 E mail Environment Settings 241 E mail Overview 242 Preparations 243 Installation Procedure 245 Step 1 Enabling Port and Setti...

Page 8: ...2 Setting the Server Fax Feature 272 12 Encryption and Digital Signature Settings 275 Encryption and Digital Signature Overview 276 Encryption Features for Communication 276 Encryption and Digital Sig...

Page 9: ...entication Feature is not Enabled 303 When the Authentication Feature is Enabled 306 Jobs Manageable by Account Administration 309 Configuration for Authentication 312 Installation Overview 312 Step 1...

Page 10: ...e Bottom Left Cover B 429 Paper Jams in the Bottom Left Cover C 430 Paper Jams in the Top Cover E 430 Paper Jams in the Trays 1 to 3 431 Paper Jams in the Tandem Tray Module 431 Paper Jams in the HCF...

Page 11: ...Machine 493 Notes and Restrictions in the Interrupt Mode 495 Notes and Restrictions on the Use of the Internet Fax Feature 496 Notes and Restrictions when Connecting with Internet Service Provider 49...

Page 12: ......

Page 13: ...ne This chapter describes organization of this guide and conventions z Preface 12 z Types of Manuals 13 z Using This Guide 14 z Interface Cables 17 z Energy Saver Mode 18 z Customizing the Control Pan...

Page 14: ...how to perform operations or if a problem occurs with the machine Refer to the User Guide for copy print scan fax operating procedures For information about optional accessories for the printer functi...

Page 15: ...m settings setting up the network environment and solving problems that may occur with the machine Quick Reference Guide Introduces the basic operations of the machine as well as daily management and...

Page 16: ...ccurred on the machine and to print various reports lists 5 Tools Describes how to configure the system settings 6 CentreWare Internet Services Settings Describes how to use CentreWare Internet Servic...

Page 17: ...tions or features z The following symbols are used in this guide A cross reference included in this guide Refers to names of CD ROM features and touch screen messages and input text Refers to folders...

Page 18: ...ide z Orientation of documents or paper is described in this guide as follows Long Edge Feed LEF Loading with one of the long edges of the document or paper Short Edge Feed SEF Loading with one of the...

Page 19: ...the machine 3 Connect the other end of the USB interface cable to a computer 4 Switch on the machine 5 Restart the computer For details of setting items refer to Installation When Using USB Port P 22...

Page 20: ...oes out to indicate that the Energy Saver feature is cancelled Sleep Mode In this mode the power is lowered more than in the Low Power mode The touch screen goes out and the Energy Saver button on the...

Page 21: ...st operation Note The default for From Last Operation to Low Power Mode is 15 minutes The Low Power Mode cannot be disabled From Last Operation to Sleep Mode Set the time to move to the Sleep Mode aft...

Page 22: ...e system administrator s user ID with the numeric keypad or the keyboard displayed and select Enter When a passcode is required select Next Input and enter the system administrator s passcode then sel...

Page 23: ...cting features and their positions you can customize the All Services screen that is displayed when you press the All Services button on the control panel The following are the factory default feature...

Page 24: ...s without returning to the All Services screen If you do not want to assign any feature to a button select Not Assigned By factory defaults Copy is assigned to the Copy button and no feature is assign...

Page 25: ...the Control Panel 23 Before Using the Machine 1 z Network Scanning z Scan to PC For information on how to change the settings refer to Copy Tab Features Allocation P 125 First Tab P 157 and Screen Def...

Page 26: ...aracters numerals letters and symbols Item Description Entering letters and numerals If you select Shift uppercase letters appear To return to the lowercase letters select Shift again Entering symbols...

Page 27: ...describes the types of paper that can be used on the machine precautions when handling paper and how to load paper in trays z Paper Types 26 z Loading Paper 29 z Changing the Paper Size for the Trays...

Page 28: ...is curled Supported Paper Types The following table lists the paper types supported for each paper tray duplex module and the finisher O Available X Not available WARNING Do not use conductive paper s...

Page 29: ...e malfunction Use paper and OHP films recommended by Fuji Xerox z Damp or wet paper z Paper pre printed with other printer or copier z Wrinkled creased or ripped paper z Envelopes that are not flat or...

Page 30: ...Paper and Other Media 2 z When continuously outputting onto transparencies transparency sheets may sometimes stick to each other Remove transparencies from the output tray every 20 or so sheets and f...

Page 31: ...e trays may not be selected in automatic tray selection For more information refer to Change Settings P 111 The Tray 5 bypass cannot be selected in the automatic tray selection When the machine runs o...

Page 32: ...y cause paper jams or machine malfunctions 3 Push the tray in gently until it comes to a stop Loading Paper in the Tray 5 Bypass When printing or copying with paper sizes or types that cannot be set i...

Page 33: ...o the machine apply a curl to the paper as shown in the figure on the right Note however that excessively bending or folding the paper may cause paper jams Depending on the type of the paper paper may...

Page 34: ...ray 3 Insert the projections on the bottom of the guide into the paper size holes on the tray j Insert the projection on the tray into the paper size hole on the guide k and then tighten the screw rem...

Page 35: ...the paper k and then push the lever back into its position l Note Do not use the slot at the left of the 8 5 slot on the end guide 7 Open the end guide and place the paper stack tightly against the r...

Page 36: ...paper refer to 3 Copy Copy Paper Supply Selecting the Paper for Copying in the User Guide For information on how to print on non standard size paper refer to the print driver s online help 1 Pull out...

Page 37: ...en loading standard size paper in the Tray move the paper guides to the marks corresponding to the paper size 8 Push the tray in gently until it comes to a stop Note Affix the paper size label to the...

Page 38: ...how to set names to Custom 1 to Custom 5 refer to Custom Paper Name Color P 111 The Setup screen which can be displayed by selecting Setup in the All Services screen allows you to change the paper ty...

Page 39: ...s displayed 9 Select Image Quality 10 Select the paper type to be set at Items and select Change Settings Note Select to return to the previous screen or to move to the next screen 11 Select the image...

Page 40: ...2 Paper and Other Media 38 Paper and Other Media 2 14 Select Close to return to the All Services screen...

Page 41: ...n the machine adjust gradation print a report list and delete the print job with an invalid User ID z Replacing Consumables 40 z Cleaning the Machine 62 z Executing Calibration 65 z Printing a Report...

Page 42: ...3 R4 CWAA0692 1 unit box Staple cartridge for A1 B1 C C1 1 CWAA0540 5 000 staples 3 sets box Staple cartridge for Finisher B1 Booklet 2 CWAA0728 2 000 staples 4 sets box Stamp replace kit F451 WARNING...

Page 43: ...tem Replacing the Toner Cartridges 42 Replacing the Black K Toner Cartridge 43 Replacing the Color CMY Toner Cartridges 44 Replacing the Waste Toner Bottle 46 Replacing the Drum Cartridge 48 Replacing...

Page 44: ...lace toner cartridges while the machine is on Copy or print density may be reduced slightly after the message Please order a XXX Toner Cartridge appears on the screen Message 1 Page yield after the me...

Page 45: ...artridge door 3 Remove the toner cartridge from the machine Important Be careful when handling the empty cartridge to avoid spilling any residue toner 4 Remove the new toner cartridge from its box Rot...

Page 46: ...t locks into position 6 Close the toner cartridge door 7 Close the front cover Note A message will be displayed and the machine will not operate if the front cover is not completely closed Replacing t...

Page 47: ...ridge with the arrow on the machine and push until it locks into position 6 Close the toner cartridge door 7 Close the front cover Important A message will be displayed and the machine will not operat...

Page 48: ...i Xerox for the machine Replace the waste toner bottle while the machine is on Note The number of pages is for when A4 paper is used The number of copies that can be printed is only an estimate and va...

Page 49: ...chine and push until it locks into position 4 Completely remove the old ROS cleaner R4 from the machine 5 Insert the new ROS cleaner into the machine 6 Close the front cover Note A message will be dis...

Page 50: ...umber of copies that can be printed is only an estimate and varies depending on the image type paper size paper type and the machine usage environment 1 Make sure that the machine is not in operation...

Page 51: ...x Important Do not place the new drum cartridge in an upright position Return used drum cartridges to our Customer Support Center 5 Carefully remove the protective sheet from the cartridge 6 Place the...

Page 52: ...warning message approximately 1 500 copies and prints before the unit reaches the end of its life Another message will be displayed at this point when the unit needs to be replaced 1 Select Second Bia...

Page 53: ...Select Reset Counter on the screen 10 Select Yes on the screen to reset the counter Replacing the Fuser Unit The fuser unit lasts approximately 100 000 copies and prints The machine will display a war...

Page 54: ...roximately 30 minutes 3 Pull the side cover open 4 Remove the two screws securing the fuser unit by rotating them anticlockwise 5 Grip the fuser unit by the two ring tabs and remove the fuser unit fro...

Page 55: ...the Supplies tab on the touch screen then select Fuser Assembly 12 Select Reset Counter on the screen 13 Select Yes on the screen to reset the counter Replacing the Transfer Belt Cleaner The Transfer...

Page 56: ...ve the Transfer Belt Cleaner unit from the machine Important Be careful when handling the unit not to spill any residue toner left on the Transfer Belt Cleaner unit 6 Remove the new Transfer Belt Clea...

Page 57: ...n 13 Select Yes on the screen to reset the counter Replacing the Staple Cartridge for Finisher A1 When the Finisher A1 optional is installed and it is time to replace the staple cartridge a message ap...

Page 58: ...e with your fingers 1 and remove the staple case from the cartridge 2 5 Insert the front side of the new staple case into the staple cartridge 1 and then push the rear side into the cartridge 2 6 Retu...

Page 59: ...ridges recommended by Fuji Xerox for the machine Note To order a staple cartridge contact our Customer Support Center 1 Make sure that the machine is not operating and open the front cover of the fini...

Page 60: ...Finisher B1 When the Booklet Maker Unit for Finisher B1 optional is installed and it is time to replace the staple cartridge a message appears on the touch screen When this message appears load a new...

Page 61: ...ontainer becomes full a message appears on the touch screen When the message is displayed empty the hole punch waste container as instructed Make sure to discard all paper chads when emptying the hole...

Page 62: ...Important Do not touch the ink pad of the stamp cartridge If it comes into contact with your skin wash immediately Problems caused by using consumables not recommended by Fuji Xerox are not covered by...

Page 63: ...e and pull it straight out of the machine Note If only the sponge part of the stamp cartridge is removed make sure to remove the bottom part of it also 4 Insert the new stamp cartridge in the machine...

Page 64: ...a small amount of neutral detergent 2 Wipe off any excess water with a soft cloth Cleaning the Document Cover and Document Glass If the document cover and document glass are dirty streaks or smears ma...

Page 65: ...and Constant Velocity Transport Glass Dirt or smudges on the film or constant velocity transport glass can cause streaks or smears on outputs To ensure clean copies at all times clean the machine abo...

Page 66: ...so might damage paint or coating on plastic parts Cleaning the machine with an excessive amount of water may cause the machine to malfunction or damage documents during copying or printing 1 Pull up...

Page 67: ...ty and Auto Screening or Gradation of Screen in the Image Options tab is selected Important Because the calibration uses the Tray 5 Bypass load plain paper in the Tray 5 Bypass Any other types of pape...

Page 68: ...assword is x admin 3 Select Tools 4 Select Image Quality Adjustment 5 Select Calibration 6 Load A4 plain paper in the Tray 5 Bypass and gently align the paper guides with the paper 7 Select the screen...

Page 69: ...ically adjusts the gradation It takes about 20 seconds to complete the gradation adjustment When the adjustment is completed successfully the Calibration screen for screen type settings appears again...

Page 70: ...1 Press the Machine Status button 2 Select Print Reports Note If Print Reports Button under Reports is set to Disabled the Print Reports button appears only in User Mode of the System Administration m...

Page 71: ...delete documents that have an invalid User ID stored with the Private Charge Print feature For details on how to specify a duration of how long the print jobs are kept refer to Stored Document Settin...

Page 72: ......

Page 73: ...4 Machine Status This chapter describes the features for checking the machine status z Overview of Machine Status 72 z Machine Information 73 z Faults 87 z Supplies 88 z Billing Information 89...

Page 74: ...us and hard disk overwriting status You can check or set print modes You can also print various reports lists to check the job history settings and registered information For more information refer to...

Page 75: ...s button 2 On the Machine Information screen displayed you can check the machine status General Information On the General Information screen you can check the serial number of the machine machine con...

Page 76: ...2 Check the software version in a screen displayed On the Software Version screen you can check the following items Paper Tray Status You can check the paper trays set on the machine On the screen you...

Page 77: ...s the Start button Job History Report You can check job results The data for the latest 200 jobs is printed Select the option for the report to print from All Jobs Scan Fax Internet Fax Jobs Job Flow...

Page 78: ...ect Machine Information Print Reports Copy Reports 2 Select Configuration Report 3 Press the Start button Configuration Report You can check the hardware configuration network information and print an...

Page 79: ...the settings configured in the ESC P K emulation mode ESC P Logical Printers List Prints the stored programming settings configured in the ESC P K emulation mode HP GL 2 Settings List Prints the sett...

Page 80: ...y settings of the machine Note The content of Configuration Report is identical whether it is printed from Copy Reports Printer Reports Scan Reports or Fax Reports z Scan Fax Configuration Report You...

Page 81: ...or the fax and scan features Note The content of Scan Fax Configuration Report is identical whether it is printed from Scan Reports or Fax Reports z Mailbox Selector List You can check the settings fo...

Page 82: ...d 1 Select Mailbox List Note To display the Mailbox List screen select the Machine Status button and then select Machine Information Print Reports Mailbox List 2 Select a range of mailbox numbers to b...

Page 83: ...Account Administration feature for each service refer to Accounting P 195 1 Select Auditron Reports Note To display the Auditron Reports screen select the Machine Status button and then select Machine...

Page 84: ...d You can check a reduced image of the scanned data and its transmission result Set whether to print out the Transmission Report Job Undelivered automatically from the system administrator mode For in...

Page 85: ...result To have the report printed enter the System Administration mode For information on specifying whether or not to have the report printed automatically refer to File Transfer Report Fax Server P...

Page 86: ...s Custom Settings The numbers stored in the memory appear Programming You can check or change the values set for the print mode item numbers For the items that can be configured in the ESC P K and PDF...

Page 87: ...to be stored or to be deleted Store Current Selections Stores the current selections If you select a number already stored its settings will be overwritten with the new settings The overwritten setti...

Page 88: ...ers and select Save Fax Receiving Mode You can set a fax receiving mode For information on automatic and manual fax receiving modes refer to 4 Fax Receiving Faxes in the User Guide 1 Select Fax Receiv...

Page 89: ...y The following describes how to print the error history report 1 Press the Machine Status button 2 Select the Faults tab 3 Select Error History Report 4 Press the Start button Note You can also acces...

Page 90: ...e Supplies screen you can check the following items Note The items displayed vary depending on the options installed Important If using a partly consumed toner cartridge such as a toner cartridge remo...

Page 91: ...d on models equipped with Fax features Only B W and not color is supported for Faxes For 2 large size full color is counted as a print at either of number of full color copies or number of full color...

Page 92: ...m administrator meter 1 Using the numeric keypad or the keyboard displayed enter the user ID to enter the System Administration mode and select Enter When a passcode is required select Next Input and...

Page 93: ...nd the procedures to change the settings z System Settings Procedure 92 z Tools Menu List 95 z Common Service Settings 106 z Copy Service Settings 125 z Connectivity Network Setup 134 z Print Service...

Page 94: ...Passcode Entry from Control Panel in Authentication Security Settings is set to On the passcode needs to be entered It is recommended to change the system administrator s user ID and passcode immediat...

Page 95: ...aults copy operation control button indications and so on For more information refer to Copy Service Settings P 125 Connectivity Network Setup Allows you to configure the ports protocols and so on For...

Page 96: ...re information refer to Setup Calibration P 178 Accounting You can register machine users and configure the settings for account administration For more information refer to Accounting P 195 Authentic...

Page 97: ...08 z Fault Tone P 108 z Alert Tone P 109 z Out of Paper Warning Tone P 109 z Low Toner Alert Tone P 109 z Line Monitor Volume P 109 z Ringing Volume P 109 z Stored Programming Tone P 109 z Auto Clear...

Page 98: ...ning Position P 117 z Finisher Adjustment P 117 z Delete All Certificates Initialize Settings P 117 Watermark P 117 z Date Format P 117 z Default Watermark Effect P 117 z Default Watermark P 117 z Fon...

Page 99: ...8 z 2 Sided Copying P 128 z Mixed Sized Originals P 128 z Edge Erase Top Bottom Edge P 128 z Edge Erase Left Right Edge P 128 z Center Erase Binding Erase P 128 z Image Shift Side 1 P 128 z Image Shif...

Page 100: ...ents P 133 Port Settings P 134 z USB P 134 z LPD P 135 z NetWare P 135 z SMB P 135 z IPP P 135 z EtherTalk P 136 z Bonjour P 136 z Port9100 P 136 z SNMP P 136 z FTP Client P 136 z Receive E mail P 136...

Page 101: ...Service Settings P 143 z Authentication System Setup P 143 z Kerberos Server Settings P 143 z LDAP Server Directory Service P 144 z SMB Server Settings P 146 Security Settings P 147 z SSL TLS Settings...

Page 102: ...t P 158 z Sharpness P 158 z Background Suppression P 158 z Shadow Suppression P 158 z Color Space P 158 z Original Orientation P 158 z Resolution P 158 z Mixed Sized Originals P 158 z Edge Erase P 158...

Page 103: ...Mode P 164 z Transmission Header Text Polling P 164 z Polled Documents Auto Delete P 164 z Rotate 90 degrees P 165 z Sender ID P 165 z Save Undelivered Faxes P 165 z Save Deleted Faxes P 165 z Saved F...

Page 104: ...z Response to Read Receipts P 172 z Read Receipts P 173 z Print Delivery Confirmation E mail P 173 z Split Send Method P 173 z Maximum Data Size per E mail P 173 z Maximum Total Data Size P 173 z Max...

Page 105: ...cted P 180 Stored Programming P 180 Create Job Flow Sheet P 180 z Create P 181 z Edit Delete P 181 z Search by Name P 182 z Search by Keyword P 182 z Select Keyword P 182 z Sheet Filtering P 181 z Nam...

Page 106: ...2 z Transfer Protocol P 192 z Server Name IP address P 192 z Shared Name SMB Only P 192 z Save In P 193 z User Name P 193 z Password P 193 z Port Number P 193 z When the Delete Entry Button is Selecte...

Page 107: ...nt Name ID P 200 z Mask Account ID P 200 z Store User Details P 200 Fax Billing Data P 201 System Administrator Settings P 202 z System Administrator s Login ID P 202 z System Administrator s Passcode...

Page 108: ...s Procedure P 92 2 Select Common Service Settings 3 Select the item to be set or changed Machine Clock Timers You can set the clock time or the time intervals until the energy saver or reset features...

Page 109: ...pecify how many seconds should elapse with no operation before automatic reset occurs When On is selected specify a value between 30 and 900 seconds in 1 second increments In order not to set this fea...

Page 110: ...240 minutes in 1 minute increments Note Configure the From Last Operation to Sleep Mode time to be longer than the From Last Operation to Low Power Mode time Audio Tones Select whether or not to sound...

Page 111: ...ound select Off Ringing Volume Select the sound to be made when an incoming call arrives at the machine You can select the volume from Soft Normal and Loud To disable the sound select Off Stored Progr...

Page 112: ...ect the job types to be shown on the Completed Jobs screen of the Job Status screen that is displayed when the Job Status button on the control panel is pressed Select from All Jobs Printer Print from...

Page 113: ...standard size paper When you load non standard size paper select Custom Size then set the size in the X width direction within the range 182 to 432 mm and in the Y height direction within the range 1...

Page 114: ...ray 5 Bypass You can assign the paper size set here to the Tray 5 standard size button If you frequently use non standard size paper for copying assigning the paper size to a button will save your tim...

Page 115: ...quality is suitable for the recycled paper of 70 or more recycled pulp included Paper having ream weight of 60 105 g m2 Plain D The image quality is suitable for color printing Paper having ream weigh...

Page 116: ...ty to conduct a pre scan and sample the whole document to detect the background color Important When you select High Quality and if Corner Shift is selected in Image Shift and a ratio not greater than...

Page 117: ...hether or not to automatically print a Transmission report Job Undelivered Transmission Report Job Deleted Select whether or not to automatically print a Transmission report Job Deleted for a cancelle...

Page 118: ...sion report undelivered for a transmission failure 2 Sided Report When printing a report list select whether to print 1 sided or 2 sided Note This feature does not appear for some models An optional p...

Page 119: ...atermark You can make settings relating to Watermark Date Format Set the format for printing dates in annotations and Watermark This setting is common to Annotation and Watermark Three format types ar...

Page 120: ...User Role and Authorization Groups P 294 Force Watermark Client Print Set whether to force Watermark printing for printing from a client computer Force Watermark Mailbox Print Set whether to force Wa...

Page 121: ...pport Center No Offset No offset output Offset per Set Offsets the output position for each set of copies Offset per Job Offsets the output position for each job being specified Booklet Offset This se...

Page 122: ...X O X X X X A5 O O O O X O O O O X A5 O X X X X O O O O X A4 O O O X X O O O O X A4 O O O X O O O O O O A3 O O O X X O O O O X B6 O X X O X O X X X X B6 X X X X X X X X O X B5 O X O O X O O X O X B5 O...

Page 123: ...O O O X O O O X X O O O X X B6 O X X X X O X X O X O X X X X B6 X X X O X X X X X X X X X X X B5 O O O O X O X O O X O X O X X B5 O O O O X O O X X X O O X X X B4 O O O O X O O O X X O O O X X 5 5 8 5...

Page 124: ...uous scrolling Display Consumables Screen Set whether the machine displays the parts status when parts need to be replaced Off Does not display the consumable status screen When power is switched on S...

Page 125: ...The recording area stores the following data Spooled print data Print data including Secure Print and Sample Set Forms for the form overlay feature Mailbox and job flow sheet settings box name passco...

Page 126: ...m Administrator Maximum Login Attempts settings When On is set you can set the Maintenance Passcode Make sure not to lose the system administrator s user ID and passcode Otherwise the various settings...

Page 127: ...By setting the most commonly used features you can avoid extra operations such as selecting tabs 1 Select the number of features displayed on the Copy screen 2 From the buttons appearing on the right...

Page 128: ...r Paper Supply in the Copy screen When the default value of Reduce Enlarge is set to Auto Auto Paper Select cannot be selected for Paper Supply Reduce Enlarge Set the default value for Reduce Enlarge...

Page 129: ...Original Type in the Image Quality screen This is valid when Black White is selected for Output Color in the Copy screen Lighten Darken Set the default value for Lighten Darken of Image Options in th...

Page 130: ...ayout Adjustment screen Set the value from 0 to 50 mm in 1 mm increments Edge Erase Left Right Edge Set the default value for the amount of edge erased from the original in the left directions in Edge...

Page 131: ...for Annotation in the Output Format screen Annotations Comment Font Color Set the default value for Format Style displayed when Comment is selected for Annotation in the Output Format screen Annotati...

Page 132: ...y in the Transparency Options screen Copy Control These settings relate to copy operation control Memory Full Procedure When the space of the hard disk runs out during scanning originals a screen appe...

Page 133: ...d suppression level for color copying This setting is valid when Photo Text is selected for Original Type in the Image Quality screen The larger the value the stronger the effect of removing backgroun...

Page 134: ...Detect When frequently making copies of non standard size originals by presetting the non standard size you can save time to enter the original size each time a copy is made A B Series Size You can se...

Page 135: ...ice Settings 133 Tools 5 Annotations Create Comments Register text to be printed with Comment under Annotation You can enter up to 64 characters For information about how to enter characters Entering...

Page 136: ...Select Connectivity Network Setup 3 Select the item to be set or changed Port Settings Set the interface by which the machine is connected to a client In Port Settings you can set the following items...

Page 137: ...to use LPD LPD Port Number Select Standard 515 or Enter Number Enter a port number in the range from 1 to 65535 when selecting Enter Number The default value is 515 Important Do not use the numbers a...

Page 138: ...umbers assigned to the other ports SNMP Port Status Select Enabled to use SNMP when you use any Fuji Xerox manufactured web applications to remote control the machine FTP Client Port Status Select Ena...

Page 139: ...P Port Number Select Standard 80 or Enter Number Enter a port number in the range from 1 to 65535 when selecting Enter Number The default value is 80 Important Do not use the numbers assigned to the o...

Page 140: ...address subnet mask and gateway address will automatically be set via BOOTP RARP The address subnet mask and gateway address will automatically be set via RARP DHCP Autonet The address subnet mask and...

Page 141: ...et Services Settings P 215 IPv6 Address Manual Configuration Allows you to select whether or not to configure the IPv6 address settings manually Manually Configured IPv6 Address This setting is config...

Page 142: ...com z Account name mymail z Host name myhost z Domain Name example com When receiving E mails via POP3 Enter the POP user name on the left side of and incoming POP3 mail server name in the address se...

Page 143: ...ers are allowed HTTP Proxy Server Password Enter a password of the HTTP server Up to 31 characters are allowed HTTPS Proxy Server Name Enter the HTTPS server name Up to 255 characters are allowed HTTP...

Page 144: ...ng all 3 digits select Next SMTP Server Settings Set the SMTP server In SMTP Server Settings you can set the following items Note For IPv4 enter the address in the format xxx xxx xxx xxx where xxx is...

Page 145: ...rsonal mailboxes and personal job flow sheets operated on the previous authentication system are not deleted automatically If these mailboxes or job flow sheets are no longer needed delete them from t...

Page 146: ...nge from 1 to 65535 The default value is 389 Important Do not use the numbers assigned to the other ports Secondary Server Name IP Address Enter the secondary server name or IP address Note For IPv4 e...

Page 147: ...n is not required When setting the login name you can enter up to 255 characters Password Set a password for address book search and access to the directory server by User Attribute Authentication of...

Page 148: ...er limit the search operation is stopped at that number Search Time Out Select whether or not to set a search time out Set the value from 5 to 120 seconds in 1 second increments Directory Service for...

Page 149: ...nabled The port number for SSL TLS communications with LDAP directory server is normally 389 Device Certificate Client Select a certificate to be linked Verify Remote Server Certificate When the machi...

Page 150: ...ble signature and Select during send DocuWorks Signature Select the setting for DocuWorks Signature from Do not add signature Always add signature and Select during send XPS Signature Select the setti...

Page 151: ...led This setting is effective when PEAP MS CHAPv2 is selected in Authentication Method Certificate Revocation Retrieval Settings You can configure the settings for certificate revocation retrieval The...

Page 152: ...cation in the range of 5 to 60 seconds in 1 second increments Other Settings In Other Settings you can set the following items E mail Receive Protocol Select from SMTP and POP3 depending on the usage...

Page 153: ...the power is turned on if the settings exceed the available memory capacity they are automatically adjusted by the system Note When a port is set to Disabled the corresponding items do not appear Depe...

Page 154: ...pooling uses memory When this setting is selected specify the memory capacity of a receiving buffer for spooling from 0 50 MB to 32 00 MB in 0 25 MB increments Note that print data exceeding the set m...

Page 155: ...within the range from 64 to 1 024 KB in 32 KB increments Delete Form You can delete registered ESC P K forms 1 Select Delete Form 2 Select the print mode to delete forms 3 Enter the form number with t...

Page 156: ...the paper type specified on the print driver and selects another type of paper loaded on the machine Display Paper Supply Screen The Paper Supply screen appears prompting you to load another type of p...

Page 157: ...PostScript DMS Deferred Media Selection feature is enabled or disabled Note This feature does not appear for some models An optional package is necessary For more information contact our Customer Supp...

Page 158: ...eiving Buffer LPD Spool refer to Receiving Buffer LPD P 152 Data Processing Order Prints jobs in order of completion of job processing If two or more jobs are continuously submitted a smaller size job...

Page 159: ...elect the item to be set or changed First Tab You can set items relating to the First E mail Scan to Mailbox Network Scanning Scan to PC screen display Feature in 2nd Column You can set the features t...

Page 160: ...contrast setting is valid when Color Scanning is set to Color or Grayscale Sharpness Set the default value for Sharpness of Image Options in the Advanced Settings screen Background Suppression Set th...

Page 161: ...Up to 128 characters can be entered for the subject Searchable Text Set whether or not to use the OCR feature to generate searchable text Note This feature does not appear for some models An optional...

Page 162: ...sizes of A and B series Inch Size Select from 11 sizes of inch series Others Select from other 14 sizes Reduce Enlarge Presets Set the magnifications shown in Preset for Reduce Enlarge in the Layout A...

Page 163: ...uto Suppression Color Space Set whether to display the color space feature When set to Enabled the Color Space button appear on the Advanced Settings screen for E mail Scan to Mailbox Scan to PC and N...

Page 164: ...item to be set or changed Screen Defaults You can set items relating to the Fax Internet Fax screen Fax Screen Default Set the default screen that appears when the Fax Internet Fax screen is displaye...

Page 165: ...firmation Options Set the default value for Confirmation Options of Acknowledgement Report in the Fax Internet Fax Options screen Set whether to automatically print a report that shows a transmission...

Page 166: ...how to re enter a recipient after the first entry z Enter Once Only No need to re enter the recipient z Enter Twice Use the speed dial feature to re enter the recipient z Re enter Fax Number or E mail...

Page 167: ...nts A longer transmission interval increases the total time to send a broadcast transmission for example but allows calls to be received during the standby time Batch Send When the machine stores mult...

Page 168: ...to print two pages of a fax document on one side of a sheet This is convenient for saving paper For example when two A5 pages are received they are printed on a single A4 sheet However if paper of the...

Page 169: ...ceive Display Priority 1 to 3 Set the priority to display the fax document information received using mailboxes For instance when using Network Scanner Utility3 the fax information is displayed in the...

Page 170: ...t Adjustment screen You can assign any magnification to the buttons other than 100 and Auto Preset You can select from preset ratios Variable You can specify a magnification from 50 to 400 in 1 increm...

Page 171: ...e Password Set the machine password when you want to limit the other parties that can send faxes When the machine password is set only a party that sends the correct machine password by F code is allo...

Page 172: ...that a transmitted Internet Fax has arrived at its destination Note You can select Delivery Receipts when the destination machine supports the DSN feature You can use Read Receipts when the destinati...

Page 173: ...ejects receiving the e mail and deletes it Transmission Header Fax Transfer When forwarding received e mail from Internet Fax to fax select whether to add a send header start time sender name recipien...

Page 174: ...f the maximum number of addresses is exceeded the e mail transmission is aborted Important This option is not applicable to the Internet Fax service Incoming E mail Print Options When an e mail sent t...

Page 175: ...when delivery fails Prints only when the transmission failed Split Send Method Set the mail split method Split into Pages Split into pages Split by Data Size Split by the data size set in Maximum Data...

Page 176: ...e mail address from the LDAP server E mail Sending When Search Failed Set whether to disable E mail when an authenticated user fails to retrieve an e mail address from the LDAP server Add Me to To Fie...

Page 177: ...ument is forcibly deleted Print Delete Confirmation Screen Set whether to display a confirmation screen for deleting documents before printing documents that are stored in the mailbox Convert Custom t...

Page 178: ...you to set the document expiration date within the range of 1 to 23 hours in 1 hour increments Print documents stored in the machine will be deleted at the time specified for Documents deleted at Sam...

Page 179: ...ervice Settings 177 Tools 5 Job Flow Service Settings Job Flow Service Settings allows you to configure a pool server Leave the default settings unchanged because a pool server is not available for th...

Page 180: ...2 2 Select any item Create Mailbox Register mailboxes in order to store scanned documents You can register up to 500 mailboxes You can check the current mailboxes in the Mailbox list For more informat...

Page 181: ...tically deleted Delete Expired Documents Specify whether to enable the feature to delete documents stored in a mailbox at a specified time after a retention period has elapsed No Even when the set ret...

Page 182: ...low Sheet Job flow is a feature for executing a series of registered actions The target of a job flow is documents stored in a mailbox A job flow can be executed by using one of the following four met...

Page 183: ...or File Format for the job flow Restrictions on Using Job Flow A job flow can be used by single or multiple users or can be used by linking to a specific mailbox The use of job flows is restricted by...

Page 184: ...ngs Deletes the setting values of the selected items Change Settings Confirm or change the settings of the selected items Name Set the name for the job flow sheet of up to 128 characters Description S...

Page 185: ...lowing options z Internet Fax Message Enter a comment by using the keyboard displayed z Internet Fax Profile Select an Internet Fax profile A profile controls the image resolution paper size and other...

Page 186: ...signature feature z Resend Attempts Set whether to try again if a transmission fails If you select On also set Resend Attempts and Resend Interval Seconds Resend Attempts Set the transmission retry co...

Page 187: ...ing is to be stored Address Book When the server address is registered in Address Book you can specify the address from Address Book The specified address appears in the Transfer via SMB screen For in...

Page 188: ...on paper loaded in the Tray 5 Bypass 2 Sided Printing Sets the 2 sided printing option Output Performs the stapling hole punch and output destination settings z Staple Set the position for stapling z...

Page 189: ...an register up to 999 locations Abbreviated address numbers 001 to 070 are supported by the one touch buttons The one touch buttons are available for fax and Internet Fax To specify an e mail or serve...

Page 190: ...il address with not more than 128 characters z Address Type z Maximum Image Size z Fax Number z Delay Start z Name z Remote Mailbox z Index z F Code z Relay Station Setup z Relay Broadcast z Starting...

Page 191: ...ss book entry with the communications mode set it is not possible to change the communications mode in the Fax Internet Fax screen Resolution Set the transmission image quality Select from Panel image...

Page 192: ...30 communication protocol method for using sub addresses that are standardized by the ITU T The F code sub address and password use not more than 20 digits 0 to 9 and 1 Select Off or On 2 If you sele...

Page 193: ...o Billing Data List P 80 1 Enter the System Administration mode For details on how to enter the System Administration mode refer to System Settings Procedure P 92 2 Select one of Billing Day Time Bill...

Page 194: ...propriate for information represented by a shorter character string such as telephone number employee number For more information on the attribute name refer to Attribute Name of Custom Item 1 2 and 3...

Page 195: ...example domain name fuji user name z For workgroups Local user up to 32 characters Example Fuji Taro Password When a password entry is prompted by the forwarding destination server specify a password...

Page 196: ...ocedure of Step 3 to register the address numbers 5 Select Save Delete from this group Deletes a registered address Enter the address number you want to delete with the numeric keypad and select Delet...

Page 197: ...ation feature is used register user IDs and user names to authenticate registered users For a user of the machine you can set a limit on the number of pages For each registered user you can also check...

Page 198: ...eature to restrict 3 To set account limits select Account Limit then with the numeric keypad enter the maximum number of pages Note Select Next to switch to another item Feature Access Place access re...

Page 199: ...ting information Change Alternative name for Account ID Mask Account ID Print an Auditron report for each user Add This User to Authorization Group Allows you to select an authorization group for a us...

Page 200: ...and documents within mailboxes belonging to the user are deleted If the user is owner of a large amount of material when a large quantity of documents is left remaining within a mailbox for example t...

Page 201: ...ox Standard Accounting Accounting administration is carried out based on the user information and account information pre registered on the machine Auditron Mode Allows you to set whether or not to en...

Page 202: ...f asterisks Alternative Name for Account Name ID If required you can change the indication Account ID on the Login screen that appears when the Log In Out button on the control panel is pressed to ano...

Page 203: ...et Billing refer to Billing Day Time Billing Night Time Billing Midnight P 191 The registered details can be confirmed by printing the Billing Data List For information about how to print refer to Bil...

Page 204: ...g changes and ensure security System Administrator s Login ID Set the system administrator s user ID Enter the ID from 1 to 32 characters Note The default of the system administrator s user ID is 1111...

Page 205: ...up 208 System Administrator Maximum Login Attempts 209 Passcode Policy 209 Charge Private Print Settings 209 Login Type Allows you to select a type of authentication No Login Required Does not authent...

Page 206: ...eted according to the Charge Print settings Note The settings in Service Access are not effective if Login Type is set to Login to Remote Accounts For information about Login Type refer to Login Type...

Page 207: ...ns on the use and the maximum number of allowed pages for each of the copy fax scan and print features 1 Select Account Limit 2 Select a feature to restrict 3 To set account limits select Account Limi...

Page 208: ...passcode view unavailable for some settings user information Register delete change view accounting information Change the authentication mode when being set other than the Local Machine Authenticati...

Page 209: ...otal Impressions Resets all account administration data for all users including the system administrator The number of pages is also reset to 0 All Authorization Groups Delinks users from authorizatio...

Page 210: ...rt list displays Mask User ID You can set how an entered user ID is shown on the screen Use this feature to strengthen security as required Show As you enter the user ID the characters are echoed on t...

Page 211: ...above settings Important The setting of Passcode Entry from Control Panel is used for authentication on the machine A passcode must always be entered when accessing from remote devices using CentreWa...

Page 212: ...the User ID set on the print driver exceeds 24 characters a print job will be cancelled and will not be saved in Private Charge Print z Job Login Failure Set the processing to be applied to authentic...

Page 213: ...not all received jobs are saved using the Charge Print feature Important When using Save in Charge Print all the print jobs are saved regardless of whether or not being successfully authenticated To...

Page 214: ...if you power the machine on again with the unfinished files remaining on the hard disk The data is erased by overwriting once but overwriting three times makes it even more definite that the data cann...

Page 215: ...and manage and train them properly z When turning off the machine make sure no operation is running Train the users to turn off the machine after an active operation completes if any z Note that Secu...

Page 216: ......

Page 217: ...es Settings This chapter describes how to set up CentreWare Internet Services z Installation of CentreWare Internet Services 216 z Starting CentreWare Internet Services 218 z Setting Items Using Centr...

Page 218: ...ater For Mac OS X 10 4 z Safari 1 3 or later Refer to CentreWare Internet Services Problems P 353 when any troubles occur during the configuration Configuration on the Machine The following describes...

Page 219: ...P address a subnet mask and a gateway address For information on how to set an IP address refer to Protocol Settings P 137 4 Select Close The machine automatically reboots 5 After the machine is resta...

Page 220: ...he Internet address entry when the machine s Internet address is myhost example com http myhost example com Note If your network uses DNS Domain Name System and the machine s host name is registered i...

Page 221: ...ails on the setting items z Mailbox Allows you to register a mailbox as well as import or print documents saved in a mailbox z Job Flow Sheets Allows you to register edit or delete job flow sheets z P...

Page 222: ...re that verifies a user and sends scanned data to the folder prespecified for the user z Scan to PC Allows you to configure the settings for Scan to PC z Accounting Configuration Allows you to configu...

Page 223: ...Retrieval Settings Allows you to configure the settings for certificate revocation retrieval z 802 1x Allows you to configure the IEEE 802 1x settings z SSL TLS Settings Allows you to configure SSL TL...

Page 224: ......

Page 225: ...z Print Features Overview 224 z Installation When Using USB Port 227 z Installation When Using TCP IP LPD Port 9100 229 z Installation When Using NetWare 232 z Installation When Using Microsoft Networ...

Page 226: ...stablished For more information on how to set up the machine using LPD refer to Installation When Using TCP IP LPD Port 9100 P 229 NetWare The machine supports PServer mode using Netware directory ser...

Page 227: ...ttings of the machine accordingly with that of the file server Use CentreWare Internet Services to change these settings For more information on how to set up the machine using NetWare refer to Instal...

Page 228: ...9 10 4 10 10 5 For information on network environments refer to the manual in the CD ROM of the Driver CD Kit Connection method Local connection Network connection Port USB 2 0 LPD NetWare SMB IPP Po...

Page 229: ...face on the machine For more information refer to USB P 134 Note To print binary data by using a USB interface set Adobe Communication Protocol to RAW The configuration can also be performed using Cen...

Page 230: ...procedure refer to the manual contained in the CD ROM of the Driver CD Kit You can also print from a Macintosh computer using USB if Adobe PostScript 3 Kit optional has been installed For information...

Page 231: ...address Note The configuration can also be performed using CentreWare Internet Services or IP Address Setting Tool included in the CD ROM of the Driver CD Kit For the items that can be configured usi...

Page 232: ...a Configuration Report refer to Print Reports P 75 Configure other LPD or Port 9100 settings as necessary Refer to CentreWare Internet Services Setting Items P 230 Step 3 Configuration on the Compute...

Page 233: ...IP Address Link Local Address Gateway Address z Domain Name z DNS Configuration IPv4 IPv6 z WINS Server z Port Number z TBCP Filter Note The TBCP filter is set only when optional Adobe PostScript 3 K...

Page 234: ...can also be performed using CentreWare Internet Services or IP Address Setting Tool included in the CD ROM of the Driver CD Kit For the items that can be configured using CentreWare Internet Services...

Page 235: ...he Tools screen is displayed 3 Set an IP address and the others If an IP address is already set this step is not necessary If DHCP or BOOTP is available in your environment configure the method for ob...

Page 236: ...n on how to start CentreWare Internet Services refer to CentreWare Internet Services Settings P 215 z Print page buffer of NetWare z Port Settings z Frame Type z Queue Poll Interval z Host Name z Pass...

Page 237: ...e CD ROM of the Driver CD Kit For the items that can be configured using CentreWare Internet Services refer to CentreWare Internet Services Setting Items P 236 1 Display the Tools screen 1 Press the L...

Page 238: ...orted operating systems refer to Supported Operating Systems P 226 For information on the driver installation procedure refer to the manual contained in the CD ROM of the Driver CD Kit CentreWare Inte...

Page 239: ...vices or IP Address Setting Tool included in the CD ROM of the Driver CD Kit For the items that can be configured using CentreWare Internet Services refer to CentreWare Internet Services Setting Items...

Page 240: ...o have a print driver installed For information on the supported operating systems refer to Supported Operating Systems P 226 For information on the driver installation procedure refer to the manual c...

Page 241: ...eWare Internet Services For the items that can be configured using CentreWare Internet Services refer to CentreWare Internet Services Setting Items P 240 1 Display the Tools screen 1 Press the Log In...

Page 242: ...ms P 226 For information on how to install a print driver refer to the manual contained in the CD ROM included in Adobe PostScript 3 Kit optional CentreWare Internet Services Setting Items The items t...

Page 243: ...ibes the configuration to use the E mail features on the machine Note An optional package is required to use this feature For more information contact our Customer Support Center z E mail Overview 242...

Page 244: ...ically prints out the attached file Contents of e mail other than its attached file are processed according to the settings specified in Incoming E mail Print Options in CentreWare Internet Services C...

Page 245: ...U U Machine e mail address Set the E mail address for the machine O O O O O DNS server address Required when the addresses for a POP3 server and a SMTP server are set with a domain name format instea...

Page 246: ...ng Consumables Status Notice Job Completion Notice via SMTP via POP3 Machine e mail address When using the e mail feature on the machine an e mail account of the machine must be registered to a mail s...

Page 247: ...e The default user ID is 11111 The default passcode is x admin 3 Select Tools 2 Enable a port which is used for the E mail feature 1 Select Connectivity Network Setup 2 Select Port Settings 3 Select S...

Page 248: ...ter the system administrator s passcode then select Enter Note The default user ID is 11111 The default passcode is x admin 3 Select Tools 2 Set the e mail address host name and domain name 1 Select C...

Page 249: ...After the machine is restarted print a Configuration Report to confirm that each item is configured For information on how to print a Configuration Report refer to Print Reports P 75 CentreWare Inter...

Page 250: ......

Page 251: ...te An optional package is required to use this feature For more information contact our Customer Support Center z Scan Service Overview 250 z Configuration of Scan to Mailbox 251 z Configuration of Sc...

Page 252: ...r to Configuration of Scan to Mailbox P 251 Network Scanning Job Template Scanning A configuration file defining scanning conditions is called a job template You can apply a job template to a scanned...

Page 253: ...efer to CentreWare Internet Services Settings P 215 1 Display the Tools screen 1 Press the Log In Out button 2 Enter the system administrator s user ID with the numeric keypad or a keyboard and select...

Page 254: ...e Mailbox P 178 Step 3 Configuring a Computer When using Network Scanner Utility3 install Network Scanner Utility3 on a computer Network Scanner Utility3 is stored in the CD ROM of the Driver CD Kit p...

Page 255: ...ws XP FTP service of Microsoft Internet Information Server 3 0 or later z Mac OS X FTP service of Mac OS X 10 2 X 10 3 8 10 3 9 10 4 2 10 4 4 10 4 8 10 4 9 10 4 10 z Novell NetWare FTP service of NetW...

Page 256: ...ctivity Network Setup 2 Select Port Settings 3 Select FTP Client and then select Change Settings 4 Select Port Status and then select Change Settings 5 Select Enabled then select Save 6 Select Close r...

Page 257: ...lder Note When using Mac OS X set Windows Sharing to On in the Service tab of Sharing under System Preferences CentreWare Internet Services Setting Items The items that can be configured using CentreW...

Page 258: ...Vista Step 2 Enabling Ports and Setting TCP IP In order to use Network Scanning feature on the machine enable the ports and set the IP address The procedure for setting the machine is as follows Note...

Page 259: ...nfirm that the ports are enabled and TCP IP is configured For information on how to print a Configuration Report refer to Print Reports P 75 Step 3 Configuring the SNMP Port Configure the transport pr...

Page 260: ...en 1 Press the Log In Out button 2 Enter the system administrator s user ID with the numeric keypad or a keyboard and select Enter When a passcode is required select Next Input and enter the system ad...

Page 261: ...e SNMP port using CentreWare Internet Services 1 Start CentreWare Internet Services For information on how to start the CentreWare Internet Services refer to Starting CentreWare Internet Services P 21...

Page 262: ......

Page 263: ...Internet Fax service on the machine Note This feature does not appear for some models An optional package is required to use this feature For more information contact our Customer Support Center z In...

Page 264: ...ernet Fax service the preparation of the following e mail environment configurations is required Item Description Internet Fax Inter net Fax Direct SMTP POP3 SMTP TCP IP address TCP IP address of the...

Page 265: ...Fax Path to Direct P2P POP3 server When a POP3 server is used for e mail receiving register the machine s e mail address and a user account to the server Also the configuration of the POP3 server s ad...

Page 266: ...ypad and select Enter When a passcode is required select Next Input and enter the system administrator s passcode then select Enter Note The default user ID is 11111 The default passcode is x admin 3...

Page 267: ...lect Tools 2 Set an e mail address host name and domain name 1 Select Connectivity Network Setup 2 Select Machine s E mail Address Host Name 3 Select E mail Address and then select Change Settings 4 E...

Page 268: ...xxxx xxxx where xxxx is a hexadecimal value When you make an entry mistake press the C Clear button and enter again When moving to the next value without entering all 3 digits select Next z POP3 Port...

Page 269: ...e Password Passcode If you do not set the password leave it blank and select Save 2 Select Close 5 Configure the Domain filter 1 Select Domain Filtering and set the following items z Domain filtering...

Page 270: ...sent from an address registered in the address book 7 Select Close repeatedly until the Tools screen is displayed 8 Select Close The machine automatically reboots 9 After the machine is restarted pri...

Page 271: ...to use the Server Fax service on the machine z Server Fax Overview 270 z Preparations 270 z Installation Procedure 271 Note This feature does not appear for some models An optional package is necessar...

Page 272: ...ature is detected as not installed even if a Fax Kit is installed on the machine During that time therefore fax transmission and reception are disabled and printed reports show that the machine does n...

Page 273: ...ng Items Using CentreWare Internet Services P 219 Note You can switch to the Server Fax feature also on the machine s Control Panel 1 Start a web browser 2 Enter the machine s IP address or the Intern...

Page 274: ...isplay the items in the folder 5 Click on the left of Fax to display the items in the folder 6 On the tree in the left frame click General 7 On the General screen set Scan File Transfer Report under F...

Page 275: ...settings For details on the SMTP server settings refer to Step 2 Configuring E mail Environment P 246 The following settings are additionally required for the SMTP server z Domain Name z E mail Addre...

Page 276: ......

Page 277: ...the Encryption and Digital Signature features z Encryption and Digital Signature Overview 276 z Configuration of HTTP Communication Encryption 278 z Configuration of Encryption using IPSec 280 z Conf...

Page 278: ...icate must be registered from CentreWare Internet Services to the machine When verification of server certificates is enabled to verify a remote server the root certificate of the remote server must b...

Page 279: ...rvices Certificates created by CentreWare Internet Services are valid for one year Encryption and Digital Signature Features for Scan Files Encryption of PDF DocuWorks Documents PDF and DocuWorks docu...

Page 280: ...ne Configure a certificate to the machine No certificate is imported on the machine in the default settings Import certificates for a SSL server as needed This section describes how to create a self c...

Page 281: ...not use the numbers of any other ports 5 Click Apply 6 When the right frame on the web browser will change to the machine reboot display click Reboot Machine The machine will reboot and the setting va...

Page 282: ...treWare Internet Services Two methods are available depending on types of certificates Create a self certificate on the machine and enable HTTPS Enable HTTPS and import a created certificate on the ma...

Page 283: ...left of Security to display the items in the folder 4 Configure the certificate 1 Click Certificate Management 2 Select Local Device for Category IPSec for Certificate Purpose and then click the Displ...

Page 284: ...282 Encryption and Digital Signature Settings 12 Step3 Configuration on a Computer The following describes the configuration for the computer Configure the following on the computer z Create an IP sec...

Page 285: ...rst then configure the certificate to the machine Configuration on a Computer Prepare a certificate that is suitable for E mail Encryption Digital Signature Step1 Configuration on the Machine To confi...

Page 286: ...click the Display the List button 4 Select the owner of the certificate to be set 5 Click the Certificate Details button 6 Click the Use this Certificate button 7 Click Reboot Machine The machine will...

Page 287: ...tificate refer to the CentreWare Internet Services online help Sending e mail with S MIME digital signature from the machine to a computer No settings are required on a recipient computer Sending S MI...

Page 288: ...ttings 286 Encryption and Digital Signature Settings 12 Supported e mail applications E mail applications that can send and receive e mail to and from the machine are as follows z Outlook 2000 2002 20...

Page 289: ...a person to whom the data is disclosed on the machine and then register the certificate to the address book When registering a personal certificate on the machine the root certificate should be includ...

Page 290: ...icate Management 2 Select Local Device for Category Scan File for Certificate Purpose and then click the Display the List button 3 Select the owner of the certificate to be set 4 Click the Certificate...

Page 291: ...he machine and then register the certificate to the address book When registering a personal certificate on the machine the root certificate should be included in the personal certificate For informat...

Page 292: ......

Page 293: ...ontains information for System Administrators on the features used to change the settings and on the setting procedures z Overview of Authentication and Account Administration 292 z Authentication 294...

Page 294: ...ation types Login to Local Accounts authenticates users based on the user information registered with the machine Login to Remote Accounts authenticates users based on the user information registered...

Page 295: ...tion Local Accounting Network Accounting and Xerox Standard Accounting For more details refer to Types of Account Administration P 296 Available Combinations of Authentication and Account Administrati...

Page 296: ...henticated Users These are users who are registered on the machine or a remote server When using a restricted service an authenticated user is prompted to type the user ID and passcode on the authenti...

Page 297: ...tive Settings For information on Allow User to Disable Active Settings refer to Allow User to Disable Active Settings P 211 Types of Authentication The following describes the types of authentication...

Page 298: ...Network Accounting Account administration is carried out based on user information managed by a remote service The remote service collects job data and counts up the numbers of pages processed for eac...

Page 299: ...tion and Accounting Modes You can individually select Authentication and Accounting types The valid combinations are as follows O Available X Not available 1 Default Account Mode Off Local Network Rem...

Page 300: ...on the restrictions that can be set for the device as a whole Services Controlled by Authentication and Account Administration The services controlled by authentication and account administration dep...

Page 301: ...unting Service optional For information on ApeosWare Accounting Service optional refer to the documentation provided with it The following services are controlled 1 This column shows whether authentic...

Page 302: ...shows whether authentication is required for each service O indicates that authentication is required 2 You can select features available for each user For more information refer to the CentreWare Int...

Page 303: ...n feature is enabled this type of job flow sheet can only be handled by a system administrator Mailbox Job Flow Sheet This is a job flow sheet created by a general user or a system administrator on th...

Page 304: ...ed and its settings can be changed by any user When the Authentication feature is enabled this mailbox can only be handled by a system administrator Personal Mailbox This is a mailbox created by an au...

Page 305: ...ication Feature is not Enabled Available Job Flow Sheet Operations If the authentication setting is changed from enabled to disabled delete all existing personal job flow sheets and create general sha...

Page 306: ...o mailboxes they cannot be edited or copied but still can be used If you cancel the links however the job flow sheets will no longer be displayed and will be unavailable Create Job Flow Sheet under Se...

Page 307: ...de is changed and therefore a job flow sheet that is linked to a mailbox becomes unavailable the job flow sheet cannot be edited or copied but can still be used for the mailbox When the job flow sheet...

Page 308: ...other than a guest user in Login to Remote Accounts Important If authenticated as a guest user in Login to Remote Accounts you are treated as an unauthenticated user general user and cannot handle jo...

Page 309: ...oxes Important If job flow sheets which are no longer available for use due to a change in the authentication status are linked to mailboxes they cannot be edited or copied but still can be used If yo...

Page 310: ...t user in Login to Remote Accounts Important If authenticated as a guest user in Login to Remote Accounts you are treated as an unauthenticated user general user and cannot handle job flow sheets or m...

Page 311: ...Collected Managed Items Normal Print Machine s print driver Required Authenticated user Pages sheets Other than machine s print driver 2 Unauthenticated user Pages sheets Secure Print Store Documents...

Page 312: ...ion printing Automatic Reception Printing Not required Fax reception Receptions pages charging units printed pages number of sheets Manual Reception Printing Calling in Calling out Required Fax recept...

Page 313: ...r of pages counted will be those received not those printed The number of charging units is not computed for the following communications When dialing a fax number using the numeric keypad or the on h...

Page 314: ...ver Change the default authorization group settings and add an authorization group as necessary Step 1 Enabling Authentication This step explains the procedures when Login to Local Accounts is selecte...

Page 315: ...User Role and Add This User to Authorization Group respectively When Login to Remote Accounts is Selected Use the following procedure to enable remote authentication 1 Press the Log In Out button 2 E...

Page 316: ...cation server For more information on the Authentication feature refer to Kerberos Server Settings P 143 LDAP Server Directory Service P 144 and SMB Server Settings P 146 Step 2 Changing the Default A...

Page 317: ...t Enter When a passcode is required select Next Input and enter the system administrator s passcode then select Enter Note The default user ID is 11111 The default passcode is x admin 3 Select Tools 4...

Page 318: ...elect Enter When a passcode is required select Next Input and enter the system administrator s passcode then select Enter Note The default user ID is 11111 The default passcode is x admin 3 Select Too...

Page 319: ...Select Account Limit 9 Configure the Account Limit and Feature Access settings for each service Refer to Account Limit P 196 10 If necessary select a user role and an authorization group for the user...

Page 320: ......

Page 321: ...ons z Troubleshooting 320 z Machine Trouble 321 z Image Quality Trouble 325 z Trouble during Copying 330 z Trouble during Printing 334 z Trouble during Faxing 337 z Trouble during Scanning 341 z Netwo...

Page 322: ...ed No Yes Action For information on paper jams refer to Paper Jams P 427 For information on document jams refer to Document Jams P 436 No Cause Is an error code displayed Action Refer to Error Code P...

Page 323: ...Guide Is the screen contrast low Adjust the screen contrast by using the contrast adjustment dial on the control panel Refer to 2 Product Overview in the User Guide Unable to print or unable to copy I...

Page 324: ...ot output Data remains in machine memory Cancel printing or delete the remaining data Refer to 9 Job Status Checking Current Pending Jobs in the User Guide Unable to insert or remove a paper tray Did...

Page 325: ...ing Paper P 29 Is paper exceeding the maximum fill line in the tray Load paper in the paper tray so that it does not exceed the maximum fill line Refer to Loading Paper P 29 Are the paper guides set c...

Page 326: ...fer to 3 Copy Copying Procedure in the User Guide Is a piece of torn paper remaining in the document feeder Open the document feeder cover and check inside Refer to Document Jams P 436 Is the Mixed Si...

Page 327: ...a transparency film under the document when copying The copy has black lines Is the document glass on the document feeder dirty Clean the document glass Refer to Cleaning the Film and Constant Veloci...

Page 328: ...r to Loading Paper P 29 Part of the image is missing on the copy Is the paper damp If the paper is damp the copy image may be partially missing or unclear Replace the paper with new one Refer to Loadi...

Page 329: ...d lines are printed The drum cartridge has deteriorated or is damaged Replace the drum cartridge with a new one Refer to Replacing the Drum Cartridge P 48 The document glass on the document feeder is...

Page 330: ...ltage power supply problem may have occurred Contact our Customer Support Center Nothing is printed Two or more sheets of paper are being fed simultaneously double feed Fan the paper well and load it...

Page 331: ...aded paper The paper is damp Text is blurred The paper is unsuitable Replace the paper with new one Refer to Loading Paper P 29 Paper has been added to the loaded paper The paper is damp White or colo...

Page 332: ...egular sized documents business cards transparencies or thin documents In addition the document feeder does not feed documents with tags paper clips or tape Refer to 3 Copy Copying Procedure in the Us...

Page 333: ...he original document density is too light Adjust the copy density Refer to 3 Copy in the User Guide The setting for Original Type is inappropriate for the document Copy black text If it is too light s...

Page 334: ...e specified size The document glass or the document cover is dirty Clean the document glass or the document cover Refer to Cleaning the Document Cover and Document Glass P 62 The document is a transpa...

Page 335: ...hed A finisher is needed to perform stapling Attach the Finisher or change the print option setting to cancel stapling The number of pages to staple exceeds the maximum number for stapling Staple enab...

Page 336: ...n to check the Print Mode on the Machine Status screen If Print Mode is set to Off line select On line An error occurred with the machine Check the error details The IP address or SMB network path is...

Page 337: ...ssing on the output The image is larger than the printable area Expand the printable area or reduce the document print area The font differs from the font specified on the computer The font replacemen...

Page 338: ...olor of documents in mailboxes is reproduced by the presence or absence of dots as with copy or fax On the other hand the output color of Secure Print is reproduced by density by default as with print...

Page 339: ...s the subscribed one Tone 10pps for the machine An error occurred with the phone line Use a telephone near the machine to check whether to be able to make a phone call If the phone call is disabled th...

Page 340: ...Image quality may be affected by a problem of the sender s machine as well as a problem of this machine Symptom Cause Remedy The phone line has a problem The phone line is not connected correctly The...

Page 341: ...r to Fax Receiving Mode P 86 The sending mode is manual To use FAX Information Service set the receiving mode to manual on the on hook screen to enter an information code and press the Start button Th...

Page 342: ...ailbox The unregistered mailbox is specified on the mailbox selector feature When using the mailbox selector feature specify the registered mailbox If the unregistered mailbox is selected the received...

Page 343: ...ure in the User Guide The document type is unsuitable The document feeder does not feed irregular sized documents business cards transparencies or thin documents In addition the document feeder does n...

Page 344: ...between the computer and machine is abnormal Check with your network administrator Unable to open a mailbox The mailbox is unregistered Register the mailbox Refer to Create Mailbox P 178 The mailbox...

Page 345: ...sword The time setting on the machine does not agree with that of Windows when SMB transmission to Windows Server 2003 Synchronize the time settings of the machine and Windows On Windows Server 2003 o...

Page 346: ...ent Cover and Document Glass P 62 The document is a transparent type such as a transparency film If the document is transparent dirt on the document cover will appear on the image Place a white sheet...

Page 347: ...Guide The document is a non standard size Specify the document size Refer to 5 Scan Advanced Settings in the User Guide The document is folded Unfold and correctly place the document Refer to 5 Scan...

Page 348: ...uters are on different networks consult your network administrator The host name for the machine is already in use Print out Configuration Report to confirm if Repetitive Host Name is printed in the S...

Page 349: ...rom the Printer menu Cancel All Documents menu Select the print data to be deleted and delete from the Document menu in the Printer window Select Cancel The print data has a different owner Confirm if...

Page 350: ...or group name is not specified in the user setting for the print server Use NWADMIN from a computer to confirm that the print server s User information lists the job sender user or group name Re trans...

Page 351: ...he number in the print data The level settings for the IPX checksum do not match Use the set command from the console screen on the file server and confirm whether the IPX checksum is set to level 2 E...

Page 352: ...the file server using Network Neighborhood Start the file server There is another device on the network with an identical device name Switch off the machine and use NWADMIN from a computer to confirm...

Page 353: ...e print data Specify the Notify option when transmitting the print data Netware command CASTOFF has been issued on the computer Issue the NetWare command CASTON on the computer Cause Check point Remed...

Page 354: ...the print data Confirm the selected print language on the machine and the print language of the print data Select the print language on the machine to match the print data The computer is not using t...

Page 355: ...annot be browsed from clients If the printer is turned on before it is connected to a network clients may not be able to identify the printer name and therefore cannot browse the printer Turn the prin...

Page 356: ...en an user operation on the control panel is being performed or has just been completed When the automatic reset function is configured any setting by CentreWare Internet Services is not applied until...

Page 357: ...not supported by the machine Only Basic Authentication is supported by the machine The machine does not support NTLM digest For security purposes use the authentication feature using SSL The IP addres...

Page 358: ...work cable is properly connected We recommend spanning tree configuration with which network disconnection rarely occurs Communication cannot be established due to overloading of the server applicatio...

Page 359: ...rect Set the correct IP address of the proxy server When the proxy server requires authentication cannot connect to the server because the user name or password is incorrect Set the user name and pass...

Page 360: ...IPv6 communication cannot be made with Bonjour Bonjour does not support IPv6 communication Use IPv4 for Bonjour Symptom Remedy When the machine is configured with a link local address only file trans...

Page 361: ...twork with no DNS server installed authentication fails if an SMB authentication server is specified using the computer name Directly specify the IPv6 address to specify the computer name of an authen...

Page 362: ...nable to process the job template due to insufficient hard disk space Remedy Remove unnecessary data from the hard disk to increase free disk space 003 701 O O Cause A digital code is embedded in the...

Page 363: ...e the Adjustment Chart properly on the document glass Refer to Executing Calibration P 65 003 764 O Cause The scanned documents contains only one page for form overlay function Remedy Make sure the do...

Page 364: ...upport Center Trays other than the Tray 2 can be used 007 272 O Cause Tray 3 malfunction Remedy Contact our Customer Support Center Trays other than the Tray 3 can be used 007 274 O Cause Tray 5 bypas...

Page 365: ...contact our Customer Support Center 012 254 O Cause The sensor was activated because paper output to the finisher was removed before the finisher tray lowered and completely stopped in position Or th...

Page 366: ...ort Center 013 210 013 211 013 212 013 213 013 220 O Cause Finisher did not work correctly Remedy Turn the machine off and on and perform the same operation again 016 210 016 211 016 212 016 213 016 2...

Page 367: ...Cause Failed to update the IPv6 address and hostname for the DNS server Remedy Check if the address of the DNS server is correctly set on the machine 016 454 O Cause Unable to retrieve the IP address...

Page 368: ...hods to resolve the problem z Set Image Quality to Standard z Increase the amount of memory zPrint using the print driver PCL etc from XPS Document Viewer For details on Print Mode refer to the online...

Page 369: ...d Remedy Change the SSL certificate of the LDAP server to a valid one This error can be cleared if you select Off for LDAP SSL TLS Communication under SSL TLS Settings on the machine however note that...

Page 370: ...Could not connect to the Remote Download server The port of the destination Remote Download server is not open Remedy Check the port in the network settings 016 538 O Cause An error occurred when writ...

Page 371: ...t Remedy Check whether the printer driver is correctly installed on the computer that specified printing whether the operating conditions are satisfied and whether the driver is one that can be used w...

Page 372: ...ix of the file or folder name exceeded the limit after connection Remedy Change the file name or change the destination folder on the FTP server Or move or delete files from the destination folder 016...

Page 373: ...rver 016 588 O Cause The machine failed to transfer data using FTP of the Scan to PC feature because the data could not be written in the FTP server after connection Remedy Check if enough space is av...

Page 374: ...ta due to insufficient print page buffer Remedy Take one of the following actions zSet Image Quality to Standard z Increase the print page buffer size z Add on memory For information about the Print M...

Page 375: ...f you need to use the feature select on under Hard Disk on the Printer tab of the print driver If the error persists even after following the listed solutions contact our Customer Support Center 016 7...

Page 376: ...ocuments in the User Guide 016 717 O Cause Unable to create a transmission report undelivered or transmission report because transmission result information required for creating the report is not sto...

Page 377: ...nt by fax using the Job Flow feature but the mailbox document could not be converted to fax data Remedy Do not use the Job Flow feature Simply scan the document through the machine s Fax screen to sen...

Page 378: ...O Cause Any data cannot be saved in the forwarding destination directory Remedy Take one of the following actions 1 Check the free space of the forwarding destination disk 2 Check to see whether you...

Page 379: ...nsupported by this machine Remedy Check if you are correctly using the application such as ContentsBridge and if the print instruction was correct If your application usage and print instruction are c...

Page 380: ...151 016 761 O Cause An error occurred during image processing Remedy Set Image Quality to Standard and try again If the problem persists set Print Page Mode to On 016 762 O Cause The specified print...

Page 381: ...error occurred during image conversion processing Remedy For error upon forwarding with Scan to Mailbox or Internet Fax The image conversion processing for the data may be finished partially Get each...

Page 382: ...s setting on the Address Book If the IP address is used change it to the host name 016 783 O Cause Unable to find the specified server path during file forwarding Remedy Check the server path name spe...

Page 383: ...Failed to access to the destination computer or the save location for Network Scanning Remedy Check the directory configuration and files on the server the access privileges for the destination or the...

Page 384: ...y Check the property information for the specified user and check if the server sets the login limit for computers 018 503 O Cause An error occurred while connected to the CA authentication server Rem...

Page 385: ...hen the destination computer is Macintosh specify a user who is permitted to use Windows Sharing The password cannot be retrieved If you have forgotten the password reset the password To reset the pas...

Page 386: ...re logging in to the SMB server failed because one of the following problems occurred on the shared name of the SMB server z The specified shared name does not exist on the server z Unavailable charac...

Page 387: ...t side error occurred Received HTTP Status 4xx other than 401 and 404 Remedy Check the followings z The destination HTTP server for the scanned document is accessible by PC z The server settings 018 5...

Page 388: ...certificate is unexpired the time set on the machine is correct the certificate is not on the discard list 4 Check the certificate path to the SSL server certificate and import the required CA certifi...

Page 389: ...PAIR at the server console on the NetWare server 018 579 O Cause The hard disk on the NetWare server may be full Remedy Check the followings z The NetWare server is accessible by PC z The free space o...

Page 390: ...urred on the NetWare server Remedy 1 Check the status of the HDD on the NetWare server 2 Check if the NetWare server is accessible by PC 3 Run DSREPAIR at the server console on the NetWare server 018...

Page 391: ...ame server is not being accessed from multiple machines 2 If the problem occurs again contact our Customer Support Center 018 591 O O Cause When the server was connected to and the name of a file or f...

Page 392: ...roblem persists check with your network administrator 018 705 O Cause LDAP server protocol error caused by the Address Book operation The server returned RFC2251 Result Message No 5 compare false for...

Page 393: ...ddress Book query Remedy Retry after waiting for a while If the problem persists check with your network administrator 018 716 O Cause LDAP server protocol error caused by the Address Book operation T...

Page 394: ...the Address Book operation The server returned RFC2251 Result Message No 34 invalid DN syntax for Address Book query Remedy The LDAP server has a Name problem Check the user name and password to cance...

Page 395: ...service problem Retry after waiting for a while If the problem persists check with your network administrator 018 753 O Cause LDAP server protocol error caused by the Address Book operation The serve...

Page 396: ...s Book operation The server returned RFC2251 Result Message No 70 results too large for Address Book query Remedy Change the search conditions start position to narrow the range of search area and try...

Page 397: ...returned RFC2251 Result Message No 86 unknown authentication method for Address Book query Remedy Have the network administrator check the LDAP server status 018 787 O Cause LDAP server protocol error...

Page 398: ...ng for Address Book query Remedy Have the network administrator check the LDAP server status 018 796 O Cause LDAP server protocol error caused by the Address Book operation The server returned RFC2251...

Page 399: ...ts contact our Customer Support Center 026 701 O Cause The number of queries to Address Book exceeded the machine s processing capability Remedy Wait for a while and try again If the number of queries...

Page 400: ...d on the network Remedy Change the IPv6 link local address of the machine or the address of the other device Refer to Auto Configured IPv6 Address P 139 027 452 O O Cause IP address already exists Rem...

Page 401: ...using SMB of the Scan to PC feature because the machine could not resolve the host name or the server name of the SMB server when accessing the DNS Remedy Check the connection to the DNS Check if the...

Page 402: ...if the server address can be resolved correctly z For Windows NT 4 0 Server Workstation use the following steps to see if the NetBIOS interface device is activated on the destination SMB server 1 Sel...

Page 403: ...e During the transfer using SMB of the Scan to PC feature the file name or folder name could not be retrieved Remedy Check the access privilege to the SMB server 027 521 O Cause During the transfer us...

Page 404: ...llowing reasons z The file does not exist z The directory is not empty z The specified directory name does not exist Remedy If any lock directory LCK exists in the forwarding destination manually dele...

Page 405: ...etected in the specified domain name Remedy If the error occurred during SMB authentication Check with the network administrator for the domain name then re configure correctly Also check if the domai...

Page 406: ...tact our Customer Support Center 027 564 O Cause SMB protocol error The SMB server was not found Remedy Check if the connection between the authentication server and the machine has been established v...

Page 407: ...te 027 591 O O Cause SMB protocol error Users are restricted A blank password is invalid Remedy Set the password for the user 027 599 O O Cause SMB protocol error Remedy Try again If the problem persi...

Page 408: ...se the address in its From field was not the same as the mail address in the S MIME signature mail Remedy Tell the sender that the mail addresses are not identical and ask to send the e mail again 027...

Page 409: ...external services exceeded the maximum number Remedy Reduce the number of files and send them again 027 730 O O Cause The number of the document pages attached to the SMTP mail is more than the maximu...

Page 410: ...lt values to the mandatory fields of the job flow 027 753 O Cause 1 Attempted to execute the service while the port necessary for the job flow is either deactivated or disabled 2 Attempted to execute...

Page 411: ...he EHLO command 027 777 O Cause The destination SMTP server does not support SMTP AUTH Remedy Set E mail Send Authentication to Off under System Settings Connectivity Network Setup Outgoing Incoming E...

Page 412: ...ending 033 721 O Cause An error occurred during fax transmission Remedy Turn the machine off and on If the error persists contact our Customer Support Center 033 722 O Cause The document is jammed or...

Page 413: ...ause An error occurred during fax transmission Remedy Try again If the error persists contact our Customer Support Center 033 738 O Cause Received abnormal JBIG data Remedy No operation is necessary 0...

Page 414: ...e 133 xxx 134 xxx and then solve the problem If the error persists contact our Customer Support Center 034 211 034 212 O Cause An error occurred on the fax control system Remedy Contact our Customer S...

Page 415: ...nations specified for the broadcast transmission exceeded the upper limit Remedy Wait until the waiting jobs decrease or reduce the number of destinations and try again 034 520 O Cause The number of w...

Page 416: ...4 719 034 720 O Cause An error occurred during fax transmission Remedy Check the settings and the phone number and send the fax again If the error persists contact our Customer Support Center 034 721...

Page 417: ...t Center 034 752 O Cause The destination machine is busy Remedy Retry after waiting for a while If the error persists contact our Customer Support Center 034 753 O Cause The destination machine does n...

Page 418: ...9 034 780 034 781 034 782 034 783 O Cause An error occurred during fax transmission Remedy Check the settings and the phone number and send the fax again If the error persists contact our Customer Sup...

Page 419: ...to check the condition of the machine and try again 035 706 O Cause The destination machine has a problem or the fax number is incorrect Remedy Call the destination to check the condition of the machi...

Page 420: ...O Cause Unable to communicate because the fax number is incorrect or the destination machine does not have the specified feature Remedy Check if the fax number is correct and the destination machine...

Page 421: ...he telephone line and telephone switchboard for the destination machine are defective 035 750 O Cause An error occurred during fax transmission Remedy Check the settings and the phone number and send...

Page 422: ...ived document Remedy Check if the destination machine has the remote copy feature 036 796 O Cause The document was faxed with normal transmission because the destination machine does not have the remo...

Page 423: ...our Customer Support Center 065 219 065 220 O O Cause The document feeder is defective Remedy Contact our Customer Support Center 071 210 071 211 071 212 O Cause Tray 1 malfunction Remedy Contact our...

Page 424: ...hold down both the Start and Stop buttons simultaneously for 6 seconds when turning the machine back on This will delete the print data which caused the error If the error was caused by other reasons...

Page 425: ...re is no plot data in the HP GL 2 print data Remedy Check the print data 116 749 O Cause The job was cancelled because the specified font does not exist Remedy Install the font or set the font replace...

Page 426: ...ination was changed to the center tray due to the malfunction of the specified Finisher tray Remedy Contact our Customer Support Center Any trays other than the defective output tray can be used 124 7...

Page 427: ...tions z Load the printable paper for printing the received fax document A3SEF A4LEF B4SEF B5LEF A4SEF A5SEF B5SEF 8 5x11 SEF 8 5x13 SEF 8 5x14 SEF 11x17 SEF 8 5x11 LEF 5 5x8 5 SEF zUse the printable p...

Page 428: ...sts record the displayed contents for xxx yyy Switch off the machine immediately wait for the touch screen to go dark and contact our Customer Support Center Completed with an error xxx yyy O O O O O...

Page 429: ...in the Trays 1 to 3 431 Paper Jams in the Tandem Tray Module 431 Paper Jams in the Tray 5 Bypass 433 Paper Jams in the Duplex Kit 434 Paper Jams in the Finisher A1 434 Paper Jams in the Finisher B1 4...

Page 430: ...er jammed in the machine 1 Open the bypass tray and then open Cover A while lifting up the release lever Note Remove the paper from the side tray before opening Cover A 2 If the jammed paper extends f...

Page 431: ...the steps below to clear paper jams in Cover B 1 Open Cover B while lifting up the release lever 2 Remove the jammed paper 3 Close the Cover B until it latches Note Firmly press the center of the cov...

Page 432: ...the jammed paper 3 Close the Cover C until it latches Note Depending on the type of paper jam a message may be displayed on the screen with instructions on opening and closing the paper tray Paper Ja...

Page 433: ...r paper jams in Trays 1 to 3 of the machine 1 Pull out Tray 1 2 or 3 2 Remove the jammed paper 3 Close the paper tray Paper Jams in the Tandem Tray Module Follow the steps below to clear paper jams in...

Page 434: ...around the High Capacity Feeder Tray 6 At the Exit of Tray 6 1 Make sure that the screw is removed from the left side of Tray 6 Note The screw should have been removed during the installation of Tray...

Page 435: ...e jammed paper 3 Close the top cover In Tray 6 1 Pull out Tray 6 2 Remove the jammed paper 3 Close Tray 6 Paper Jams in the Tray 5 Bypass Follow the steps below to clear paper jams in the bypass tray...

Page 436: ...w to clear paper jams in the optional Finisher A1 1 Open the finisher top cover 2 Turn the wheel to remove the jammed paper 3 Close the finisher top cover Note If a paper jam message appears again or...

Page 437: ...y torn pieces inside the machine 4 Close the top cover of the finisher Paper Jams in the Center Unit 1 Lift the top cover and open Note The top cover cannot be detached from the machine 2 Remove the j...

Page 438: ...ument feeder remove the document 3 If the displayed message instructs you to turn the wheel turn the green wheel to eject the document upward Important If the document is caught do not pull it out for...

Page 439: ...t torn wrinkled or folded and load the document again following the instructions displayed on the touch screen Note After removing the jammed document reload the entire document including the pages al...

Page 440: ...are not stapled or staples are bent Contact our Customer Support Center if the problem persists after you have tried the following solutions If copies are stapled as shown in the figures below contac...

Page 441: ...le cartridge out of the machine Note The staple cartridge is firmly inserted A slight force is required to pull the cartridge out of the finisher 3 After removing the staple cartridge check inside of...

Page 442: ...t remove jammed staples even after you use the above procedure contact our Customer Support Center Staple Jams in the Staple Cartridge For Finisher B1 The following describes how to clear staple jams...

Page 443: ...the figure 6 Remove the jammed staples 1 and return the metal part pulled up in step 5 to the original position 2 7 Return the staple cartridge to its original position until it clicks into place 8 C...

Page 444: ......

Page 445: ...nal components and printer emulation languages z Specifications 444 z Printable Area 453 z Internal Fonts 454 z Optional Components 456 z ESC P K Emulation 457 z PDF Direct Print 471 z Using the Telep...

Page 446: ...erature Original Paper Size The maximum size is 297 432 mm A3 11 17 for both sheets and books Output Paper Size Paper Tray 1 to 3 Maximum A3 297 420 mm 11 17 279 432 mm Minimum A5 148 210 mm Paper Tra...

Page 447: ...reduced depending on the paper type When paper in width narrower than B5 such as postcards is output continuously temperature on the fuser unit becomes high As a result the machine may suspend the out...

Page 448: ...nal is attached the capacity is 250 sheets The Center tray is called Lower center tray when an Exit 2 Tray is attached Important When using 80 g m2 paper Power Supply 220 240V AC 8A Power Consumption...

Page 449: ...a English Microsoft Windows Server 2003 English Microsoft Windows Server 2008 English Microsoft Windows XP Professional x64 Edition English Microsoft Windows Vista x64 English Microsoft Windows Server...

Page 450: ...N Driver supported OS Microsoft Windows 2000 Microsoft Windows XP Microsoft Windows Vista Microsoft Windows Server 2003 Microsoft Windows XP Professional x64 Edition Microsoft Windows Vista x64 Micros...

Page 451: ...t uses and the status of the communication line Transmission Mode ITU T G3 Scanning Resolution Standard 8 3 85 lines mm 200 100 dpi 7 9 3 9 dots mm Fine 8 7 70 lines mm 200 200 dpi 7 9 7 9 dots mm Sup...

Page 452: ...g 80 g m2 paper Feeding Speed A4 1 sided DocuCentre III C4100 Monochrome 50 sheets minute Color 45 sheets minute DocuCentre III C3100 Monochrome 50 sheets minute Color 45 sheets minute The number of s...

Page 453: ...Width 1 129 Depth 679 mm main unit Finisher A1 when the extension tray is extended when Bypass Tray is fully extended Type Finisher tray 1 Collated offset stacking available Uncollated offset stackin...

Page 454: ...sheets center binding 5 sheets folding Paper Size Maximum A3 11 17 Minimum A4 8 5 11 Paper Weight 64 80 g m2 center binding 64 105 g m2 folding Important When using 80 g m2 paper Dimensions Weight Wi...

Page 455: ...r control language Extended Printable Area With the extended printable area setting the printable area can be extended to 297 x 432 mm at a maximum The unprintable area however may vary depending on t...

Page 456: ...ond Kursiv Garamond Halbfett Garamond Kursiv Halbfett Default Courier Courier Italic Courier Bold Courier Bold Italic Letter Gothic Letter Gothic Italic Letter Gothic Bold Albertus Medium Albertus Ext...

Page 457: ...e Japan ese PCL Heisei Mincho W3 Heisei Gothic W5 KO PCL5 Muyngio Gothic R Gothic Graphic Kungso Saemmul KS Muyngio Gothic R Gothic Graphic Kungso Saemmul T Myungio T Gothic TR Gothic T Graphic T Kung...

Page 458: ...ent feeder Allows you to load up to 2 000 sheets of paper HDD Extension Kit Provides the extended copy features and adds the spool and scanner features Extension System Memory 512 MB Increases the sys...

Page 459: ...tion Different host interfaces support different printer languages The host interfaces that support printer languages are as follows z USB port z NetWare port z lpd port z SMB port z IPP port z Port 9...

Page 460: ...ily and then printed To minimize this processing time the processed bitmap data is saved in the memory This process is called font caching The saved bitmap data is deleted upon power off or system res...

Page 461: ...r tray 3 Sets the paper tray to be used for printing 0 Auto 1 Default Tray 1 2 Tray 2 3 Tray 3 5 Tray 5 Bypass 6 Tray 6 High Capacity Feeder If printing from Tray 5 Bypass instruct printing and then o...

Page 462: ...nd will be printed in a scale of 100 When 2 Up is selected the machine automatically calculates the magnification based on Document Size and 1 2 of Paper Size The orientation set here is that of the o...

Page 463: ...100 Also if 2 Up is selected the original will be reduced to the size where two pages fit into one sheet of paper Variable is a magnification set in Variable under Reduce Enlarge A reference point for...

Page 464: ...tended command is received Print control 51 Blank sheet output Sets whether to print blank pages if included in the original 0 Default Off 1 On Note Even when Off is selected blank pages will be print...

Page 465: ...the action to be performed when a CR command is received 0 Default Carriage return 1 Carriage return and linefeed Position adjustment 15 Vertical position adjustment Adjusts the printing position vert...

Page 466: ...ble 3 Top Right 4 Left Double 5 Right Double 6 Bottom Left 7 Bottom Double 8 Bottom Right Bypass Tray Wait User 67 Sets whether to suspend the print processing when feeding paper from Bypass Tray The...

Page 467: ...rt edge 164 116 81 143 100 156 120 120 120 53 11 x 17 Long edge 97 68 48 84 59 100 82 76 64 100 Short edge 106 74 51 92 64 100 77 77 77 100 8 5 x 14 Long edge 119 83 58 102 72 122 100 93 78 100 Short...

Page 468: ...83 83 83 100 Short edge 116 80 55 100 69 120 98 90 76 100 11 x 17 Long edge 68 48 100 59 100 64 49 49 49 100 Short edge 74 51 100 64 100 77 62 58 48 100 8 5 x 14 Long edge 83 58 100 72 50 78 60 60 60...

Page 469: ...e 158 110 76 136 95 149 114 114 114 50 11 x 17 Long edge 95 67 47 82 57 98 80 74 63 100 Short edge 103 72 50 89 62 97 74 74 74 100 8 5 x 14 Long edge 116 81 57 100 70 119 98 90 76 100 Short edge 133 9...

Page 470: ...54 97 67 105 81 81 81 100 Short edge 110 76 53 95 65 114 93 86 72 100 11 x 17 Long edge 67 47 100 57 100 63 48 48 48 100 Short edge 72 50 100 62 100 74 60 56 47 100 8 5 x 14 Long edge 81 47 100 70 49...

Page 471: ...ending on the hardware configuration Paper Size Portrait Landscape Characters Lines Characters Lines A3 113 92 161 63 B4 97 78 139 53 A4 79 63 113 42 B5 68 53 97 35 A5 54 42 79 27 Postcard 35 30 54 19...

Page 472: ...r pitch and 6 lpi line pitch 10 inch Continuous Form Mode Paper Size Portrait Landscape Characters Lines Characters Lines A3 116 99 165 70 B4 101 85 143 60 A4 82 70 116 49 B5 71 60 101 42 A5 58 49 82...

Page 473: ...printing PDF files using ContentsBridge Utility refer to the manual provided on the driver CD kit CD ROM z Output Quantity z Layout z 2 Sided Printing z Paper Size z Print Mode z Print Processing Mode...

Page 474: ...ints four pages on each sheet of paper When 4 Up is selected the paper size is fixed at A4 Paper Size 406 Set the size of the paper to be printed 0 Default Auto 1 A4 The Auto setting automatically det...

Page 475: ...4 Default A4 5 A5 14 B4 15 B5 21 8 5 14 22 8 5 13 23 Default 8 5 11 24 11 17 30 8K Sets the default paper size when the machine is set to select the paper size automatically Only available when Paper...

Page 476: ...Arial Bold 38 Arial Bold Italic 39 Times New 40 Times New Italic 41 Times New Bold 42 Times New Bold Italic 43 Symbol 44 Wingdings 45 Line Printer 46 Times Roman 47 Times Italic 48 Times Bold 49 Time...

Page 477: ...0 represents 1 point Font Pitch 210 600 2400 Default 1000 Specifies the pitch size of a font The value of 100 represents the pitch size of 1 Form Line 211 5 128 Default 64 or 60 Specifies the number o...

Page 478: ...ed the document size is determined based on the Scaling Mode setting the item number 160 Paper Size 102 99 Auto 101 Default A Size 3 A3 4 A4 5 A5 14 B4 15 B5 Sets the paper size to be printed This can...

Page 479: ...ts the two sided printing None Prints one side Head to Head Place the paper as in the Paper Orientation and it prints both sides so that the orientation of the up sides are aligned for each page when...

Page 480: ...ere is received drawing is terminated and the paper is ejected Off Does not process as an eject command On Processes as an eject command ON is set as the default for SPO only Scaling 159 0 OFF 1 Defau...

Page 481: ...dth specified in the page are used to calculate the rectangular area Paper Margin 162 0 to 99 Default 0 0 99 mm Sets the paper margin when auto scaling is being used Image Enhancement 163 0 OFF 1 Defa...

Page 482: ...nes a size that is the same as the paper as the hard clip area However the area that allows actual printing is within the printable area The hard clip area can be set either via HP GL emulation mode s...

Page 483: ...1940 1260 1260 56988 39420 58248 40680 1260 1260 B4 103176 72828 1260 1260 100656 70308 101916 71568 1260 1260 B5 72828 51588 1260 1260 70308 49068 71568 71568 1260 1260 Paper size Paper Length 1 7200...

Page 484: ...out Function Set the following items with the operation panel to activate the Auto Layout function z Set the document size to AUTO The default value is AUTO z Set the Auto Layout to ON for setting the...

Page 485: ...he data becomes the active coordinate area If there are no IW commands in the data the active coordinate area is determined by Adapted IP The area that encompasses all the areas specified by IP comman...

Page 486: ...arger value of either the font size specified in the page the default size or one half the specified pen width to the ACA obtained in 1 3 Subtract the value set in paper margins from the ACA obtained...

Page 487: ...but is A2 or smaller the document size is determined to be A2 5 How to Determine Paper Size If the operation panel settings are as follows the paper size is determined as below Document size Auto Pape...

Page 488: ...ording to the scale mode setting Supplementary Notes To activate scaling turn the scaling setting to ON on the operation panel If it is OFF it is plotted at the same scale 100 If the Document Size is...

Page 489: ...l However the maximum memory capacity for Auto Layout is 5120kbyte So print data larger than 5120kbyte cannot be received When using the Auto Layout function we recommend the printer be equipped with...

Page 490: ...ing HP DJ750C which is the emulation target for the HP GL 2 emulation mode sets lines to a round joint if the lines are 0 35mm width or under A miter joint is not set However using the HP GL 2 emulati...

Page 491: ...Saver button to switch out of the Energy Saver mode 2 Specify the call destination z The call destination can be specified using the numeric keypad address numbers or one touch buttons The address bo...

Page 492: ...specified using the numeric keypad address numbers or one touch buttons The address book cannot be used z The call destination can be specified also with the keyboard displayed on the screen Selectin...

Page 493: ...minal name dG3 ID including spaces eCommunication mode EC or G3 SG3 Note You can set the number of character digits displayed for the recipient For details on setting up see Recipient on Activity Repo...

Page 494: ...d at transmission Status The result of the operation is indicated here Normal The operation ended normally Busy The recipient is busy or did not answer Auto resend The document is being resent and the...

Page 495: ...large data such as an A3 size photo with many halftone levels the machine may not print it even after the machine finishes receiving it In that case press the Stop button or turn the machine off and t...

Page 496: ...heet 2 up for Document 2 2 pages both Documents 1 and 2 are set to 2 sheets J 1 sheet 2 up and the number of printed pages is calculated as follows z Total pages 5 z 2 up 5 The numbers of pages for 2i...

Page 497: ...Fax Transmission Required O Internet Fax reception printing Required 4 O Internet Fax reception Internet Fax reception to mailbox Not required U Forwarding an incoming Internet Fax to a regular fax ma...

Page 498: ...the Fax Internet Fax Options screen Superfine 400 dpi or Superfine 600 dpi cannot be selected For information on Internet Fax profiles refer to 4 Fax Fax Internet Fax Options Internet Fax Profile Spec...

Page 499: ...not delivered successfully to the recipient the e mail that was received originally will be deleted For more information on the fax gateway feature refer to 4 Fax About Internet Fax Internet Fax Over...

Page 500: ...3 Notes on E mail Receptions A large volume of e mail may not be printed if the memory capacity is insufficient In such a case increase the memory size or ask the sender to lower the resolution Note o...

Page 501: ...ions Supported protocol SMTP Port number 25 Authentication for transmission SMTP authentication supported POP before SMTP Plain and APOP Waiting time for POP authentication cannot change Encryption co...

Page 502: ...s for Using SMB The following are the notes and restrictions for using SMB Configuration on the Machine z IP addresses are managed throughout the system as a whole The configuration should be performe...

Page 503: ...her hard disk or memory the print data will not be received Note When the print data has exceeded the receivable size some computers may immediately re transmit the print data When this occurs the com...

Page 504: ...nsulting with your network administrator z When performing network settings IP address etc on a host under the NIS Network Information Service management consult with the NIS administrator Switching O...

Page 505: ...Notes and Restrictions for Using EtherTalk The following are the notes and restrictions for using EtherTalk Printer Name Printer names used to be identified by clients are set not to duplicate each o...

Page 506: ...r or type of characters used a name differing from the designated name may be assigned in some cases We recommend not to change printer names or host names Notes and Restrictions for Using Scanner Fea...

Page 507: ...red folder list z Workgroup names server names shared names and the like on the network may not be displayed alphabetically on the list Notes and Restrictions when Connecting to Internet or Intranet T...

Page 508: ...re Watermark feature is not available z A time synchronization server cannot be specified in IPv6 format Use the IPv4 format to specify a time synchronization server z The following operating systems...

Page 509: ...Use an IPv4 network for correct logging z When searching a device outside the router via SMB directly specify the address Multicasting is supported only within a local link FF02 1 z In IPv6 environme...

Page 510: ...15 Appendix 508 Appendix 15 Removing the Finisher A1 Use the following procedure to remove the Finisher A1 from the machine To attach the Finisher A1 to the machine reverse the procedure 1 4 2 5 3...

Page 511: ...e ECM Error Correction Mode A type of G3 transmission ECM transmission sends the document image data in segments and retransmits segments that the remote machine receives incorrectly ECM described on...

Page 512: ...ent from a remote machine Profile A protocol controlling image resolution paper size and other attributes when sending or receiving faxes using Internet Fax Internet Fax The profiles that can be used...

Page 513: ...Annotations Comment Density 131 Annotations Comment on Side 2 132 Annotations System Settings 129 Annotations Create Comments 133 applicable lines 449 applicable paper size 450 452 audio tones 108 Aud...

Page 514: ...ow Balance System Settings 127 color capability 444 Color Shift System Settings 128 Color Space 161 Color Space System Settings 158 Comments System Settings 194 Common Service Settings 106 Company Log...

Page 515: ...ments Retrieved By Client 175 DocuWorks signature 287 Domain Filter 267 Domain Filter List 78 79 Domain Filtering 143 Domain Name 140 drum cartridge 40 48 Dual Color Non target Area Color System Setti...

Page 516: ...ettings 169 General Settings 2nd Column 162 general shared mailbox 302 Given Name 192 H halftone printable colors 444 HDD 444 hole punch waste container 59 hole punching 451 Host Name 140 265 HP GL 2...

Page 517: ...Language To Identify 159 LDAP Server Directory Service 144 Lighten Darken default value 127 158 Lighten Darken System Settings 163 Line Monitor Volume System Settings 109 line type 169 Link Job Flow...

Page 518: ...k dialing 489 Offset Center Tray 119 Offset Right Middle Tray 119 on hook dialing 490 opening top cover of Tray 6 432 operating system 447 449 Operation of Up Down Buttons 122 Optimize PDF For Web Vie...

Page 519: ...0 136 Port Status Receive E mail 136 Port Status Send E mail 136 Port Status SNMP 136 Port Status SOAP 137 Port Status UPnP Discovery 136 Port Status USB 134 Port Status WebDAV 137 Port Status SMB 135...

Page 520: ...ngs 165 S S MIME 247 267 S MIME certificate 192 S MIME Settings 147 Saturation 161 Saturation default value 127 Save Deleted Faxes System Settings 165 Save in 193 Save in Charge Print 211 Save in Priv...

Page 521: ...nterfaces 225 Surname 192 System Administrator Maximum Login Attempts 209 System Administrator mode 92 System Administrator Settings 202 System Administrator s Login ID 202 System Administrator s Mete...

Page 522: ...ulation 457 using the Ethernet interface 17 using the USB interface 17 V Verify User Details 199 W warm up time 444 Waste toner bottle 40 waste toner bottle 46 Watermark 117 Watermark Background Contr...

Page 523: ...DocuCentre III C4100 C3100 Administrator Guide ME4264E2 1 Edition 1 July 2008 Fuji Xerox Co Ltd Copyright 2008 by Fuji Xerox Co Ltd...

Reviews: