


7
+(
'
2&80(17
&
203$1<
DC230LP Windows NT
®
4.0 TCP/IP Quick Install
Page 3 of 4
d)
Press [
] repeatedly to delete the
current entry.
e)
Use the [
] or [
] key to select the
first character in the Printer Name.
f)
Press [
] to move to the next charac-
ter. Repeat this procedure to enter the
entire Printer Name.
g)
Press [Enter].
**SAVED**
displays
momentarily, followed by
.
10.
Enable the Line Printer Daemon (LPD):
a)
Press [Escape] to move back a level
in the menu system.
displays.
b)
Press [
] until
displays.
c)
Press [
].
displays.
d)
Press [
].
displays.
e)
Press [
] until
displays.
Printer Name
(your entry)
>
TCP/IP
-
>
Line Printer
Daemon
>
Enablement
(current entry)
>
Enablement
=
(current entry)
*
Enablement
=
Enabled
f)
Press [Enter].
**SAVED**
displays
momentarily, followed by
.
Note: The next menu at this level,
Port Setting,
has a fixed setting for the LPD (515) and can not
be changed.
11.
Save all settings:
a)
Press [Online].
displays.
b)
Press [Enter].
displays. The DC230LP will reboot,
save the settings entered, and print a
Configuration Report in approximately
3 minutes.
12.
Check the settings on the Configuration
Report against those entered to be sure
they are correct.
Enablement
Enabled
>
Reset Required
Press ENTER key
Warming Up
Please Wait . . .
>
13.
At the client, install print drivers and map
the printer in the usual manner. Refer to
the CentreWare
®
manual,
Getting Started
with Print and Fax Services, for additional
information.
14.
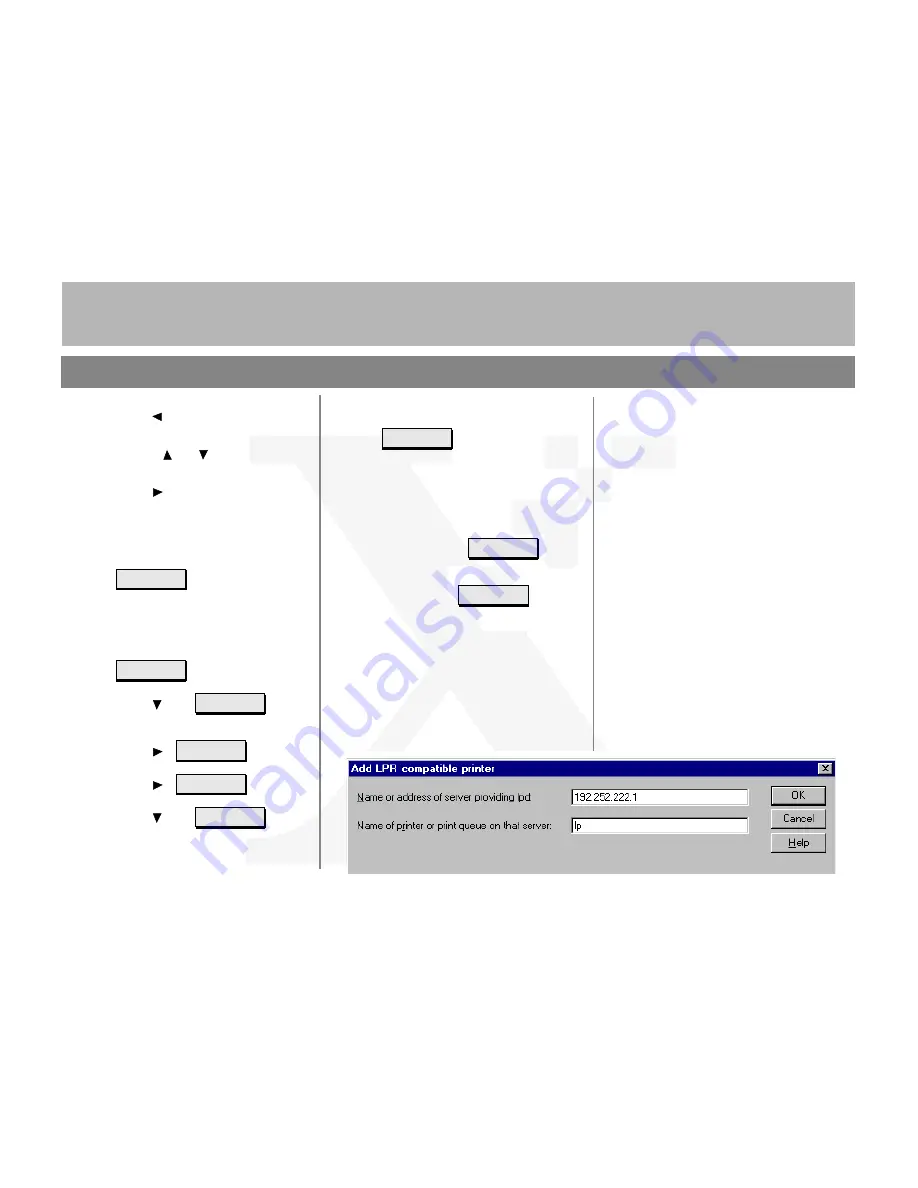
TCP/IP protocol and TCP/IP print services
must be installed on the NT Server and the
printer name must be set to [lp] (lower
case) when configuring the LPR port.
Refer to the screen sample below.
Additional information on the Windows NT
TCP/IP setup can be found in the
DC230LP
System Administration Guide, Network Installa-
tion and Troubleshooting.


