background image

Image Quality

3-20

09/06

PHASER 3124 / PHASER 3125

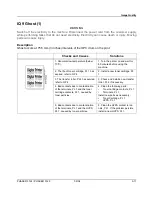
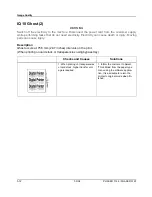
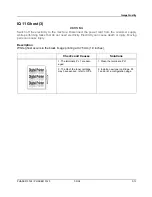
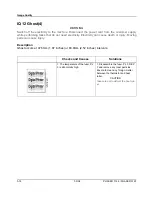
IQ 18 Periodic Defective Image

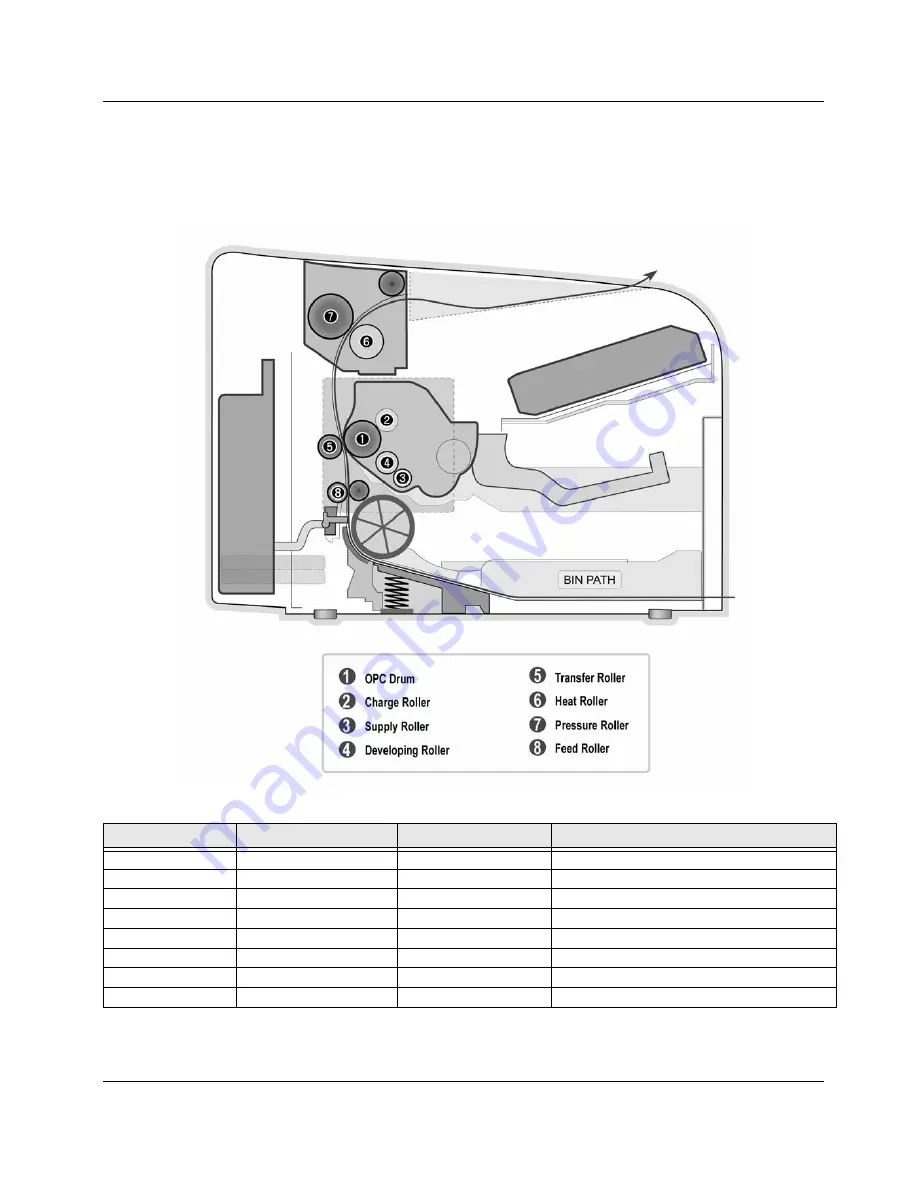
If a mark or other printing defect occurs at regular intervals on the page it may be caused by a 
damaged or contaminated roller. Measure the repetition interval and refer to the table below to 
identify the roller concerned.   

Table 1: Periodic Defective Image

No

Roller

Defective Image

Typical Defect

1

OPC Drum

75.5mm (2.97 inches)

White spots on a black image or vice versa

2

Charge Roller

37.7mm (1.48 inches)

Black spots

3

Supply Roller

47.5mm (1.87 inches)

Light or dark horizontal image bands

4

Developing Roller

35.2mm (1.39 inches)

Horizontal image bands

5

Transfer Roller

46.2mm (1.82 inches)

Ghost image

6

Heat Roller

77.7mm (3.06 inches)

Black spots or ghost image

7

Pressure Roller

75.4mm (2.97 inches)

Black spots on the back page

8

Feed Roller

57mm (2.24 inches)

Black spots

Summary of Contents for 3124 - Phaser B/W Laser Printer

Page 1: ...Transmittal Page Product Phaser 3124 Phaser 3125 Title Service Manual Part Number 708P88624 Status Launch Date September 2006 ...

Page 2: ......

Page 3: ...708P88624 09 06 Service Manual 708P88624 PHASER 3124 PHASER 3125 ...

Page 4: ...ity will be accepted by Xerox Europe arising out of any inaccuracies or omissions All service documentation is supplied to Xerox external customers for informational purposes only Xerox service documentation is intended for use by certified product trained service per sonnel only Xerox does not warrant or represent that it will notify or provide to such customer any future change to this documenta...

Page 5: ...rting x 1 Service Call Procedures Section Contents 1 1 2 Repair Analysis Procedures Section Contents 2 1 3 Image Quality Section Contents 3 1 4 Repairs Adjustments Section Contents 4 1 5 Parts List Section Contents 5 1 6 General Procedures Information Section Contents 6 1 7 Wiring Data Section Contents 7 1 ...

Page 6: ...Introduction ii 09 06 PHASER 3124 PHASER 3125 Page intentionally blank ...

Page 7: ...Introduction PHASER 3124 PHASER 3125 09 06 iii Service Manual Formats Table 1 Service Manual Formats Part number Format 708P88624 Hardcopy 708P88623 PDF on CD ...

Page 8: ... by appropriately qualified service engineers High voltages and lasers inside this product are dangerous This machine should only be serviced by a suitably trained and qualified service engineer 2 Use only Xerox replacement parts There are no user serviceable parts inside the machine Do not make any unauthorized changes or additions to the machine these could cause the machine to malfunction and c...

Page 9: ...not allow water or other liquids to spill into the machine this can cause electric shock Do not allow paper clips pins or other foreign objects to fall into the machine these could cause a short circuit leading to an electric shock or fire hazard CAUTION INVISIBLE LASER RADIATION WHEN THIS COVER OPEN DO NOT OPEN THIS COVER VORSICHT UNSICHTBARE LASERSTRAHLUNG WENN ABDECKUNG GE FFNET NICHT DEM STRAH...

Page 10: ...such defects should be repaired immediately Take care not to cut or damage the power cable or plugs when moving the machine 9 Use caution during thunder or lightning storms Xerox recommend that this machine be dis connected from the power source when such weather conditions are expected Do not touch the machine or the power cord if it is still connected to the wall socket in these weather condi ti...

Page 11: ...ismantling the machine or replacing any parts 1 Check the contents of the machine memory and make a note of any user settings These will be erased if the mainboard is replaced 2 Ensure that power is disconnected before servicing or replacing any electrical parts 3 Disconnect printer interface cables and power cables 4 Be sure to remove the print cartridge before you disassemble any parts 5 Only us...

Page 12: ... Do not put fingers or hair into the rotating parts paper feeding entrance motor fan etc Doing so may cause injury 3 When you move the machine This machine weighs 8 7kg 19 2lbs Use safe lifting and handling techniques Back injury could be caused if you do not lift carefully 4 Ensure the machine is installed safely The machine weighs 8 7kg 19 2lbs ensure the machine is installed on a level surface ...

Page 13: ...o prevent electrostatic charge buildup in the vicinity of the assembly 3 Use only a grounded tip soldering iron to solder or desolder ESDs 4 Use only an anti static solder removal device Some solder removal devices not classified as anti static can generate electrical charges sufficient to damage ESDs 5 Do not use Freon propelled chemicals When sprayed these can generate electrical charges suffici...

Page 14: ... or light print occurs The Error LED will come on You can temporarily re establish the print quality by redistributing the remaining ton er in the cartridge Note Help the environment by recycling your used toner cartridge Refer to the recycling brochure packed with the toner cartridge for details 1 Open the Front Cover 2 Lightly push the used cartridge down then pull it out 3 Unpack the new toner ...

Page 15: ...o report product incidents to Xerox Environment Health Safety within 24 hours of becoming aware of the event 2 The information to be provided at the time of reporting is contained in Appendix A Health and Safety Incident Report involving a Xerox product 3 The initial notification may be made by any of the following methods For incidents in North America and Developing Markets West Brazil Mexico La...

Page 16: ...ci ated equipment located in the vicinity of the incident b Return any affected equipment part s to the location designated by Xerox EH S and or the Business Division c Implement all safety retrofits 2 Xerox EH S shall a Manage and report all incident investigation activities b Review and approve proposed product corrective actions and retrofits if necessary c Manage all communications and corresp...

Page 17: ...Service Call Procedures PHASER 3124 PHASER 3125 09 06 1 1 1 Service Call Procedures SCP 1 Service Call Actions 1 3 SCP 2 Final Actions 1 4 ...

Page 18: ...Service Call Procedures 1 2 09 06 PHASER 3124 PHASER 3125 Page intentionally blank ...

Page 19: ...can cause injury WARNING Do not touch the fuser while it is hot WARNING Take care during this procedure Sharp edges may be present that can cause injury 1 Take note of symptoms or error messages 2 Ask the operator to describe or demonstrate the problem 3 Make sure that The power cord is connected to the wall outlet and to the machine All cables are connected correctly 4 If available check the mach...

Page 20: ...s preferred set tings Mark off any hardware software options and modifications installed and or enabled in the Service Log book At the first service and at any subsequent service where changes are made or options are added print the configuration report and store it with the machine log book Discard any pre vious versions of the configuration report Remove and destroy any copies of test patterns C...

Page 21: ...7 4 JAM 2 RAP 2 8 5 Multi feeding RAP 2 9 6 Fuser Jam RAP 2 10 7 Toner Cartridge Jam RAP 2 11 8 Blinking LED Fault RAP 2 12 9 Melting Fuser Gear RAP 2 13 10 Paper Empty RAP 2 14 11 Cover Open RAP 2 15 12 Faulty Motor RAP 2 16 13 No Power RAP 2 17 14 Bad Software Environment RAP 2 18 15 Abnormal Printing RAP 2 20 16 Spool Error RAP 2 21 ...

Page 22: ...Status Indicator RAPs 2 2 09 06 PHASER 3124 PHASER 3125 Page intentionally blank ...

Page 23: ...cover is open PL 1 Close the relevant cover covers The paper tray PL 1 is empty Load paper in the tray The printer has stopped printing due to a major system error The toner cartridge PL 1 is not installed Install the toner cartridge Blinking An error has occurred and the printer is waiting for the error to be cleared When the problem is cleared the printer resumes printing The toner cartridge PL ...

Page 24: ... cables and driver installation 5 Check the print quality Is there a print quality problem Go to Section 3 Image Quality 6 Check consumables toner etc Using the online key print a demo page GP 3 Expected life of various consumable parts compare this with the figures printed and install new parts as required GP 4 If necessary install a new toner cartridge PL 1 Initial inspection 1 Check the power T...

Page 25: ...ny air conditioning fan or open window If necessary move the machine Ensure the machine is not positioned in direct sunlight If unavoidable use a curtain to shade the machine Ensure the machine is installed in a clean dust free environment Move the machine to a clean area if necessary Some industrial or cleaning processes give of fumes which can affect the machine Move the machine away from this t...

Page 26: ...ution 1 Clear any paper jams in the machine 1 Refer to clearing paper jams GP 6 2 Check the surface of the pick up assembly PL 4 for contamination or damage 2 Clean the pick up assembly PL 4 using a soft cloth dampened with IPA Isopropyl Alco hol or water 3 The main motor PL 5 may be defective 3 If the main motor is not working refer to RAP 14 4 The solenoid PL 4 is faulty 4 Check and install a ne...

Page 27: ...re 2 Check and Cause Solution 1 Clear any paper jams in the machine 1 Refer to clearing paper jams GP 6 2 Paper is jammed in the exit roller and the fuser PL 3 after passing through the feed sensor actuator PL 4 the feed sensor actua tor may be defective 2 Check and install new parts as necessary Feed sensor actuator PL 4 Feed sensor Note The feed sensor is mounted on the SMPS PL 1 3 Paper is jamm...

Page 28: ...tina jam occurs 2 Disassemble the fuser REP 9 and clean the surface of the rollers with IPA Isopropyl Alcohol or water Clean the contamination between the heat roller and thermistor PL 3 3 If paper is completely fed out of the machine but Jam 2 occurs the feed sensor is defective Note The feed sensor is mounted on the SMPS PL 1 3 Check and install new parts as necessary Feed sensor actuator PL 4 S...

Page 29: ...once Check and Cause Solution 1 Clear any paper jams in the machine 1 Refer to clearing paper jams GP 6 2 Paper is out of specification 2 Use paper within specification refer to the User Guide Recommend the use of good quality long grain paper 3 Friction pad PL 4 is contaminated with for eign matter oil etc 3 Clean using a soft cloth which is dampened with IPA Isopropyl Alcohol or water Install a ...

Page 30: ... cause injury Description Paper is jammed in the fuser Check and Cause Solution 1 Clear any paper jams in the machine 1 Refer to clearing paper jams GP 6 2 Contamination of the pressure roller or heat roller PL 3 11 2 Disassemble the fuser REP 13 Clean the surface of the rollers with IPA Isopropyl Alco hol or water 3 Damaged stripper fingers PL 3 3 If there is a dark background on the docu ment re...

Page 31: ...ng tasks that do not need electricity Electricity can cause death or injury Moving parts can cause injury Description Paper is jammed in the toner cartridge Check and Cause Solution 1 Clear any paper jams in the machine 1 Refer to clearing paper jams GP 6 2 Paper is out of specification 2 Use paper within specification and refer to the User Guide Recommend the use of good quality long grain paper ...

Page 32: ... the customer supply while performing tasks that do not need electricity Electricity can cause death or injury Moving parts can cause injury Description 1 All LED s on the OPE panel are blinking Check and Cause Solution 1 The fuser gear PL 3 has melted 1 Refer to RAP 9 2 The thermistor PL 3 is damaged 2 Check and install a new thermistor PL 3 if necessary 3 The halogen lamp PL 3 may be defective 3...

Page 33: ... cord from the customer supply while performing tasks that do not need electricity Electricity can cause death or injury Moving parts can cause injury Description The fuser gear has melted Check and Cause Solution 1 Problem caused due to an overheated machine 1 Check and install new parts as necessary Halogen lamp PL 3 Fuser assembly PL 3 Main PBA PL 1 ...

Page 34: ...rom the customer supply while performing tasks that do not need electricity Electricity can cause death or injury Moving parts can cause injury Description The paper lamp on the operator panel does not come ON when the paper cassette is empty Check and Cause Solution 1 The paper empty sensor actuator is dam aged or bent PL 2 1 Check and install a new paper empty sen sor actuator PL 2 if necessary ...

Page 35: ...eath or injury Moving parts can cause injury Description The ERROR lamp does not come ON even when the front cover or exit cover is open Check and Cause Solution 1 The exit cover PL 1 and or front cover assembly PL 1 may be damaged 1 Check the following parts as necessary Exit cover PL 1 Front cover PL 1 Exit cover open switch Front cover open switch Note The exit cover open switch is mounted on t...

Page 36: ...e performing tasks that do not need electricity Electricity can cause death or injury Moving parts can cause injury Description The main motor is not working during printing Therefore paper does not feed into the printer re sulting Jam 0 Check and Cause Solution 1 The main motor PL 5 may be defective 1 Check and install new parts as necessary Main drive assembly PL 5 Main PBA PL 1 ...

Page 37: ... electricity Electricity can cause death or injury Moving parts can cause injury Description LED s on the operator panel fail to come ON when the printer is turned ON Check and Cause Solution 1 Check the following parts Power supply cord PL 1 SMPS PL 1 1 Install a new SMPS PL 1 if necessary 2 Check the LED Note The LED is mounted on the HVPS PL 1 2 Check and install new parts as necessary HVPS PL ...

Page 38: ...er devices that need to share the printer port try temporarily discon necting these devices and perhaps even un installing their drivers to ensure the machine works by itself If you are using a USB hub try connecting directly to the back of the PC instead 3 Printing fails due to errors in the OS 3 Check the connection between the PC and printer port If using windows check if the printer driv ers a...

Page 39: ...ated during printing 1 The message insufficient printer memory means there is a hard disk space problem on the PC rather than a printer RAM problem Inform the customer to secure more space on the hard disk 2 Printing error occurs even if there is enough space in the hard disk 2 The connection of the cable and printer port is not correct Check the cable is properly con nected and the parallel port ...

Page 40: ...n 1 Set up the parallel port settings in CMOS setup 1 Select SPP Normal or ECP LPT Port 2 Printer Driver Error 2 Ensure that the correct driver is loaded Use the driver supplied on the CD or down loaded from Xerox com DO NOT use the Microsoft driver supplied with the Windows operating system If the machine is a GDI printer ensure that ALL OTHER GDI drivers are uninstalled as Windows allows only 1 ...

Page 41: ...to delete as it must wait for a time out Check and Cause Solution 1 Insufficient space of the hard disk in the directory assigned for the basic spool 1 Ask the customer to delete the unneces sary files to provide more space to start print ing job 2 The previous printing error is not resolved 2 There may be files from previous failed print jobs on the hard disk with the name in the form jnl Delete ...

Page 42: ...Status Indicator RAPs 2 22 09 06 PHASER 3124 PHASER 3125 Page intentionally blank ...

Page 43: ...Light Image 3 7 IQ 6 Dark Image or Black Image 3 8 IQ 7 Uneven Density 3 9 IQ 8 Background 3 10 IQ 9 Ghost 1 3 11 IQ 10 Ghost 2 3 12 IQ 11 Ghost 3 3 13 IQ 12 Ghost 4 3 14 IQ 13 Contamination on the Face of Page 3 15 IQ 14 Contamination on the Back of Page 3 16 IQ 15 Blank Page Print out 1 3 17 IQ 16 Blank Page Print out 2 3 18 IQ 17 Uneven Vertical Lines 3 19 IQ 18 Periodic Defective Image 3 20 ...

Page 44: ...Image Quality 3 2 09 06 PHASER 3124 PHASER 3125 Page intentionally blank ...

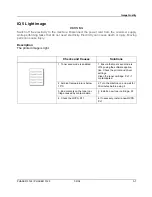
Page 45: ...Moving parts can cause injury Description Straight thin black vertical lines occur on the print Dark black vertical band occurs on the print Checks and Causes Solutions 1 The transfer roller PL 4 is deformed 1 Install a new transfer roller PL 4 2 The developer roller or doctor blade inside the toner cartridge PL 1 is damaged 2 Install a new toner cartridge PL 1 3 The surface of the charge roller i...

Page 46: ...mination of the LSU mir rors PL 1 2 Clean the LSU window with rec ommended cleaner IPA and a clean cotton swab If necessary install a new LSU PL 1 3 Check for sharp edges in the paper path that may correspond to the position of the voids 3 Open the front cover PL 1 and clean inside the frame assembly PL 2 4 Check the life of the toner car tridge GP 4 4 If the toner cartridge has expired install a ...

Page 47: ...ath or injury Moving parts can cause injury Description Dark or blurry horizontal stripes on print periodically Checks and Causes Solutions 1 Bad contacts between the voltage terminals and toner cartridge PL 1 1 Clean the terminals PL 1 Ensure all toner and dust particles are removed 2 The developer rollers in the toner cartridge may be stained 2 Clean all the toner cartridge gears PL 1 If the pro...

Page 48: ...taminated with foreign matter or paper particles Refer to periodic defective image IQ 18 1 If the spots still appear at 37 7mm 1 48 inches intervals install a new toner cartridge PL 1 2 If faded areas or voids occur on a black image at intervals of 75 5mm 2 97 inches the OPC drum surface is damaged 2 75 5mm 2 97 inches repetition Carefully clean the OPC drum in the toner cartridge PL 1 with a soft...

Page 49: ... The printed image is light Checks and Causes Solutions 1 Toner save mode is enabled 1 Ensure the toner save mode is off by using the software applica tion Check the printer and driver settings Clean the toner cartridge PL 1 if contaminated 2 Ambient temperature is below 10 C 2 Turn the machine on and wait for 30 minutes before using it 3 Bad contacts on the toner car tridge caused by contaminatio...

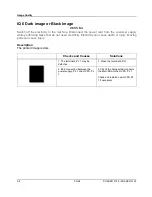
Page 50: ...ks that do not need electricity Electricity can cause death or injury Moving parts can cause injury Description The printed image is dark Checks and Causes Solutions 1 The terminals PL 1 may be defective 1 Clean the terminals PL 1 2 Bad connection between the power supply PL 1 and HVPS PL 1 2 Check the harness that connects the Main PBA to the HVPS PL 1 Check and install a new HVPS PL 1 if necessa...

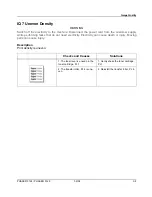
Page 51: ... supply while performing tasks that do not need electricity Electricity can cause death or injury Moving parts can cause injury Description Print density is uneven Checks and Causes Solutions 1 The toner level is uneven in the toner cartridge PL 1 1 Gently shake the toner cartridge PL 1 2 The transfer roller PL 4 is une ven 2 Reinstall the transfer roller PL 4 ...

Page 52: ... less than 2 The printer has not been in use for a long period of time 1 The toner cartridge is basically designed to print 2 000 sheets with 5 print area 2 Is the vertical movement of the transfer roller PL 4 smooth 2 Clean the bushings on the trans fer roller PL 4 3 Is recycled paper being used 3 The printer cannot handle recy cled paper See the user guide for paper specifications 4 The life of ...

Page 53: ...efore using the machine 2 The life of toner cartridge PL 1 has expired refer to GP 4 2 Install a new toner cartridge PL 1 3 The transfer roller PL 4 has expired refer to GP 4 3 Check and install a new transfer roller PL 4 if necessary 4 Bad contacts due to contamination of the terminals PL 1 and the toner cartridge contacts PL 1 caused by toner particles 4 Clean the following parts Toner cartridge...

Page 54: ...ury Moving parts can cause injury Description Ghost occurs at 75 5 mm 2 97 inches intervals on the print When printing on card stock or transparencies using bypass tray Checks and Causes Solutions 1 When printing on transparencies or card stock higher transfer volt age is required 1 Inform the customer to Select Thick Mode from the paper type menu using the software applica tion It is advisable to...

Page 55: ...do not need electricity Electricity can cause death or injury Moving parts can cause injury Description White ghost occurs in the black image printing at 47 5mm 1 9 inches Checks and Causes Solutions 1 The terminals PL 1 are dam aged 1 Clean the terminals PL 1 2 The life of the toner cartridge may have expired refer to GP 4 2 Install a new toner cartridge PL 1 and print a configuration page ...

Page 56: ...Electricity can cause death or injury Moving parts can cause injury Description Ghost occurs at 47 5mm 1 87 inches or 63 9mm 2 52 inches intervals Checks and Causes Solutions 1 The temperature of the fuser PL 3 is abnormally high 1 Disassemble the fuser PL 3 REP 7 and remove any toner particles Ensure to clean any foreign matter between the thermistor and heat roller CAUTION Take care not to defor...

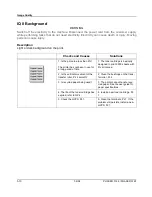
Page 57: ... can cause death or injury Moving parts can cause injury Description The background on the face of the printed page is stained Checks and Causes Solutions 1 The transfer roller PL 4 may be contaminated 1 If the transfer roller is contami nated run PC Cleaning Mode Print 2 or 3 times Perform Self Test 2 or 3 times to remove contamination 2 Toner leakage due to a dam aged sealed developer in the ton...

Page 58: ...njury Moving parts can cause injury Description The back of the page is stained at 47 mm intervals Checks and Causes Solutions 1 The transfer roller PL 4 is con taminated 1 Check and install a new transfer roller PL 4 if contaminated severely 2 The pressure roller PL 3 is con taminated 2 Disassemble the fuser REP 7 and clean the heat roller and pres sure roller PL 3 Clean the area between the heat...

Page 59: ...t the power cord from the customer supply while performing tasks that do not need electricity Electricity can cause death or injury Moving parts can cause injury Description Blank page is printed Checks and Causes Solutions 1 Bad ground contacts on the toner cartridge PL 1 1 Clean the terminals PL 1 and the toner cartridge contacts PL 1 ...

Page 60: ...ng parts can cause injury Description One or several blank pages are printed When the printer is switched on several blank pages print Checks and Causes Solutions 1 Computer system error 1 Turn the power off delete the print job and resend the print job again 2 Bad ground contacts on the toner cartridge PL 1 2 Clean the terminals PL 1 and the toner cartridge contacts PL 1 3 Damaged solenoid PL 4 3...

Page 61: ...connect the power cord from the customer supply while performing tasks that do not need electricity Electricity can cause death or injury Moving parts can cause injury Description Printed vertical lines are not straight Check and Cause Solution 1 Check the LSU PL 1 1 Check and install new parts as necessary LSU PL 1 Main PBA PL 1 ...

Page 62: ...ctive Image No Roller Defective Image Typical Defect 1 OPC Drum 75 5mm 2 97 inches White spots on a black image or vice versa 2 Charge Roller 37 7mm 1 48 inches Black spots 3 Supply Roller 47 5mm 1 87 inches Light or dark horizontal image bands 4 Developing Roller 35 2mm 1 39 inches Horizontal image bands 5 Transfer Roller 46 2mm 1 82 inches Ghost image 6 Heat Roller 77 7mm 3 06 inches Black spots...

Page 63: ...ssembly 4 3 REP 2 Cassette Tray 4 4 REP 3 Rear Cover 4 5 REP 4 Top Cover 4 6 REP 5 Left Cover and Right Cover 4 8 REP 6 Engine Shield 4 9 REP 7 Fuser Assembly 4 10 REP 8 HVPS 4 13 REP 9 SMPS 4 14 REP 10 Main PBA 4 15 REP 11 Main Drive Assembly 4 15 REP 12 LSU 4 18 REP 13 Paper Path Assembly 4 18 ...

Page 64: ...Repairs Adjustments 4 2 09 06 PHASER 3124 PHASER 3125 Page intentionally blank ...

Page 65: ...d from the customer supply while performing tasks that do not need electricity Electricity can cause death or injury Moving parts can cause injury 1 Open the front cover Figure 1 Figure 1 2 Gently flex the right hinge of the front cover in the direction of the arrow then remove the front cover Figure 2 Figure 2 Replacement Replacement is the reverse of the removal procedure ...

Page 66: ...r cord from the customer supply while performing tasks that do not need electricity Electricity can cause death or injury Moving parts can cause injury 1 Open the cassette tray Figure 1 Figure 1 2 Unhinge the cassette tray in the direction of the arrow then remove the cassette tray Figure 2 Figure 2 Replacement Replacement is the reverse of the removal procedure ...

Page 67: ...onnect the power cord from the customer supply while performing tasks that do not need electricity Electricity can cause death or injury Moving parts can cause injury 1 Open the exit cover Figure 1 Figure 1 2 Gently flex the exit cover in the direction of the arrow then remove the exit cover Figure 2 Figure 2 3 Remove 4 screws Figure 3 Figure 3 ...

Page 68: ...placement is the reverse of the removal procedure REP 4 Top Cover Assembly Parts list on PL 1 WARNING Switch off the electricity to the machine Dis connect the power cord from the customer supply while performing tasks that do not need electricity Electricity can cause death or injury Moving parts can cause injury 1 Remove the front cover assembly refer to REP 1 2 Remove the rear cover refer to RE...

Page 69: ...ction of the arrows then remove the top cover Figure 2 Note The plastic latches holding the top cover and the main assembly together are tightly fitted Figure 2 6 Remove 2 screws Remove the LED lens and online key Figure 3 Figure 3 Replacement Replacement is the reverse of the removal procedure ...

Page 70: ...ming tasks that do not need electricity Electricity can cause death or injury Moving parts can cause injury 1 Remove the top cover refer to REP 4 2 Gently flex the left cover in the direction of the arrows then remove the left cover Figure 1 Figure 1 3 Gently flex the right cover in the direction of the arrows then remove the right cover Figure 2 Figure 2 Replacement Replacement is the reverse of ...

Page 71: ...er to REP 1 2 Remove the rear cover refer to REP 3 3 Remove the top cover assembly refer to REP 4 4 Disconnect all connectors from the main PBA and SMPS except CN 18 Phaser 3124 CN 11 Phaser 3125 from the main PBA and CON 2 from the SMPS Figure 1 Figure 1 5 Remove 6 screws then the shield assem bly Carefully release all the harnesses wound around the shield assembly CAUTION Take care not to bend t...

Page 72: ...erforming tasks that do not need electricity Electricity can cause death or injury Moving parts can cause injury 1 Remove the engine shield refer to REP 6 2 Disconnect CN 1 Phaser 3124 CN 4 Phaser 3125 from the main PBA and CON 1 from the SMPS Figure 1 Figure 1 3 Remove 4 screws then the fuser assem bly Figure 2 Figure 2 4 Remove the right lamp cover left lamp cover and the fuser dummy Figure 3 Fi...

Page 73: ...the direc tion of the arrows Remove the exit roller Figure 4 Figure 4 6 Remove the roller rack assemblies Figure 5 Figure 5 7 Remove the 2 spring place holders then the thermostat cap Figure 6 Figure 6 8 Disconnect the thermostat harnesses Remove 2 screws then the thermostat Figure 7 Figure 7 ...

Page 74: ...re 8 Figure 8 10 Disconnect the halogen lamp harnesses then remove 2 screws Figure 9 Figure 9 11 Remove 4 screws then the fuser cover Figure 10 Figure 10 12 Slide the halogen lamp out of the fuser and remove the halogen lamp Figure 11 Figure 11 Replacement Replacement is the reverse of the removal procedure ...

Page 75: ...hat do not need electricity Electricity can cause death or injury Moving parts can cause injury 1 Remove the front cover assembly refer to REP 1 2 Remove the rear cover refer to REP 3 3 Remove the top cover refer to REP 4 4 Remove the left cover refer to REP 5 5 Remove 6 screws then the protective sheet Figure 1 6 Disconnect CN 1 and CN 3 then remove the HVPS Figure 2 Figure 2 7 Remove 2 HVPS grou...

Page 76: ...PS Parts list on PL 1 WARNING Switch off the electricity to the machine Dis connect the power cord from the customer supply while performing tasks that do not need electricity Electricity can cause death or injury Moving parts can cause injury 1 Remove the rear cover refer to REP 1 2 Disconnect all SMPS connectors Remove 5 screws then the SMPS Figure 1 Figure 1 Replacement Replacement is the rever...

Page 77: ...move 6 screws then the Main PBA Figure 1 Figure 1 Replacement Replacement is the reverse of the removal procedure REP 11 Main Drive Assembly Parts list on PL 5 WARNING Switch off the electricity to the machine Dis connect the power cord from the customer supply while performing tasks that do not need electricity Electricity can cause death or injury Moving parts can cause injury 1 Remove the front...

Page 78: ...ain motor harness then remove the main drive assembly Figure 2 Figure 2 7 Remove the feed gear if necessary Fig ure 3 Figure 3 8 Remove the fuser drive gear OPC drive gear then the RDCN gear 113 83 Figure 4 Figure 4 9 Remove the 2 screws then the main motor Figure 5 Figure 5 ...

Page 79: ...4 screws then the motor bracket Figure 6 Figure 6 11 Remove the RDCN gear 139 83 gear Fig ure 7 Figure 7 Replacement 1 When replacing the main drive assembly tighten the screws in the reverse order they are numbered Replacement is the reverse of the removal procedure ...

Page 80: ...Remove 3 screws then lift the LSU and disconnect all the harnesses attached Remove the LSU Figure 1 Figure 1 Replacement Replacement is the reverse of the removal procedure REP 13 Paper Path Assembly Parts list on PL 4 WARNING Switch off the electricity to the machine Dis connect the power cord from the customer supply while performing tasks that do not need electricity Electricity can cause death...

Page 81: ...en remove the transfer roller Figure 2 Figure 2 4 Remove 1 screw then the solenoid Fig ure 3 Figure 3 5 Release the catches on both sides of the pick up assembly then slide them apart Figure 4 Figure 4 6 Remove the pick up assembly Replacement Replacement is the reverse of the removal procedure ...

Page 82: ...Repairs Adjustments 4 20 09 06 PHASER 3124 PHASER 3125 Page intentionally blank ...

Page 83: ... 3124 PHASER 3125 09 06 5 1 5 Spare Parts List PL 1 Main Assembly 5 2 PL 2 Frame Assembly 5 4 PL 3 Fuser Assembly 5 6 PL 4 Paper Path Assembly 5 8 PL 5 Main Drive Assembly 5 10 PL 6 Common Hardware General Service Items 5 12 ...

Page 84: ...Spare Parts List 5 2 09 06 PHASER 3124 PHASER 3125 PL 1 Main Assembly ...

Page 85: ...2 3 3 PAPER TRAY EXTENSION 3 4 PAPER TRAY GUIDE 4 122N00272 LSU REP 12 5 REAR COVER REP 3 6 TONER CARTRIDGE 7 FUSER ASSEMBLY 220V 7 FUSER ASSEMBLY 110V 8 ENGINE SHIELD REP 6 9 LSU HARNESS 10 105N02067 SMPS 220V REP 9 10 105N02066 SMPS 110V REP 9 11 140N63235 MAIN PBA PHASER 3124 B REP 10 11 140N63236 MAIN PBA PHASER 3125 B REP 10 11 140N63237 MAIN PBA PHASER 3125 N REP 10 12 MOTOR HARNESS 13 HVPS ...

Page 86: ...Spare Parts List 5 4 09 06 PHASER 3124 PHASER 3125 PL 2 Frame Assembly ...

Page 87: ...E UNIT 1 BASE FRAME 2 PAPER PATH ASSEMBLY 3 PAPER KNOCK UP ASSEMBLY 4 007N01572 MAIN DRIVE ASSEMBLY 5 RIGHT PAPER GUIDE 6 LEFT PAPER GUIDE 7 GEAR PINION 8 120N00504 PAPER EMPTY ACTUATOR 9 OPC GROUND 10 RIGHT TORSION SPRING 11 LEFT TORSION SPRING 12 KNOCK UP SPRING 13 ACTUATOR SPRING 14 FEED GEAR 15 SPRING 16 RUBBER FOOT ...

Page 88: ...Spare Parts List 5 6 09 06 PHASER 3124 PHASER 3125 PL 3 Fuser Assembly ...

Page 89: ...OLLER 10 022N02310 HEAT ROLLER 11 HEAT ROLLER GEAR 12 RIGHT HEAT BUSH 13 LEFT HEAT BUSH 14 122N00270 HALOGEN LAMP 220V 14 122N00269 HALOGEN LAMP 110V 15 ROLLER RACK 15 1 ROLLER MAIN 15 2 ROLLER FR 15 3 ROLLER HOLDER 15 4 SPRING 16 SPRING PLACE HOLDER 17 LEFT FUSER COVER 18 RIGHT FUSER COVER 19 130N01499 THERMISTOR 20 130N01498 THERMOSTAT 21 THERMOSTAT CAP 22 FUSER HARNESS JOINT 23 STRIPPER FINGER ...

Page 90: ...Spare Parts List 5 8 09 06 PHASER 3124 PHASER 3125 PL 4 Paper Path Assembly ...

Page 91: ...ON PAD 9 3 HOLDER M PAD 10 BUSH HOLDER 11 PICK UP GEAR 11 1 PICK UP GEAR B 11 2 PICK UP GEAR A 11 3 PICK UP GEAR SPRING 12 SOLENOID 13 FEED GEAR 14 TRANSFER ROLLER RIGHT BUSH 15 TRANSFER ROLLER LEFT BUSH 16 TRANSFER ROLLER SPRING 17 022N02309 TRANSFER ROLLER 18 PTL HOLDER 19 EARTH TRANSFER 20 PICK UP SHAFT 21 NOT USED 22 PICK UP ASSEMBLY 22 1 PICK UP RUBBER HOUSING 22 2 RUBBER PICK UP 23 NOT USED ...

Page 92: ...Spare Parts List 5 10 09 06 PHASER 3124 PHASER 3125 PL 5 Main Drive Assembly ...

Page 93: ... 11 PL 5 Main Drive Assembly Item Part Number Description Remark 0 MAIN DRIVE ASSEMBLY REP 11 1 E CLIP 2 WASHER 3 MAIN MOTOR 4 MOTOR BRACKET 5 PLATE 6 MOTOR IMPELLER 7 RDCN GEAR 139 83 8 RDCN GEAR 113 83 9 FUSER DRIVE GEAR 10 OPC DRIVE GEAR 11 SPACER ...

Page 94: ...Spare Parts List 5 12 09 06 PHASER 3124 PHASER 3125 Page intentionally blank ...

Page 95: ... Overview 6 5 GP 3 Control Panel 6 24 GP 4 Consumables and Replacement Parts 6 26 GP 5 Printer Settings Utility 6 27 GP 6 Clearing Paper Jams 6 29 GP 7 Tools 6 34 GP 8 Acronyms and Abbreviations 6 35 GP 9 Selecting Printer Locations 6 37 GP 10 Restriction of Hazardous Substances RoHS 6 38 GP 11 Sample Test Pattern 6 39 GP 12 Service Log 6 40 ...

Page 96: ...General Procedures Information 6 2 09 06 PHASER 3124 PHASER 3125 Page intentionally blank ...

Page 97: ...15sec First page print out time Ready 9 seconds Sleep mode 25 seconds Processor Speed 150MHz 400MHz Memory 8MB 32MB Font Type Windows Fonts Standard Emulation GDI PCL 6d Postscript 3 Auto Emulation Sensing Yes System requirements Operating system Windows 98 ME NT 4 0 2000 XP 23 64 bit 2003 Windows 98 ME NT 4 0 2000 XP 23 64 bit 2003 Mac 8 6 9 2 10 1 10 4 Linux CPU Windows 98 ME 2000 XP Pentium II ...

Page 98: ...e 110 127 VAC 5 5 A 220 240 VAC 3 A Nominal fre quency 50 60 MHz Power Consumption Printing 390W Ave Max 400W 400W Ave Max 420W Ready Idle 65W 70W Power Save 6 5W Ave or less 8 5W Ave or less Environmental Specifications Temperature Operating 10 32 C 50 90 F Non Operating 20 40 C 4 104 F Humidity Operating 20 to 80 RH Non Operating 20 to 80 RH Noise Level During opera tion Sound Pressure 53dB Soun...

Page 99: ...General Procedures and Information PHASER 3124 PHASER 3125 09 06 6 5 GP 2 System Overview Printing Path Layout Figure 1 Printing Path ...

Page 100: ...e Faced Down Transfer Assembly The transfer roller transfers toner from the toner cartridge to paper Main Drive Assembly The main drive assembly provides mechanical movement throughout the machine The assembly is powered by a single step motor Fuser The fuser is consists of the heat lamp heat roller pressure roller thermistor and thermostat It adheres toner on to paper with pressure and heat 1 Hea...

Page 101: ...rame grounding 5 Pressure roller Shaft Length 239 5 mm 9 43 inches Rubber Length 222 mm 8 74 inches 6 Paper separation method Teflon coating with moulded claw system 7 Safety Features To prevent overheating 1st protection device Hardware stops working when printer is overheated 2nd protection device Software system stops when printer is overheated 3rd protection device Thermostat cuts off power to...

Page 102: ...his is a core part of a laser beam printer The OPC drum rotates at the same speed as the paper being fed The Phto Diode creates a HSYNC signal and sends it to the engine when the laser beam of the LSU reaches the end of each horizontal scan line The engine detects the HSYNC signal and arranges the vertical line of the image on to paper After detecting the HSYNC signal the image data is sent to the...

Page 103: ... unit consists of an OPC drum and a charge roller while the developer unit consists of a toner cartridge supply roller developing roller and blade OPC Cleaning Removes toner by using static electricity OPC drum protective shutter N A Classifying device for toner cartridge ID is classified by interruption of the frame channel ...

Page 104: ... V3 processor The processor provides integrated printing functions such as the printer video controller laser scan unit controller PWM controller and bi polar stepper motor controller and has USB and IEEE 1284 parallel interface capacity Figure 4 Hardware Structure Flash Memory Capacity Phaser 3124 B 0 5MB ASIC built flash memory Phaser 3125 B and Phaser 3125 N 8MB Access Time 70 nsec DRAM Phaser ...

Page 105: ...General Procedures and Information PHASER 3124 PHASER 3125 09 06 6 11 Jupiter 4E Specifications Phaser 3124 B only Figure 5 Jupiter4E Internal Block Diagram ...

Page 106: ...ogramming mode using flash programmer tool Internally flash memory read write operation support Programmable access timing control 32MB Special function register area Directly connected to 3 external IO banks IOC 32 MB size in each IO bank Programmable setup access hold timing Programmable recovery time for slow devices Allows to access peripheral devices such as GPIO control logic Directly connec...

Page 107: ... internal 10 bits DAC LSU clock generation Brushless DC motor control clock generation ADC interface 4 channels ADC interface for analog devices such as temperature sensor Programmable ADC clock cycle Automatic or Manual AD conversion support 4 special function registers for monitoring the ADC results for 4 channels PWM controller 4 PWM output ports THV BIAS FAN control and AC ELECTRIFICATION Bi p...

Page 108: ...General Procedures and Information 6 14 09 06 PHASER 3124 PHASER 3125 SPGPv3 Specifications Phaser 3125 B and Phaser 3125 N only Figure 6 SPGPv3 Internal Block Diagram ...

Page 109: ...eration PCI Controller 32Bits 33 66MHz PCI local bus specification rev2 2 Complaint Host Agent Mode Supports 4 devices in host mode NAND Flash controller 8 16Bits H W EEC generation Auto boot mode Using Internal SRAM 4KB MAC 10M 100Mbps Full IEEE 802 3 Compatibility Engine Controller LSU interface unit Step Motor 2 Channels PWM 8 Channels ADC 6 Channels I2C Controller I2C S BUS Slave device suppor...

Page 110: ...24V supplied to each unit DC fan solenoid main motor LSU polygon motor unit fuser assembly and HVPS is interrupted D0 bit of the CPU detects the an open cover The D7 bit of the CPU detects the existence the toner cartridge It informs the status to the user by switching on the red LED Solenoid Driving Circuit The solenoid consists of two used for paper pick up and MP signal D4 bit of the CPU turns ...

Page 111: ...C Preserving Humidity Condition 10 90 RH Operating atmospheric pressure range 1atm EMI Requirement CISPR FCC CE MIC Safety Requirement IEC950 UL1950 CSA950 C UL Semko EK CB CCC CCIB GOST EPA Power Save Table 1 Rated Output Power Items CH1 CH2 Remarks Channel 5V 24 0V Connector pin CON 3 5V PIN 11 12 GND PIN 8 9 CON 3 24V PIN 2 3 4 GND PIN 6 7 Rated output 5V 5 4 75 5 25V 24V 5 20 4 27 6V Max outpu...

Page 112: ...ntrol method on environment THV PWM ACTIVE transfer active signal of environ ment sensing voltage is input and get feedback current and recalculate it to resistance Control method on transfer output voltage It is controlled by changing its duty of THVPWM signal as follows 10 Duty 650V 90 Duty 5KV 5 Charge Voltage MHV Input Voltage 24 V DC 15 Out Voltage 1 3KV 3 2 Out Voltage Rising Time 50 ms Max ...

Page 113: ... taking signal from engine control part When the HEATER ON signal is turned on at engine the LED of PC1 Photo Triac takes the voltage and flashes From the flashing light the triac part light receiving part takes the voltage and the voltage is supplied to the gate of triac and flows into the triac As a result the AC current flows in the heat lamp and heat is occurred On the other hand when the sign...

Page 114: ...ignal from the main system If the enable print command signal is detected this firmware controls the engine mechanism according to the printing process and paper feeding state Engine Control Firmware Overview Engine Control Firmware is executed every 10msec by a timer from the main system And it consists of 3 control modules Engine Main Control Interface Control and Sensing Unit Control Module Maj...

Page 115: ...General Procedures and Information PHASER 3124 PHASER 3125 09 06 6 21 Architecture of Engine Control Firmware Figure 7 Architecture Diagram ...

Page 116: ...Interface Module communicates with the main system in order to receive the command from main system and to transmit the present engine status for the requested status There are two sub functions One is a function to receive the command from the main system The other is a function that informs the main system of the current engine status for the requested item Engine Sensing and Unit Control Module...

Page 117: ...General Procedures and Information PHASER 3124 PHASER 3125 09 06 6 23 Firmware Architecture Figure 8 ...

Page 118: ... 1 Online Key Item Description Printing a demo page In Ready mode press and hold the button for 2 seconds until the error LED and online LED blinks slowly then release Printing a configuration page and menu map Phaser 3125 only In Ready mode press and hold the button for 5 seconds until the online LED blinks at a faster rate Manual feeding After loading the bypass tray press the button to feed the...

Page 119: ... cancel the job The online LED and error LED will blink while the print job is being cleared from the printer memory and computer The printer will then return to Ready mode The time taken to cancel a print job depends on the size Note A print job cannot be cancelled while in Manual Feed mode Table 1 Online Key Item Description ...

Page 120: ...uideline for maintenance The example list is for an average usage of 50 pages per day Environmental conditions and actual use will vary these factors The cycle period given below is for reference only COMPONENT REPLACEMENT CYCLE Pick up Roller 50 000 Pages Transfer Roller 50 000 Pages Fuser 50 000 Pages Toner Cartridge 3000 Pages Sales 1000 Pages Initial ...

Page 121: ...er to adjust printer settings such as power save settings auto continue settings altitude adjustments timeout settings and emulation type Layout This option allows the user to select different types of copying layouts such as orientation and pa per source Graphic This option allows the user to adjust the print quality Emulation Phaser 3124 is a GDI printer only This option allows the user to chang...

Page 122: ...nted Cotton Archive Paper Source Auto Manual Feed Graphic Resolution 600dpi Normal 1200dpi Best Darkness Light Normal Dark Image Enhance Normal Text Enhance Emulation 3125 series only Emulation Setting PCL Setting Type Face Symbol Set Lines Pitch Point Size Courier PostScript Setting Print Postscript Error EPSON IBM Setting Font Character Set Character Table Pitch LPI Auto Wrap Network 3125 N only...

Page 123: ... the jammed paper In the Paper Exit Area 1 Open and close the front cover The jammed paper is automatically ejected from the printer 2 Gently pull the jammed paper out of the output tray Figure 1 Figure 1 If you do not see the jammed paper or if there is any resistance when you pull stop pulling and go to the next step 3 Open the exit cover PL 1 and fuser dummy PL 3 Figure 2 Figure 2 ...

Page 124: ... pull the jammed paper out Figure 3 CAUTION Do not touch the fuser while it is hot Figure 3 5 Close the fuser dummy PL 3 and exit cover PL 1 Printing automatically resumes In the standard tray 1 Remove the jammed paper by gently pulling it straight out Make sure that all of the paper is properly aligned in the standard tray Figure 4 Figure 4 ...

Page 125: ...lose the front cover PL 1 to resume printing the document from failed pages In the manual tray 1 Remove the jammed paper in the manual tray PL 1 by gently pulling it straight out Figure 5 Figure 5 If the paper does not move when you pull or if you do not see the paper in this area check the fuser area around the toner cartridge PL 1 2 Open and close the front cover PL 1 to resume printing the docu...

Page 126: ...oner cartridge PL 1 out Figure 6 Figure 6 Note Prevent exposing the toner cartridge to light If necessary store the toner cartridge in a black bag 2 If necessary pull the manual tray PL 1 out 3 Remove the jammed paper by gently pulling it out Figure 7 If you do not see the jammed paper or if there is any resistance removing the paper stop pulling and go to the paper exit area Figure 7 ...

Page 127: ...r jams can be avoided Ensure the front cover PL 1 is not opened during a print job Ensure that the adjustable guides are positioned correctly Do not overload the tray PL 1 Do not remove the paper from the tray while printing Flex fan and straighten the paper before loading Do not use creased damp or highly curled paper Do not mix paper types in the input tray Use only recommended print media Ensur...

Page 128: ...3 digits Screwdriver Standard Slotted and Philips M3 long M3 short M2 long M2 short Tweezers Standard For general home use Cotton Swab Standard For general home use Cleaning Equipment Standard An IPA Isopropyl Alcohol dry wipe tissue or a gentle neutral detergent and lint free cloth Vacuum Cleaner Spring Hook Standard For general use Software Driver installation CD ROM ...

Page 129: ...dBM decibel milliwatt DC direct current DCU Diagnostic Control Unit DPI Dot Per Inch DRAM Dynamic Random Access Memory DVM Digital Voltmeter ECP Enhanced Capability Port EDC Embedded Diagnostic control EEPROM Electronically Erasable Programmable Read Only Memory EMI Electro Magnetic Interference EP electrophotographic EPP Enhanced Parallel Port FPOT First Printout Time F W firmware GDI graphics de...

Page 130: ...Conductor OPE Operate Panel Equipment PBA Printed Board Assembly PCL Printer Command Language Printer Control Language PDL Page Description Language PPM Page Per Minute PPS Pulse Per Second PS Post Script PTL Pre Transfer Lamp PWM Pulse Width Modulation Q PID Quick Printer Initiating Device Qt y quantity RAM Random Access Memory ROM Read Only Memory SCF Second Cassette Feeder SMPS Switching Mode P...

Page 131: ...ave enough room to open the printer trays covers and allow for proper ventilation Provide the proper environment A firm level surface Away from the direct airflow of air conditioners heaters or ventilators Free of extreme fluctuations of temperature sunlight or humidity Clean dry and free of dust Figure 1 ...

Page 132: ...ffect from 1st July 2006 Note Currently these restrictions are only for the European Union EU market and some associated countries For more information go to www Xerox com The hazardous substances are Lead Pb Mercury Hg Cadmium Cd Hexavalent Chromium Cr 6 Cr VI Polybrominated Diphenyl Ethers PBDE s Polybrominated Biphenyls PBB s Identification of a RoHS Compliant Machine Xerox will maintain a cent...

Page 133: ...hown below is the standard test pattern used in the factory The life of the print cartridge developer cartridge and printing speed are measured with the pat tern shown below of 5 area coverage The pattern is shown at approximately 70 of actual size A4 ISO 19752 Standard Pattern Figure 1 A4 ISO 19752 Standard Pattern ...

Page 134: ...General Procedures and Information 6 40 09 06 PHASER 3124 PHASER 3125 GP 12 Service Log Service Log Use the service log to record all service procedures ...

Page 135: ...24 Main PBA 5 5 7 12 WD 11 Phaser 3125 Main PBA 1 11 7 13 WD 12 Phaser 3125 Main PBA 2 11 7 14 WD 13 Phaser 3125 Main PBA 3 11 7 15 WD 14 Phaser 3125 Main PBA 4 11 7 16 WD 15 Phaser 3125 Main PBA 5 11 7 17 WD 16 Phaser 3125 Main PBA 6 11 7 18 WD 17 Phaser 3125 Main PBA 7 11 7 19 WD 18 Phaser 3125 Main PBA 8 11 7 20 WD 19 Phaser 3125 Main PBA 9 11 7 21 WD 20 Phaser 3125 Main PBA 10 11 7 22 WD 21 Ph...

Page 136: ...Wiring Diagrams 7 2 09 06 PHASER 3124 PHASER 3125 Page intentionally blank ...

Page 137: ...Wiring Diagrams PHASER 3124 PHASER 3125 09 06 7 3 WD 1 PJ Locations Figure 1 ...

Page 138: ...Wiring Diagrams 7 4 09 06 PHASER 3124 PHASER 3125 WD 2 Connection Diagram Phaser 3124 1 2 Figure 2 ...

Page 139: ...Wiring Diagrams PHASER 3124 PHASER 3125 09 06 7 5 WD 3 Connection Diagram Phaser 3124 2 2 Figure 3 ...

Page 140: ...Wiring Diagrams 7 6 09 06 PHASER 3124 PHASER 3125 WD 4 Connection Diagram Phaser 3125 2 2 Figure 4 ...

Page 141: ...Wiring Diagrams PHASER 3124 PHASER 3125 09 06 7 7 WD 5 Connection Diagram Phaser 3125 2 2 Figure 5 ...

Page 142: ...Wiring Diagrams 7 8 09 06 PHASER 3124 PHASER 3125 WD 6 Phaser 3124 Main PBA 1 5 Figure 6 ...

Page 143: ...Wiring Diagrams PHASER 3124 PHASER 3125 09 06 7 9 WD 7 Phaser 3124 Main PBA 2 5 Figure 7 ...

Page 144: ...Wiring Diagrams 7 10 09 06 PHASER 3124 PHASER 3125 WD 8 Phaser 3124 Main PBA 3 5 Figure 8 ...

Page 145: ...Wiring Diagrams PHASER 3124 PHASER 3125 09 06 7 11 WD 9 Phaser 3124 Main PBA 4 5 Figure 9 ...

Page 146: ...Wiring Diagrams 7 12 09 06 PHASER 3124 PHASER 3125 WD 10 Phaser 3124 Main PBA 5 5 Figure 10 ...

Page 147: ...Wiring Diagrams PHASER 3124 PHASER 3125 09 06 7 13 WD 11 Phaser 3125 Main PBA 1 11 Figure 11 ...

Page 148: ...Wiring Diagrams 7 14 09 06 PHASER 3124 PHASER 3125 WD 12 Phaser 3125 Main PBA 2 11 Figure 12 ...

Page 149: ...Wiring Diagrams PHASER 3124 PHASER 3125 09 06 7 15 WD 13 Phaser 3125 Main PBA 3 11 Figure 13 ...

Page 150: ...Wiring Diagrams 7 16 09 06 PHASER 3124 PHASER 3125 WD 14 Phaser 3125 Main PBA 4 11 Figure 14 ...

Page 151: ...Wiring Diagrams PHASER 3124 PHASER 3125 09 06 7 17 WD 15 Phaser 3125 Main PBA 5 11 Figure 15 ...

Page 152: ...Wiring Diagrams 7 18 09 06 PHASER 3124 PHASER 3125 WD 16 Phaser 3125 Main PBA 6 11 Figure 16 ...

Page 153: ...Wiring Diagrams PHASER 3124 PHASER 3125 09 06 7 19 WD 17 Phaser 3125 Main PBA 7 11 Figure 17 ...

Page 154: ...Wiring Diagrams 7 20 09 06 PHASER 3124 PHASER 3125 WD 18 Phaser 3125 Main PBA 8 11 Figure 18 ...

Page 155: ...Wiring Diagrams PHASER 3124 PHASER 3125 09 06 7 21 WD 19 Phaser 3125 Main PBA 9 11 Figure 19 ...

Page 156: ...Wiring Diagrams 7 22 09 06 PHASER 3124 PHASER 3125 WD 20 Phaser 3125 Main PBA 10 11 Figure 20 ...

Page 157: ...Wiring Diagrams PHASER 3124 PHASER 3125 09 06 7 23 WD 21 Phaser 3125 Main PBA 11 11 Figure 21 ...

Page 158: ...Wiring Diagrams 7 24 09 06 PHASER 3124 PHASER 3125 WD 22 Connector Circuit Diagram Figure 22 ...

Page 159: ...Wiring Diagrams PHASER 3124 PHASER 3125 09 06 7 25 WD 23 SMPS Figure 23 ...

Page 160: ...Wiring Diagrams 7 26 09 06 PHASER 3124 PHASER 3125 WD 24 HVPS 1 3 Figure 24 ...

Page 161: ...Wiring Diagrams PHASER 3124 PHASER 3125 09 06 7 27 WD 25 HVPS 2 3 Figure 25 ...

Page 162: ...Wiring Diagrams 7 28 09 06 PHASER 3124 PHASER 3125 WD 26 HVPS 3 3 Figure 26 ...

Page 163: ...Wiring Diagrams PHASER 3124 PHASER 3125 09 06 7 29 WD 27 Phaser 3124 Block Diagram Figure 27 ...

Page 164: ...Wiring Diagrams 7 30 09 06 PHASER 3124 PHASER 3125 WD 28 Phaser 3125 Block Diagram Figure 28 ...

Page 165: ... that apply Excessive Smoke Describe quantity and duration of smoke Fire with open flames seen Electric shock to operator or service representative Physical injury illness to operator or service representative Describe Other Describe Any damage to customer property No Yes Describe Did external emergency response provider s such as fire department ambulance and etc respond No Yes Identify ie source...

Page 166: ...tle Telephone Number Organization E Mail Mailing Address Date Report Submitted Instructions E mail or fax this completed form to EH S žFor incidents in Xerox Europe and Developing Markets East Middle East Africa India China and Hong Kong please e mail Elaine Grange xerox com or fax 44 0 1707 35 3914 intelnet 8 668 3914 Note If you fax this form please also send original by internal mail žFor incid...

Reviews: