

19
XciteRC Rocket 250 3D
EN
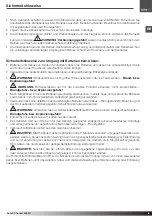
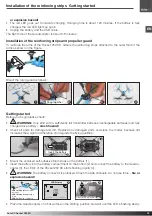
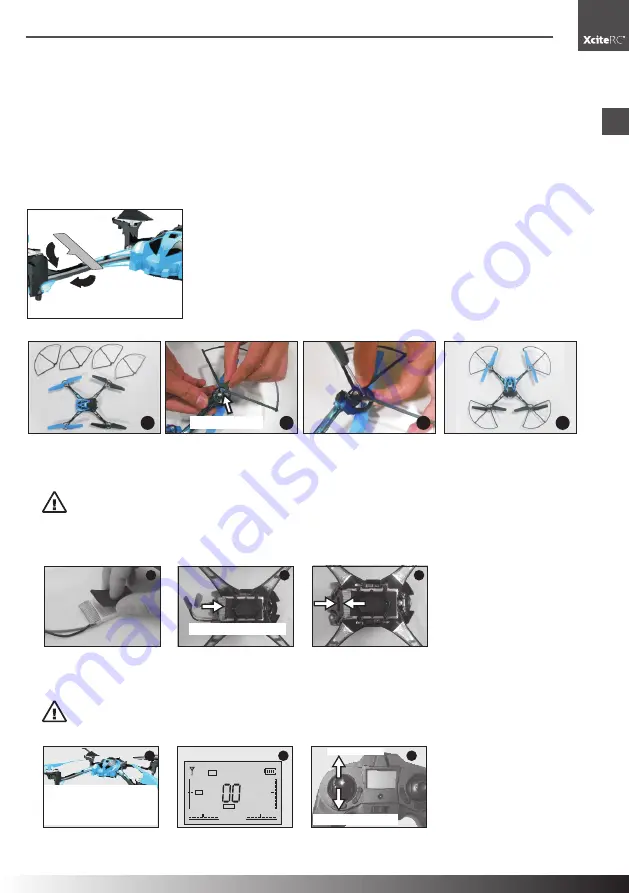
Installation of the reinforcing strips
·
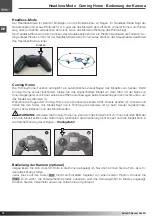
Getting started
or explosion hazard!
• The red LED goes out to indicate charging. Charging time is about 120 minutes. If the battery is fully
charged, the red LED lights up again.
• Unplug the battery and the USB cable.
The flight time of the Quadrocopter is about 6-8 minutes.
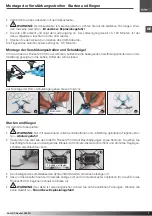
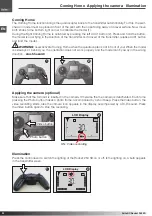
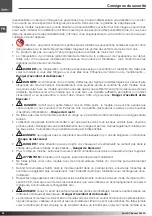
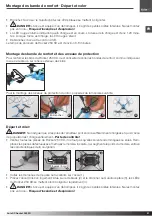
Installation of the reinforcing strips and propeller guard
To reinforce the arms of the Rocket 250 3D, adhere the reinforcing strips attached to the outer third of the
arms as shown in the Figure.
Mount the rotor guard as follows:
1
2
3
4
Snap together
Getting started
Before you begin please check:
•
WARNING:
Only start with a sufficiently full transmitter batteries (rechargeable batteries) and fully
charged drive battery –
crash hazard!
• Check all parts for damage and dirt. Replace any damaged parts and clean the model, because dirt
increases the weight and therefore can degrade the flying qualities.
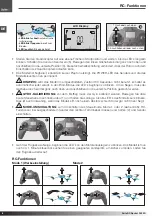
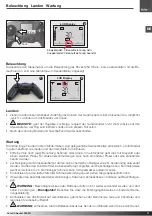
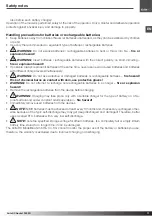
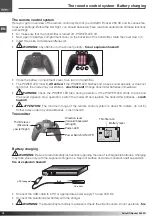
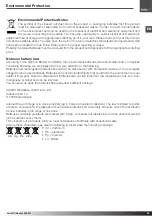
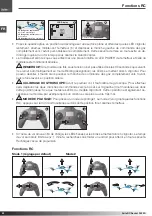
1
2
3
Insert the battery
• Mount the enclosed self-adhesive foam strips on the battery (1).
• Insert the battery into the battery compartment on the bottom (2) and connect the battery to the Quadro-
copter (3), the LED‘s of the Rocket 250 3D starts flashing rapidly (4).
•
WARNING:
The battery connector is polarized. Check the side channels. Do not use force -
fire or
explosion hazard!
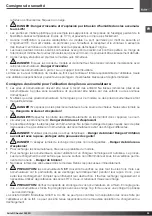
%
H
L . H
E A S Y
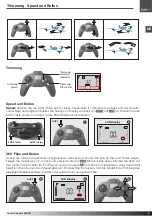
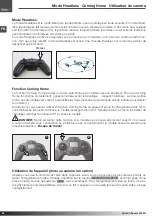
5
6
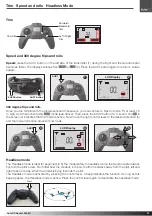
LCD Display
1. First move up
2. Move down immediately
4
LED flashing fast:
automatic
detection
LED flashing slowly:
ready to
bind
LED on:
Binding completed
-
-
-
• Place the Quadrocopter on a flat surface in the starting position and wait until the LED‘s flashing slowly.


