3
Contents
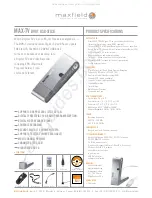
Remote Control Unit
Read this before operation
• Choose the installation location of your unit carefully. Avoid
placing it in direct sunlight or close to a source of heat. Also
avoid locations subject to vibrations and excessive dust, heat,
cold or moisture.
• Do not open the cabinet as this might result in damage to the
circuitry or electrical shock. If a foreign object should get into
the set, contact your dealer.
• When removing the power plug from the wall outlet, always
pull directly on the plug, never yank the cord.
• Do not attempt to clean the unit with chemical solvents as this
might damage the finish. Use a clean, dry cloth.
• Keep this manual in a safe place for future reference.
Maintenance
If the surface of the unit gets dirty, wipe with a soft cloth or
use diluted mild soap liquid. Be sure to remove any excess
completely. Do not use thinner, benzine or alcohol as they may
damage the surface of the unit.
Before Use
CAUTION
The product shall not be exposed to dripping or splashing and
that no object filled with liquids, such as vases, shall be placed
on the product.
Do not install this equipment in a confined space such as a
book case or similar unit.
Remove the battery compartment cover.
Insert two "AAA" (R03, UM-4) dry batteries. Make sure that the
batteries are inserted with their positive " " and negative " "
poles positioned correctly.
Close the cover.
Battery Replacement
If the distance required between the remote control unit and
main unit decreases, the batteries are exhausted. In this case
replace the batteries with new ones.
Precautions concerning batteries
• Be sure to insert the batteries with correct positive " " and
negative " " polarities.
• Use batteries of the same type. Never use different types of
batteries together.
• Rechargeable and non-rechargeable batteries can be used.
Refer to the precautions on their labels.
• When the remote control unit is not to be used for a long time
(more than a month), remove the batteries from the remote
control unit to prevent them from leaking. If they leak, wipe
away the liquid inside the battery compartment and replace the
batteries with new ones.
• Do not heat or disassemble batteries and never dispose of old
batteries by throwing them in a fire.
3
2
1
The provided Remote Control Unit allows the unit to be operated
from a distance.
When operating the remote control unit, point it towards the
REMOTE SENSOR on the front panel of the unit.
• Even if the remote control unit is operated within the effective
range, remote control operation may be impossible if there are
any obstacles between the unit and the remote control.
• If the remote control unit is operated near other appliances
which generate infrared rays, or if other remote control
devices using infrared rays are used near the unit, it may
operate incorrectly. Conversely, the other appliances may
operate incorrectly.
Battery Installation
Important Safety Instructions
. . . . . . . . . . . . . . . . . . . . . . . . . . . . 2
Contents
. . . . . . . . . . . . . . . . . . . . . . . . . . . . . . . . . . . . . . . . . . . . . . . 3
Before Use
. . . . . . . . . . . . . . . . . . . . . . . . . . . . . . . . . . . . . . . . . . . . 3
Remote Control Unit
. . . . . . . . . . . . . . . . . . . . . . . . . . . . . . . . . . . . 3
Connection
. . . . . . . . . . . . . . . . . . . . . . . . . . . . . . . . . . . . . . . . . . . . 4
Names of Each Control
. . . . . . . . . . . . . . . . . . . . . . . . . . . . . . . . . . 6
Radio Reception
. . . . . . . . . . . . . . . . . . . . . . . . . . . . . . . . . . . . . . . . 8
Preset Tuning
. . . . . . . . . . . . . . . . . . . . . . . . . . . . . . . . . . . . . . . . . . 9
Troubleshooting
. . . . . . . . . . . . . . . . . . . . . . . . . . . . . . . . . . . . . . . 10
Specifications
. . . . . . . . . . . . . . . . . . . . . . . . . . . . . . . . . . . . . . . . 11
Appendix
A (RS-232 Commands). . . . . . . . . . . . . . . . . . . . . . . . 12