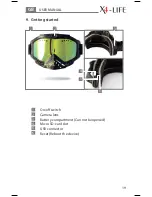
Taking pictures:
After the recording has stopped, the blue LED will be perma-
nently on. In this Standby Mode pictures can be taken. To take
a picture press the On/Off (1) button once. The blue LED will
switch off and on. The picture has been taken.
10.4. Viewing videos and pictures
Switch the goggles off. Connect the goggles to your PC, using
the supplied USB cable. The SD-card will pop-up in your
explorer as an external drive. You can now watch and modify
the files.
11. Settings
To change the video format connect the switched off goggles
to your PC. Open the removable medium. Click on your right
mouse button, select “New” and choose “Text Document”.
Rename the new file “size” and open it. Enter one of the
following digits to change resolution:
0 = 1920 x 1080 pixel / 25 frames/sec.
1 = 1280 x 720 pixel / 50 frames/sec.
2 = 1440 x 1080 pixel / 30 frames/sec.
Note:
default setting is 2 = 1440 x 1080 pixel / 30 frames/sec.
Save and close the file.
The file needs to be in the root directory of your Mirco SD-
card, don’t save it in a subdirectory.
Putting a timestamp on your photos and videos:
To add a timestamp to your photos and videos, connect
the switched off goggles to your PC. Open the removable
medium. Click on your right mouse button, select “New”
22
Video Ski Goggles HD1
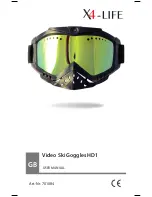
Summary of Contents for Video Ski Goggles HD1
Page 1: ...GB USER MANUAL Video Ski Goggles HD1 Art Nr 701084 ...
Page 13: ...25 USER MANUAL GB ...
Page 14: ...8 2013 ...

