


28
29
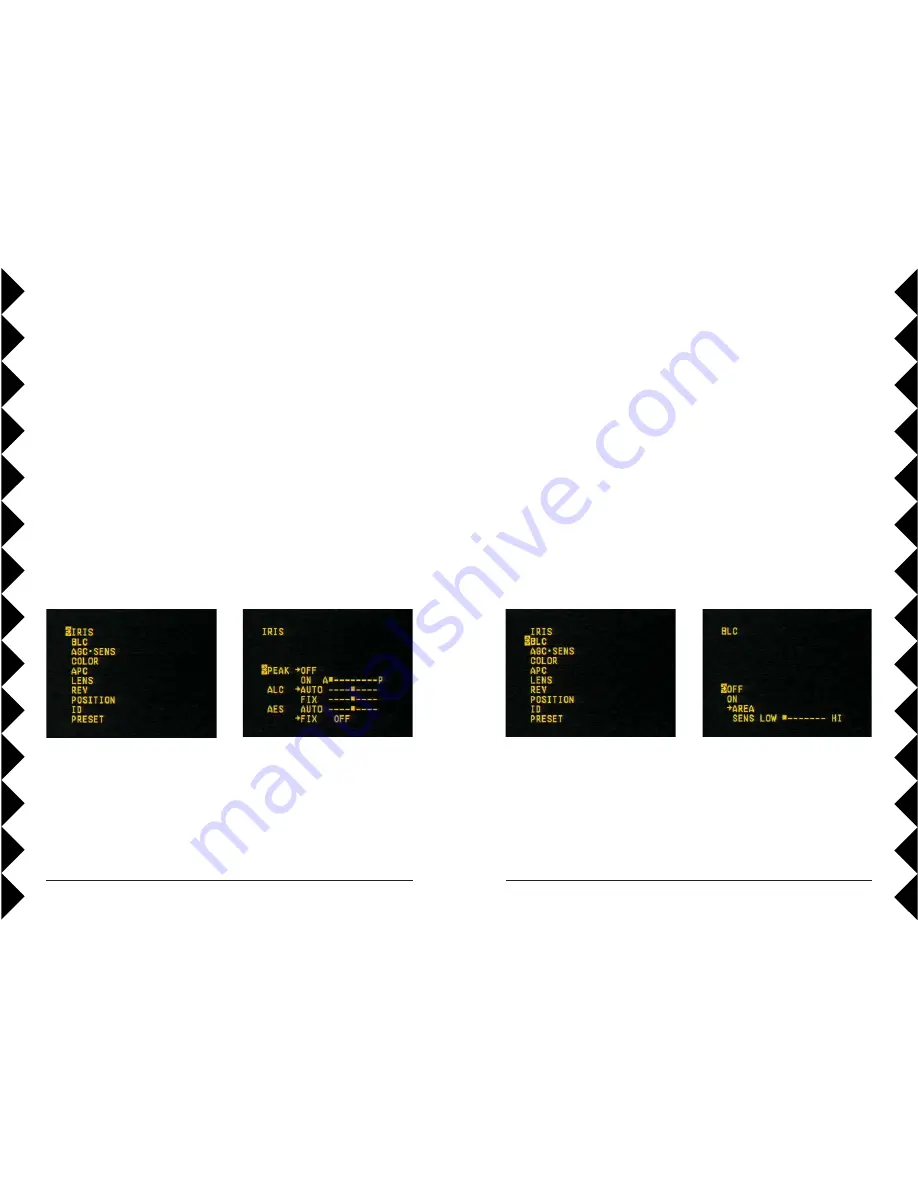
Backlight Compensation
Backlight compensation settings affect how the camera adjusts for light
sources behind the camera’s view or focus. You can use this to adjust for
the silhouette effect you might get when looking at things with light behind
them.
·
BLC:
Turns Backlight Compensation On or Off. Turning BLC On will
brighten the part of the picture that is being silhouetted, but will also
brighten the background.
·
AREA:
If BLC is on, the AREA setting allows you to set the sensitivity
separately for different parts of the camera’s fi eld of view. The default
setting only turns on BLC in the center of the camera’s viewing fi eld.
·
SENS:
Adjusts the sensitivity of the Backlight Compensation. Low
means that the camera responds less to backlit conditions, higher
settings means that compensation turns on more quickly.
Advanced Onscreen Menu Options
Advanced Onscreen Menu Options
Iris Settings
Iris settings control the amount of light let into the SentinelPro camera.
Changing these settings affect how bright your picture will be, and how the
camera reacts to changes in lighting conditions. Your options are:
·
PEAK:
This setting controls the reaction of the automatic iris
adjustment in relation to the average light level in the picture. A higher
level of peak sets the camera so that the automatic light controls adjust
to a higher average light level.
·
ALC:
Automatic Light Control determines whether the camera should
adjust for light differences automatically or manually. If you set this to
manual, you can set the level of lighting control that will be used.
·
AES:
(Automatic Exposure Setting) selects whether to use automatic or
manual exposure settings, how long the exposure should be. This affects
how fast the camera “sees” an image – a long exposure time lets more
light in and could give you a clearer picture, but it will mean that motion
is harder to see.
Use the Up and Down arrows to
select IRIS (use the Left Arrow
(Dim) to back out of the menu). With
IRIS selected, when you press the
Right arrow button the screen above
right is displayed.
Use the up and Down arrows (On
and Off) to select the desired menu
item from the screen above right
(Peak, ALC, AES). Then select the
item with the Right Arrow. Adjust
the item with the Up and Down
arrows. Select with the Right Arrow,
and then back out of the menu with
successive presses of the Left arrow.


