


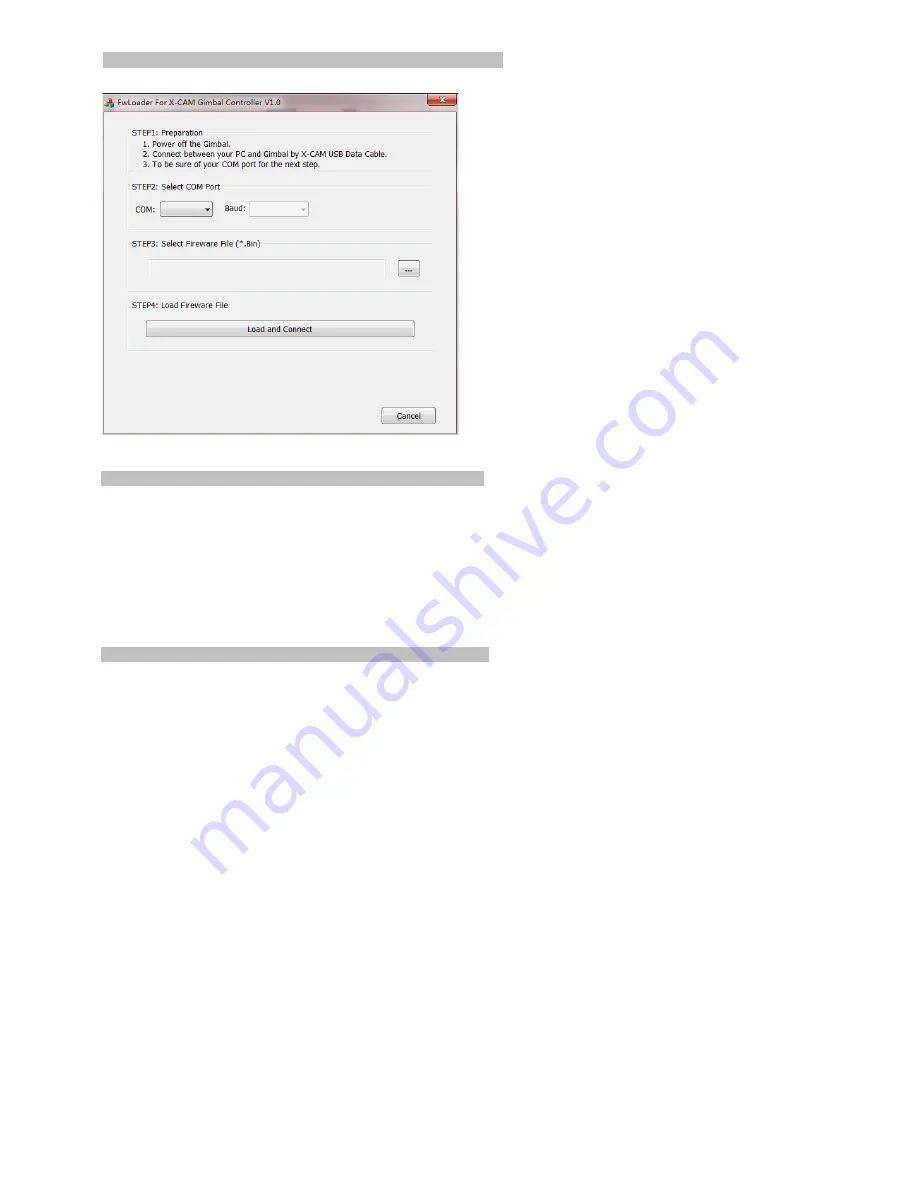
Firmware upgrade
1.
Power off the X-CAM A10-3H
2.
Uses the USB cable to connect with your PC, Normally
Windows can find the driver automatically, you will find the
PORT number in the Device manager.
3.
Select the COM port number
4.
Open the firmware file ( *.bin )
5.
Click “Load and Connect” button
6.
Power on the X-CAM A10-3H, it will upgrade the firmware
automatically.
The blue indicator will light, and red
indicator will flash quickly. When the upgrade is
completed, the red indicator will light , and the blue
indicator will flash quickly
Notice: Please do not touch anything and keep the power
on during the upgrade, if the upgrade process breaks
please go back to STEP 1 and try again, normally it can be
fix automatically. It will beep 4 times after upgrade and the
system will be restarted.
Warnings
1.
Do not touch the X-CAM A10-3H during initialization after powering on. Touching the X-CAM A10-3H can cause the gimbal to shake.
2.
Do not use a BEC to power the X-CAM A10-3H, it is strongly recommend to use a 2~6S Lipo battery directly.
3.
It is strongly recommended to use 12mm tubing to mount the X-CAM A10-3H.
4.
Make sure the center of gravity of the X-CAM A10-3H is correct before using.
5.
It is not required to supply power to the second receiver when under dual control mode. The A10-3H will supply power over S-BUS
6.
The X-CAM A10-3H supports S-BUS1 only.
Disclaimer
X-CAM A10-3H gimbals are covered by one year limited warranty. Please do not disassemble or modify mechanical structure in the
warranty period. The customized program of X140B control module is based on A10-3H structure and motors, and all debugging has
been completed in factory. Any direct or indirect damages caused by a user during use or damage will not be covered by our warranty,
and X-CAM will not compensate the loss and the corresponding liability.
SILIGOO Inc. does not take any responsibility toward any damage or loss in using the X-CAM A10-3H gimbal.


