


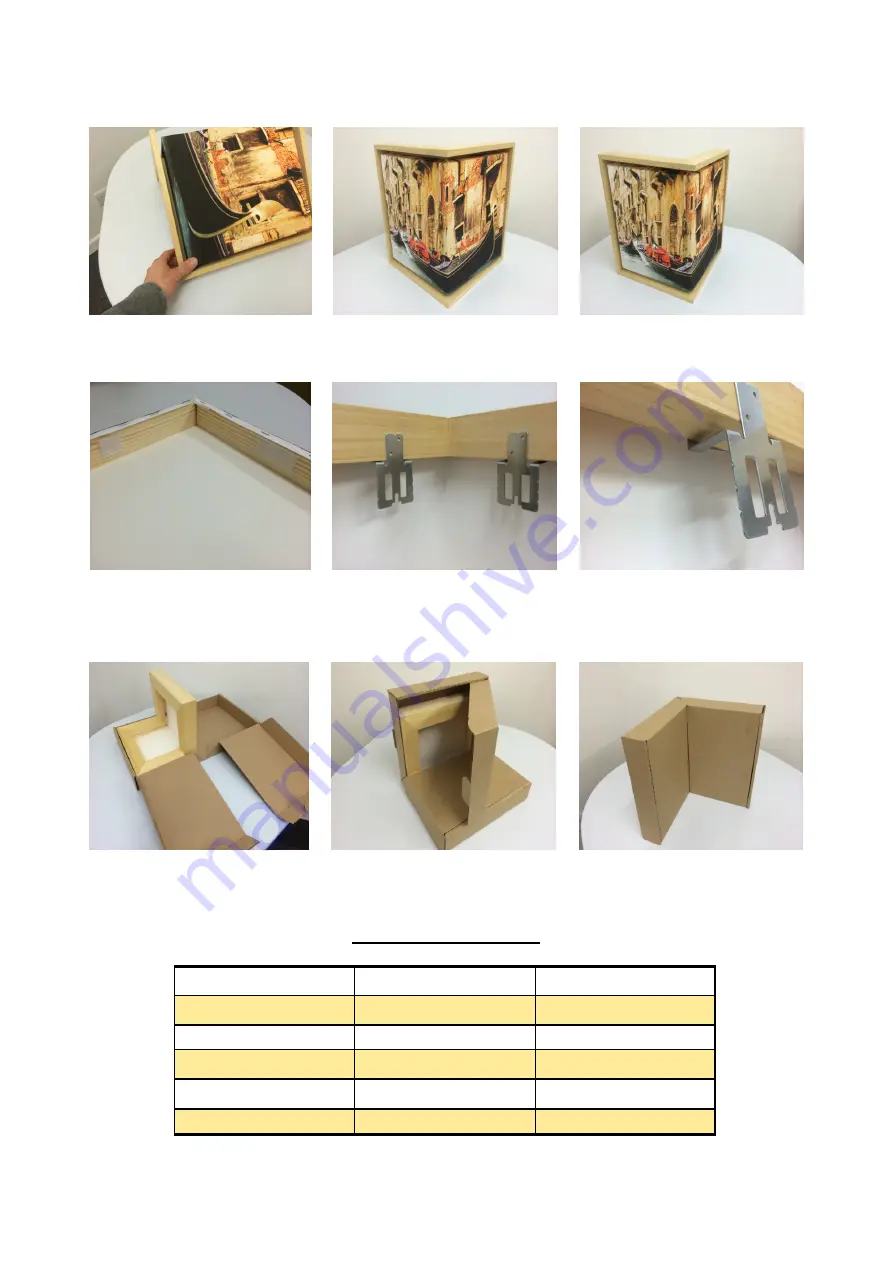
10. Firmly push the opposite side into
place on the frame
11. Check to ensure you have even spac-
ing around the corner frame
12. Congratulations you have made a
corner frame
13. Due to environmental conditions the
frame insert may become slightly loose.
Use the supplied Velcro loops to further
hold the insert in position
14. Wunderbars hangers are used for
hanging the frame (supplied separately)
15. Hangers slot onto the rear of the
frame
Printing Instructions
Image Size
Total Image Size
Crop Mark Size
Sizes in Inches
Sizes in mm
Sizes in mm
8” x 10” (each side)
410 x 259
494 x 343
10” x 12” (each side)
310 x 508
394 x 592
12” x 16” (each side)
411 x 609
495 x 693
13. Corner frames come in an innovative
box to protect them
14. Fold over your finished product
15. Slot into place and deliver to your
customer.