background image

Wottan Motor

USER MANUAL

S

TORM-

S


300

cc

Summary of Contents for STORM-S 300cc

Page 1: ...Wottan Motor USER MANUAL STORM S 300cc ...

Page 2: ... repay the trust you have placed in us We would like to remind you that only WOTTAN service technicians are trained and have all the up to date in formation and tools to provide you with excellent service according to the specific needs of your new vehicle The entire Wottan motor team is constantly working to update and improve the product Therefore some of the information in this manual may be al...

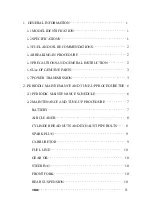
Page 3: ...tation right hangrip 39 Storage compartments 40 Fuel tank cap 41 STANDS Side stand 42 Center stand 43 DRIVING INSTRUCTIONS Electric start 44 Braking 46 Stop engine 47 MAINTENANCE INSTRUCTIONS Maintenance and cleaning 48 Wheel rims and storage 50 Technical changes accessories and spare parts 52 Engine oil 53 Tyre condition 56 Fuses 58 Battery 60 Remove and install battery 62 TECHNICAL DATA Engine 6...

Page 4: ...ong service life for your motorbike The WOTTAN Authorised Dealer and Service Network has experienced technicians capable of giving your motorbike the best possible service with the necessary tools and knowledge All information illustrations photographs and specifications contained in this manual are based on the latest production information Due to WOTTAN s policy of continuous product improvement...

Page 5: ...ing warranty care Please be advised of course that it is neither practical nor possible to warn you of all the dangers associated with the operation handling or maintenance of your vehicle You must use your common sense SAFETY SECURITY CHECK Checklist Before driving perform a safety check using the enclosed checklist Take the safety check seriously Perform proper maintenance before you start your ...

Page 6: ...d easy to handle Engine oil level Fuel quantity Front brake Rear brake Tyres contour and pressure Front fork Load distribution Lights Total weight Brake fluid level In the event of problems or difficulties contact an authorised service point WARNING Do not touch the ignition system while the engine is running ...

Page 7: ...se original accessories or products approved and certified by Wottan Motor NOTE Our approved products and accessories are available at all authorised points of sale and in our website www wottanmotor com WARNING Do not exceed the maximum permissible weight Check tyre pressure Check rims WARNING Before any journey check the operation of all lighting components of the vehicle Check that the headligh...

Page 8: ...ed in ice rain or strong wind Your reactions can be severely affected not only by alcohol but also by drugs and medicines do not drive under the influence of either Strictly observe all traffic regulations Always adapt your driving speed to the traffic and road conditions On wet roads or in the presence of loose gravel be aware that your stability and braking power are limited by the grip of the w...

Page 9: ...fore it is best to start driving immediately after starting the engine gently and without forcing the engine until it reaches optimum opera ting temperature Avoid hard acceleration Moderating the use of the accelerator to what is strictly necessary reduces fuel consumption as well as pollu tion and wear levels Drive as smoothly as possible and anticipate manoeuvres as much as possible Hard acceler...

Page 10: ...pads must be free of oil and grease If the scooter is not to be used for a while a layer of rust may form on the brakes and thus increase the bra king effect A thick layer of rust can cause the brakes to lock When riding after a period of non use carefully apply the brakes several times until they function normally Also during the first 500 km of the unit as well as when changing discs or pads the...

Page 11: ...ce braking for emergency situations but do so in a situation that will not put yourself or others at risk Turn off the engine if you are going to be stopped to save fuel Different driving conditions affect fuel consumption The following are unfavou rable for fuel consumption High traffic density especially in large cities with many stops and traffic lights Short frequent journeys with constant sta...

Page 12: ...ly the continued good performance of the unit but also reduced fuel consumption low environmental pollution and a long service life Check tyre pressure every two weeks Low tyre pressure increases rolling resistance This increases fuel consumption and tyre wear and negatively affects the performance of the unit Continuously monitor fuel consumption Check the engine oil level frequently it is recomm...

Page 13: ...s Be especially careful when transporting liquids that could spill on the vehicle or damage other vehicles in traffic If you use the rear luggage rack be sure to secure items with strong straps or nets to prevent loss Remember that a bulky package is very sensitive to wind causing instability in the handling of the vehicle Be especially careful in side winds and when overtaking large vehicles such...

Page 14: ...ce centre NOTE During the running in period drive smoothly but vary the engine speed frequently Select winding roads with some hills Constantly avoid driving at very low revs and also avoid accelerating the unit to the limit For the first 500 km Use less than half the throttle range After 1 000 km Use less than of the throttle range CAUTION The first inspection should be carried out immediately at...

Page 15: ... in various inclined positions Only then will the surface get its full grip Running in of new brake pads WARNING New brake pads must be used and will not have their full frictional power until after 500 km of use The effect of reduced braking power can be compensated by increased brake lever pressure During this period avoid unnecessary heavy braking actions ...

Page 16: ...s manual The identification plate 1 is located on the frame on the lower right hand side as shown in the illustration NOTE The identification on the right side is from the driver s perspective The chassis number 2 is located on the frame under the rubber cover of the right footrest VEHICLE IDENTIFICATION ENGINE NUMBER The engine number 3 is accessible from the left hand side of the vehicle Place y...

Page 17: ...Page 17 Wottan Motor 1 2 3 2 ...

Page 18: ...r Manual Page 18 5 6 3 1 4 2 VEHICLE IDENTIFICATION RIGHT VIEW 1 Battery box 2 Starter lock seat opening fuel filler flap opening and steering lock 3 Front brake fluid tank 4 Front brake lever 5 Engine oil filter cover 6 ECU ...

Page 19: ...Page 19 Wottan Motor 7 14 12 9 13 10 11 8 VEHICLE IDENTIFICATION LEFT VIEW 7 Spark plug 8 Fuses 9 Rear brake lever 10 Seat 11 Fuel tank cap 12 Transmission oil cap 13 Air filter 14 Side stand ...

Page 20: ...r key To close the ignition lock hole shutter Press the SHUT button on the ignition lock panel and the shutter will hide the ignition lock hole 1 To open the contact lock hole shutter with the shutter key Insert the shutter key as far as it will go into the lock hole 2 Turn the key clockwise and the ignition lock shutter will open ...

Page 21: ...Page 21 Wottan Motor 1 2 ...

Page 22: ... in a safe place NOTE Activate the indicator lights for a limited period only Note that power consumption may affect the battery charge 1 ON position Start up and all circuits activated 2 OFF position Steering unlocked 3 Engine stopped and steering locked Turn the handlebar to the left as far as it will go Press and turn the key to the left until it is in the LOCK position The steering is now lock...

Page 23: ... steering is not locked The opening of the seat or the fuel filler flap can be activated from the right hand button 5 Safety lock SHUT Use the key tool in position 5 and turn it to block access to the ignition lock by means of the safety lock ...

Page 24: ...y If the remote control is lost the keyless ignition switch cannot be activated Two methods of ignition 1 Keyless ignition Keyless start range The remote lock is within 2 metres of an open area without interference Press the main switch the indicator light comes on and can be turned to drive 2 Mechanical emergency lock Lift the black cover on the front lock and insert the key to activate the syste...

Page 25: ...Page 25 Wottan Motor Means that the whole circuit is closed and the engine can start STORM S 2022 ...

Page 26: ...ck unlock With a short press the direction indicators flash once and the anti theft system is entered Press for 3 seconds to enter the anti theft sensitivity calibration system A further short press unlocking exits the system 2 Central button flashing With a short press the direction indicators flash 3 times so that the position of the vehicle can be detected remotely 3 Transmission key key With a...

Page 27: ...Page 27 Wottan Motor STORM S 2022 1 2 3 ...

Page 28: ...ressing it If the direction indicators have flashed twice the alarm which was previously in manual activation status has switched to automatic activation status The ignition switch is illuminated and becomes fully operatio nal and the solenoid valve controlling the power supply is opened All functions are activated normally if the remote control is recognised within range of the vehicle 2 OPERATIO...

Page 29: ...ur ther vibration occurs the flashing will last for 10 seconds In the event of theft the flashing will be continuous 2 3 Deactivating the system With the anti theft system engaged if the vehicle is indicating an alarm and flashing briefly press the unlock button to cancel the alarm no further operation is required With the alarm system activated if there is no alarm briefly press the unlock button...

Page 30: ... Outside the detection range the power valve is closed at the same time the starter switch light goes out and the starter switch is locked and the functions are deactivated 3 2 Electronic control in activation state ON ACC The presence of the control is not detected within the detection range Transmission and control via remote device is invalid The supply valve interrupts the flow the switch rema...

Page 31: ...Page 31 Wottan Motor STORM S 2022 ...

Page 32: ...reset to zero by pressing and holding the ADJ button and the MODE button at the same time when the TRIP odometer is displayed DASHBOARD ELEMENTS 1 Speedometer Indicates the cruising speed in km h 2 Total partial odometer The dashboard display has two functions trip and total odometer The trip odometer records the kilometres travelled on a section The total odometer records the kilometres travelled...

Page 33: ...ght turn signal indicator lamp Flashes when the left right indicator is in use 4 Main beam high beam lamp Illuminates when the main beam is on 5 Fuel level Approximately shows the quantity of fuel available 6 Tachometer Revolution counter ...

Page 34: ...When the fuel indicator lower is flashing It means that you are using reserve fuel about 1 litre Immediately go to the nearest petrol station The scale with the pump symbol indicates the fuel level of the unit E Empty F Full Do not allow the fuel tank to run empty as this may damage components and would not be covered under warranty Refuelling Use only premium unleaded fuel min 95 octane ...

Page 35: ...Page 35 Wottan Motor 9 8 7 ...

Page 36: ...g lamp is located on the left hand side of the instrument panel This warning lamp will illumi nate after the ABS system has self tested when the ignition key is turned and will go out as soon as the vehicle is driven If the ABS microprocessor detects a malfunction the ABS warning lamp will remain illuminated until the mal function is repaired If the warning lamp illuminates and remains illuminated...

Page 37: ...Page 37 Wottan Motor 11 10 13 12 12 Battery charge volt indicator 13 Temperature lamp If the warning lamp illuminates stop the vehicle immediately and contact your service agent ...

Page 38: ... 2013 2043 month date week Press and hold ADJ to increase the character size After 10 seconds without action the system will return to ODO mode 2 Short press ADJ to switch from ODO clock mode to TRIP month TRIP month year mode 3 TRIP mode press and hold SEL ADJ to reset the trip odometer 4 ODO mode press and hold ADJ to switch between metric and British system ...

Page 39: ...6 Front brake lever 7 Throttle control 7 Throttle control 8 Engine switch 8 Engine switch When the switch is in the position the engine When the switch is in the position the engine can be started can be started When the switch is in the position the engine When the switch is in the position the engine cannot be started cannot be started 9 Start button 9 Start button 10 WARNING button 10 WARNING b...

Page 40: ... could be damaged Do not place thermally sensitive objects in the box as engine heat and high temperatures may damage them Unlock Insert the key 1 into the lock and turn it to the position marked FUEL SEAT Press the button marked SEAT Lock Press down on the seat until the lock is engaged Pull out the ignition key Never leave the key in the storage compartment WARNING Check that the seat is correct...

Page 41: ... marked FUEL Turn the cap 2 anticlockwise and remove it to fill the tank Close the fuel tank Align A with B press down the reservoir cap and turn it clockwi se Press down the cap covering the cap until the lock is in place Remove the key NOTE The cap covering the fuel tank cap is located in front of the seat on the counter shield FUEL TANK CAP ...

Page 42: ...as a safety system that prevents the unit from being started with the side stand open Risk of accidents NOTE The scooter is equipped with a side stand switch If the stand is extended the engine switches off and will not start Before unfolding the side stand with your left foot the engine must be switched off Once the side stand is extended 1 Slowly tilt the scooter to the left until the weight is ...

Page 43: ... by holding the handlebars firmly Use your right foot to push the center stand 2 downwards until both support points are on the ground Put your full body weight on the center stand su pport while simultaneously pulling the scooter towards the rear and upwards using the handles 3 Check that the scooter is firmly supported ...

Page 44: ...switch on the side stand If the side stand is deployed the en gine will not start Before starting Unhook the scooter from the centre stand so that it rests on both wheels on the ground Turn the key 1 to its operating position ON Do not accelerate 3 Press and hold the rear brake lever 2 Press the starter button 4 If the engine does not start after the starter motor has been running for 3 5 seconds ...

Page 45: ...wait a few seconds and press it again Each time press the starter button for only a few seconds to save the battery Never press the starter button for more than 10 seconds WARNING Do not allow the engine to run in an enclosed area Exhaust gases are highly toxic and can be lethal in high concentrations ...

Page 46: ...use extra caution as excessive braking on slippery pave ment can cause an accident On open curves sandy dirty roads wet asphalt and icy roads use the front brake with care if the front wheel locks the unit will slide to the side Be careful with the brakes Locked wheels adversely affect braking ability and can lead to accidents The ABS system incorporated in the unit is an electronic system that pr...

Page 47: ...Page 47 Wottan Motor 3 DRIVING DIRECTIONS STOP ENGINE Turn the ignition lock with the ignition key to the OFF position Remove the ignition key ...

Page 48: ...ama ged by corrosive and penetrating cleaning agents or solvents and are not covered under warranty WARNING Always perform a brake test after cleaning and before starting a journey CAUTION Do not use steam jet or high pressure washer guns Such devices can damage the optics dashboard hy draulic braking system and electrical system and its components The use of pressure washers no mat ter how high t...

Page 49: ...st products CAUTION Never use paint polish on plastic parts After a relatively long journey carefully clean the chassis and the metal parts and protect them with an anti corrosion agent Winter operation and corrosion protection NOTE Protect the environment by using only environmen tally friendly preservation agents use them sparin gly Use of the motorbike in winter can cause considera ble damage d...

Page 50: ...es such as a boiler room for long periods of time WARNING Remember to check the minimum tyre clearance and avoid reaching the safety marks For your safety it is recommended that tyres are changed when they show signs of wear and or when the tyre compound becomes harder as it has lost its grip properties Storage Clean the scooter Remove the battery Observe the maintenance instructions Rub the shiny...

Page 51: ... any external preservation agents Clean the scooter Fit the charged battery Preserve the battery terminals with terminal grea se Check adjust tyre pressure Check brakes Perform activities according to inspection plan Perform safety checks ...

Page 52: ...the loss of the vehicle s Warranty CAUTION We recommend using only original accessories and spare parts for our scooter This is in your own interest the safety suitability and reliability of these accessories and parts will have been tested specifically for the scooter Although we monitor the market we cannot evalua te or be responsible for the quality of unapproved accessories and parts even if t...

Page 53: ...ring oil level checks even the slightest tilt to the side will result in measurement errors The measurement is taken when the engine is hot keep an eye on hot spots so as not to burn yourself Place the scooter on the centre stand Remove the oil plug from the dipstick 1 located on the lower right hand side of the oil sump Wipe the dipstick with a clean paper or cloth and check that the level is wit...

Page 54: ...ne oil level flows 2 and add the new oil up to the MAX level mark Tighten the oil filler cap 1 CAUTION Use a lightweight oil suitable for scooters such as synthetic oil specifically formulated for Wottan Formula W scooters If necessary top up the engine oil for classification and viscosity see table by opening the oil container to the maximum level mark Recommended viscosity The viscosity depends ...

Page 55: ...r screw 1 and check if the oil level is below the oil container opening If necessary top up the SAE 80w90 transmission oil through the oil container opening When changing the transmission oil open the drain hole screw 2 until all the transmission oil flows out of the container then tighten the screw 2 and add new oil through the oil filler hole We recommend that this maintenance operation is carri...

Page 56: ...lve caps must be firmly tightened to prevent the tyre from suddenly losing pressure Measure the tread depth in the centre 2 of the tyre Recommended minimum tread depth 2 0mm Observe wear marks 3 Checking tyre pressure WARNING Adjust the tyre pressure according to the weight of the load Never exceed the approved total weight or load carrying capacity of the tyres MAINTENANCE INSTRUCTIONS TYRES COND...

Page 57: ...e tyres and rims cold One person Front 1 75Kg cm Rear 2 00Kg cm Two people Front 2 00Kg cm Rear 2 25Kg cm All tyres are tubeless WARNING Use only tyres of the approved or equivalent sizes and with the european homologation stamp The use of non approved tyres or rims increases the risk of an accident Wottan Motor S L accepts no responsibility for any damage to tyres and rims that may appear as a re...

Page 58: ...Wottan Storm S 2022 User Manual Page 58 1 3 1 4 2 5 MAINTENANCE INSTRUCTIONS FUSES ...

Page 59: ...ion cover Switch the unit off from the switch off button Remove the two screws 1 and open the battery cover 2 Remove the six screws 3 and open the main com partment 4 Open the fuse box 5 and remove the fuse A faulty or blown fuse must be replaced with a new one of the same value Check the fuse for proper contact If the fuse is not properly located it may blow ...

Page 60: ...ic so always wear gloves and safety glasses Do not tilt the battery as acid may leak from ventila tion openings FIRST AID If acid comes in contact with an eye immediately wash the eye with cool water for several minutes Then immediately call a doctor Acid on skin or clothing should be neutralized imme diately with an acid neutralizer or soap and stains should be rinsed off with plenty of water If ...

Page 61: ...are a wearing part If it has not been used for a long time its charge may have diminished If the battery has not been properly maintained it may have been rendered unusable The charging current in amperes must not exceed 1 10 of the battery capacity Ah Maintenance Although the battery does not require maintenance never leave the battery discharged Keep the battery clean and dry and make sure that ...

Page 62: ...Wottan Storm S 2022 User Manual Page 62 1 1 2 3 3 4 4 MAINTENANCE INSTRUCTIONS REMOVE AND INSTALL BATTERY ...

Page 63: ...spection cover 2 First disconnect the negative terminal 3 black ca ble Then disconnect the positive terminal 4 red cable Disconnect the battery Remove the battery Installation is carried out in reverse order to disas sembly When installing the battery first connect the positive terminal 4 red cable The battery does not require maintenance Do not attempt to open it under any circumstances ...

Page 64: ...id cooling Max net power output 19 5Kw a 8 000 rpm Max net torque 23 0Nm a 8 000 rpm Ignition system Transistorised ignition system with electronic ignition control ECU Spark plug NGK CR9E Electrode spacing 0 7 0 1mm Fuel system EFI Idle 1 500 100r min with the unit warm once stabilised after start up Air filter Air filter with element Starter system Electric ENGINE TECHNICAL DATA ...

Page 65: ...sion system Hydraulic adjustable dampers Front wheels Light metal ALU MT 3 00 X 15 Rear wheels Light metal ALU MT 4 00 X 14 Front tires 120 70 15 tubeless Rear tires 140 70 14 tubeless One person Front 2 2Kg cm2 Rear 2 6Kg cm2 Two people Front 2 2Kg cm2 Rear 2 6Kg cm2 Front brake ABS disc Rear brake ABS disc TRANSMISSION CHASSIS Tyre pressure ...

Page 66: ...AE 80W 90 Filling quantity 0 25 litres Generator 12V 300W Battery 12V12Ah MF Fuse 20A Headlamp LED low beam LED high beam 12V 6 8W 6 8W Position light LED 12V 4 4W 3W Speedometer lights LED 12V 0 1W Indicator of control lights and high beam LED 12V 0 01W Rear position brake light LED 12V 12W Front rear turn signal light LED FR 7 X 12V 6 W RR 3 X12V1 3W LUBRICANTS AND OPERATING FLUIDS ELECTRICAL EQ...

Page 67: ...Page 67 Wottan Motor Overall length 2 227 mm Overall width 786 mm Maximum height 1 291 mm Wheelbase 1 617 mm Seat height 860 mm Wet weight 177 kg DIMENSIONS AND WEIGHTS ...

Page 68: ... particular profile In addition your data may be communicated to other companies belonging to the automotive financial and insurance sectors for the same purposes indicated previously You may exercise your rights of access rectification cancellation and opposition to the processing of your data as well as revoke your consent to the sending of electronic commercial communications by sending an e ma...

Page 69: ...Page 69 Wottan Motor ...

Page 70: ...or replacement of the defective part if the failure was caused by negligent or improper use of the unit or provided that the maintenance schedule has not been complied with is exceeded by 20 of the maintenance schedule either by time or mileage Replaced parts become the property of the manufacturer 2 The installation of spare parts within the scope of the warranty does not extend the warranty peri...

Page 71: ...ave not been approved by the manufacturer Repairs carried out in workshops not authorised by Wottan Motor and failure to comply with the maintenance intervals in the workshop at an authorised Service Point shall also result in the warranty being voided 5 When submitting a warranty claim the customer must present the maintenance booklet correctly completed by the seller 6 The following table gives ...

Page 72: ... reduced this may occur after 500 km Brake linings brake pads brake lines Depending on the driving style and load these can wear out after 1500 km or even earlier Pedal rings sealants gaskets Must be replaced during each maintenance interval to ensure proper function Radial seals on engine gearbox fork and wheels Depending on road conditions and care wear may start after 500 km Dirt reduces the li...

Page 73: ...uts dowels locking plates screw connections During each maintenance interval or after unscrewing the nut or unlocking the lock Variator rollers coils belts Depending on driving style and load these can wear out after 500 km Clutch friction discs Depending on driving style and load these may wear out after 500 km Pistons cylinders crankshaft connecting rods engine bearings Depending on driving styl...

Page 74: ...f non original spare parts accessories lubricants or other liquids not recommended 1 7 Damage caused by transformation or modification of the vehicle and or its components 1 8 Damage caused by ageing or prolonged storage in particular but not limited to changes in the colour of the paintwork chrome plating cracking of the paintwork or other deterioration 1 9 Perceptual sensations that do not affec...

Page 75: ...s theft or damage resulting therefrom 1 16 Damage caused by smoke oil chemicals animal droppings saline water salt or other similar materials 1 17 Damage caused by exposure to saline environments such as those found in coastal locations 1 18 Damage resulting from wear and tear 1 19 Any electrical problems or malfunctions caused by pressure washing equipment 2 The Wottan Motor Official Warranty doe...

Page 76: ...another part will become the legitimate property of Wottan Motor S L Wottan Motor reserves the right to introduce modifications or improvements to its vehicles in order to improve their operation and or durability 3 Observations for the owner The first inspection of the vehicle after delivery is of the highest importance in order to guarantee the longevity of the vehicle The purpose of the first s...

Page 77: ...ll showing the work carried out Remember that this document will be the reliable proof that you are following the Scheduled Maintenance System and it will also add value to your vehicle if you decide to sell it at some point in the future together with the stamps in this Warranty and Maintenance Manual Failure to carry out the first service within the deadlines set out above will result in the aut...

Page 78: ...ed out at the Official Dealer or Dealership where you purchased the vehicle simply to keep track of the life of your motorbike and the conditions of use and your preferences as a customer in the case of components that can be adjusted according to the customer s tastes Always keep in mind that adherence to the Scheduled Maintenance System always has an impact on reducing overall maintenance costs ...

Page 79: ...nted treated or plastic parts The best cleaning agent is neutral soap and plenty of water For cleaning very dirty elements there are many options available on the market for specific products Never use pressurised water and certainly never spray water directly on locks headlights lights turn indicators clock controls and switches electrical devices or exhaust system Wottan Motor is constantly impr...

Page 80: ...nal spare parts CAUTION In the event of non compliance the warranty will be void The activities carried out are listed in the inspection plan During the warranty period the following inspection intervals must be complied with At 500 km or 4 months At 4 000 km or after 12 months from the first service Every 4 000 km or after 12 months since the last service After the warranty period the inspection ...

Page 81: ...hassis that exceed a strictly restricted area Altering safety related parts could threaten the safety of yourself and others This applies especially to the exhaust system carburettor ignition system fork column brake system and lights Before working on the electrical system disconnect the negative terminal of the battery ...

Page 82: ...lve adjustment I I I I I Throttle cable adjustment I I I I I I Check coolant level I I I I I I Transmission oil R R R Transmission leaks check I I I I I I Checking crankcase leaks I I I I I I Rollers and transmission belt R I R I R Variator I I I COMPONENTS TO CHECK MAINTENANCE TABLE WOTTAN MODEL STORM S R Replace I Inspection cleaning and adjustment replacement if necessary L Lubrication MAINTENA...

Page 83: ...harge I I I I I I Steering and bearings I L I L I L Front and rear suspension I I I I I I Tyre pressure I I I I I I Braking system I I I I I I Brake fluid replace every 2 years I I I I I Main and side stands I L I L I L I L I L I L Bolts and nuts rims swingarm fairing I I I I I I COMPONENTS TO CHECK MAINTENANCE TABLE WOTTAN MODEL STORM S R Replace I Inspection cleaning and adjustment replacement i...

Page 84: ...rom the previous service 4th Service 12 000 km or 1 year from the previous service 5th Service 16 000 km or 1 year from the previous service 6th Service 20 000 km or 1 year since the previous service 7th Service 24 000 km or 1 year since previous service 8th Service 28 000 km or 1 year since previous service 9th Service 32 000 km or 1 year since previous service 10th Service 36 000 km or 1 year si...

Page 85: ...Page 85 Wottan Motor Wottan Motor ...

Reviews: