background image

Summary of Contents for WX254

Page 1: ...WX254 WX254 1 SAFETY AND OPERATING MANUAL Original instructions ...

Page 2: ... tools Unmodified plugs and matching outlets will reduce risk of electric shock b Avoid body contact with grounded surfaces such as pipes radiators ranges and refrigerators There is an increased risk of electric shock if your body is earthed or grounded c Do not expose power tools to rain or wet conditions Water entering a power tool will increase the risk of electric shock d Do not abuse the cord...

Page 3: ...way from moving parts Loose clothes jewelry or long hair can be caught in moving parts g If devices are provided for the connection of dust extraction and collection facilities ensure these are connected and properly used Use of dust collection can reduce dust related hazards 4 Power tool use and care a Do not force the power tool Use the correct power tool for your application The correct power t...

Page 4: ...designated battery packs Use of any other battery packs may create a risk of injury and fire c When battery pack is not in use keep it away from other metal objects like paper clips coins keys nails screws or other small metal objects that can make a connection from one terminal to another Shorting the battery terminals together may cause burns or a fire d Under abusive conditions liquid may be ej...

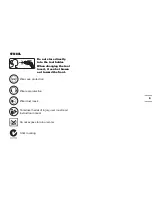
Page 5: ...ool holder When changing the tool insert it can be thrown out toward the front Wear eye protection Wear ear protection Wear dust mask To reduce the risk of injury user must read instruction manual Do not expose to rain or water C tick marking ...

Page 6: ...6 9 2 1 4 5 6 3 8 7 ...

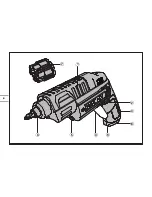
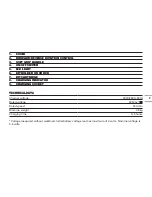
Page 7: ...r Chuck 7 Bit Cartridge 8 Charging Indicator 9 Charging Socket TECHNICAL DATA Charger voltage 230V 240V 50Hz Rated voltage 4V Max Rated speed 230 min Machine weight 0 5kg Charging time 3 5 hours Voltage measured without workload Initial battery voltage reaches maximum of 4 volts Nominal voltage is 3 6 volts ...

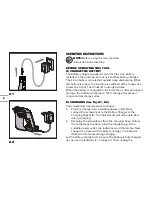
Page 8: ...e battery will accept a 100 charge after several charge and discharge cycles B CHARGING See Fig A1 A2 The screwdriver has two ways to charge 1 Plug the Charger into a suitable power outlet Next connect the screwdriver to the Battery Charger at the Charging Socket 9 The Indicator 8 will illuminate Red during charging 2 Recharge the screwdriver from the charging base Follow the same steps as above p...

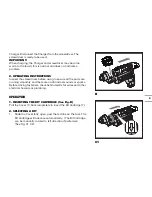
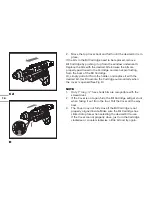
Page 9: ...the parts are running smoothly and there are no abnormal sounds or sparks Before driving fasteners check behind walls for wires and other electrical hazards or plumbing OPERATION 1 Inserting The Bit Cartridge See Fig B Pull the Cover 1 back completely to insert the Bit Cartridge 7 2 Selecting a Bit 1 Slide the Cover fully open past the red line on the tool The Bit Cartridge will advance automatica...

Page 10: ...h the desired bit It will load into the Cartridge automatically when the cover is opened See Fig D NOTE 1 Only 1 long hex shank bits are compatible with the screwdriver 2 If the Cover is not open fully the Bit Cartridge will get stuck when taking it out from the tool Pull the Cover all the way back 3 The Cover may not fully close if the Bit Cartridge is not properly aligned inside Make sure the Bi...

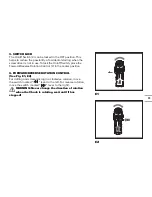
Page 11: ...place the Forward Reverse Rotation Control 2 in the center position 4 FORWARD REVERSE ROTATION CONTROL See Fig E1 E2 For drilling and screw driving in a clockwise rotation move the switch marked lever to the left For reverse rotation move the switch marked lever to the right Warning Never change the direction of rotation when the Chuck is rotating wait until it has stopped E1 e2 1 2 2 1 1 2 ...

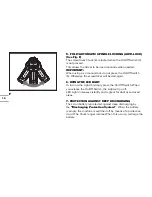
Page 12: ...aged 6 USING THE LED LIGHT To turn on the Light 5 simply press the On Off Switch When you release the On Off Switch the Light will go off LED Light increases visibility and is great for dark or enclosed areas 7 PROTECTION AGAINST DEEP DISCHARGING The Li Ion battery is protected against deep discharging by the Discharging Protection System When the battery is empty the machine is switched off by me...

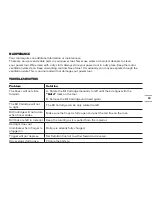
Page 13: ...blem Solution The Cover will not slide forward A Rotate the Bit Cartridge manually to left until the bit aligns with the Auto mark on the tool B Remove the Bit Cartridge and insert again The Bit Cartridge will not to right The Bit Cartridge can be only rotated to left Bit Cartridge will not rotate when Cover slides Make sure the Cover is fully open and past the red line on the tool Drill bits are ...

Page 14: ......

Page 15: ......

Page 16: ...www worxtools com Copyright 2012 Positec All Rights Reserved 2CSD16APK11002A0 ...

Reviews: