background image


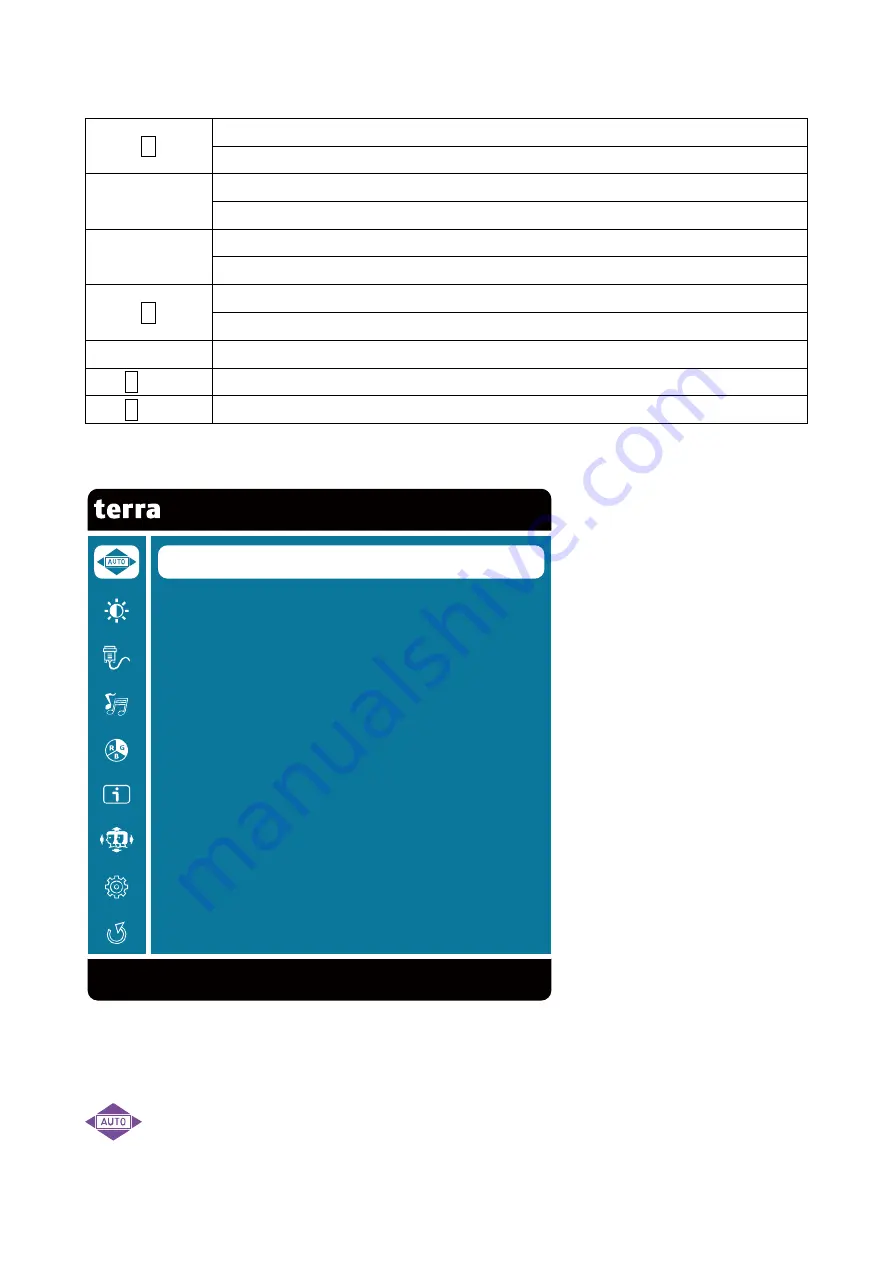
Using On Screen Display (OSD) Functions 

Display main menu 
Exit from OSD menu 


Select the desired item when in OSD menu 
Auto adjust the image when not in main menu (VGA only) 


Select the desired item when in OSD menu 
When not in OSD menu, directly enters Contrast/Brightness menu 

Manual adjust mode select for VGA, HDMI mode 
Confirm the Select 

▲+▼


Recall both of Contrast and Brightness (when not in OSD menu) 

1


+▲


OSD Lock (when not in OSD menu), press and hold for 5 seconds 

1


+▼


Power Lock (when not in OSD menu), press and hold for 5 seconds 


Main Menu 


Short Cuts Function from the button(s) 


Auto Image Adjust:

 To auto adjust Horizontal Position, Vertical Position, Phase 

(Fine Tune) and Clock (H. Size) of the screen, (VGA mode only). 
 

C o n t r a s t / B r i g h t n e s s


I n p u t   S e l e c t


A u d i o   A d j u s t


C o l o r   A d j u s t


I n f o r m a t i o n


M a n u a l   I m a g e   A d j u s t


S e t u p   M e n u


M e m o r y   R e c a l l


1 :   E x i t                      S e l e c t   : 2  

A u t o   I m a g e   A d j u s t


Summary of Contents for Terra 2311W

Page 1: ...LCD LED 2311W ...

Page 2: ...serious interference to radio or television reception resetting the monitor may determine it Moreover users are encouraged to correct interference by doing one or more of the following Reorient or relocate the receiving antenna Move the monitor and the receiver further away from each other Connect the monitor into an outlet on a circuit different from that to which the receiver is connected Consul...

Page 3: ... 2 Quick Installation 3 Installing the LCD Monitor 4 Front View of the Product 5 Rear View of the Product 6 Using On Screen Display OSD Functions 7 Supporting Timing Modes 10 Technical Information 11 Care and Maintenance 12 Troubleshooting 12 ...

Page 4: ... from your monitor caution you should remove the power cord immediately and call your service center Put your monitor only in a clean dry environment Unplug the monitor immediately if gets wet and consult your service technician Avoid exposing your monitor directly to sunlight or other heat source Always unplug the monitor before cleaning it Clean the cabinet with a clean dry cloth Apply non ammon...

Page 5: ...2 First Setup Congratulation for purchasing this monitor of high performance This monitor comes with the following accessories AC Power cord HDMI cable Warranty card Quick start guide ...

Page 6: ... Connect Power cord Connect the power cord to a properly grounded AC outlet then to the monitor 3 Power ON computer and monitor Power ON the computer then Power ON the monitor 4 Windows users Setting the Timing Mode Resolution and Refresh Rate Example 1920 x 1080 60 Hz Resolution Right click on the Windows desktop Display Settings Advanced Display Settings Set the resolution Refresh Rate vertical ...

Page 7: ...ace the monitor face down on a soft cloth or cushion on a table 2 Install the stand base to the monitor Disconnecting the Stand Base 1 Place the monitor face down on a soft cloth or cushion on a table 2 Press the tenon inwardly and pull the stand base to remove ...

Page 8: ...5 Front View of the Product OSD Menu On Off Scroll Down Decrease Scroll Up Increase Confirm Select Power ON OFF LED Indicator ...

Page 9: ...6 Rear View of the Product HDMI input VGA input Power input ...

Page 10: ...s when not in OSD menu 1 OSD Lock when not in OSD menu press and hold for 5 seconds 1 Power Lock when not in OSD menu press and hold for 5 seconds Main Menu Short Cuts Function from the button s Auto Image Adjust To auto adjust Horizontal Position Vertical Position Phase Fine Tune and Clock H Size of the screen VGA mode only C o n t r a s t B r i g h t n e s s I n p u t S e l e c t A u d i o A d j...

Page 11: ...udio functions Volume To adjust the volume output Note The audio function is only available in HDMI mode Color Adjust To select the color for improving brightness and color saturation between Cool Normal Warm User Color Preset Mode and Anti Blue Light Cool Adds blue to screen image for cooler white Normal Adds red to screen image for warmer white and richer red Warm Adds green to screen image for ...

Page 12: ...adjust to your preference Sharpness To adjust the clarity of a non Full HD Resolution 1920x1080 signal with or button Video Mode Adjustment To select the video mode from Full Screen or Aspect ratio Full Screen To select full screen size image Aspect ratio To select 4 3 image size Setup Menu To set up Language Select OSD Position OSD Time Out and OSD background Language Select To allow users to cho...

Page 13: ...70Hz VESA 1024 x 768 75Hz VESA 1280 x 960 60Hz VESA 1152 x 864 75Hz MAC 1152 x 870 75Hz VESA 1280 x 1024 60Hz VESA 1440 x 900 60Hz VESA 1440 x 900 75Hz VESA 1440 x 1050 75Hz VESA 1600 x 1200 60Hz VESA 1680 x 1050 60Hz VESA 1920 x 1080 60Hz Video Timing Modes 480i 720p 480p 1080i 576i 1080p 576p Warning Do not set the graphic card in your computer to exceed these maximum refresh rates Doing so may ...

Page 14: ...e Off Mode 0 5 W Displayable Resolution FHD 1920 x 1080 max Vertical Frequency 60Hz max Pixel Dimension 0 2652 x 0 2652 mm LCD Display Color 16 7M Active Display Area 509 18 mm x 286 42 mm Temperature Operating 0 C 40 C Storage 20 C 60 C Compliance CE WEEE BSMI Power Input Voltage AC100 240 V Speaker 1W x 2 ...

Page 15: ...nd may cause electric shock to human bodies Never try to repair your monitor yourself Always call your service center or a qualified technician to fix it Troubleshooting No power Make sure AC power cord is securely connected to the power adapter and the power supply is firmly connected to the monitor Plug another electrical device into the power outlet to verify that the outlet is supplying proper...

Page 16: ...ecting system in your Country or District Please contact the address below for more information on recycling Informations importantes relatives au recyclage En fin de vie cet appareil ne dois pas étre jeté aux ordures ménagères Veuillez respecter les réglementations locales et rester en conformité avec le système de collecte et de recyclage des ordures en vigueur dans votre région Pour plus d info...

Page 17: ...our rights with two steps 1 copyright the software and 2 offer you this license which gives you legal permission to copy distribute and or modify the software Also for each author s protection and ours we want to make certain that everyone understands that there is no warranty for this free software If the software is modified by someone else and passed on we want its recipients to know that what ...

Page 18: ...This section is intended to make thoroughly clear what is believed to be a consequence of the rest of this License 8 If the distribution and or use of the Program is restricted in certain countries either by patents or by copyrighted interfaces the original copyright holder who places the Program under this License may add an explicit geographical distribution limitation excluding those countries ...

Page 19: ...www wortmann de ...

Reviews: