background image

Page 6

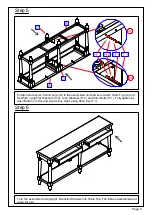
 Step 5

 Step 6

T-1

H-1

H-2

H-3

2x

2x

B

A

D

D

Position and secure Center Legs (D) to the assembled unit and secure with Table Top (A) and

Shelf (B) using Flat Washers (H-3), Lock Washers (H-2) and Allen Bolts (H-1). Fully tighten all

Allen Bolts from this and all previous steps using Allen Key (T-1).

Turn the assembled unit upright. Re-install Drawers into Table Top. The table is assembled and

ready for use.

Summary of Contents for Everett 546571

Page 1: ...OU HAVE ANY QUESTIONS PERTAINING TO THE ASSEMBLY OF THIS FURNITURE PIECE PLEASE CONTACT YOUR NEAREST COST PLUS WORLD MARKET STORE OR CALL OUR TOLL FREE NUMBER 877 967 5362 FOR ASSISTANCE Assembly Inst...

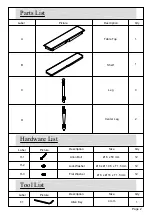
Page 2: ...ure Label Qty Description Picture Label A Table Top 1 Hardware List Tool List Parts List Leg 4 C T 1 1 Allen Key Allen Bolt 12 H 1 Lock Washer 12 H 2 H 3 Flat Washer 12 B Shelf 1 Center Leg 2 D Size S...

Page 3: ...t store or our customer service call center 877 967 5362 Assemble on a clean non marring surface packing foam Unpack all hardware bags and components to ensure you have all parts Read instructions cov...

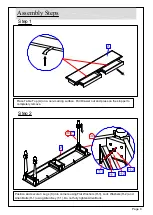
Page 4: ...lace Table Top A on a non marring surface Pull Drawer out and press on the stopper to completely remove Position and secure 3 Legs C into corners using Flat Washers H 3 Lock Washers H 2 and Allen Bolt...

Page 5: ...talled Legs C and secure with Flat Washers H 3 Lock Washers H 2 and Allen Bolts H 1 Do not fully tighten Allen Bolts Install the leg 4th C into the assembled unit and secure with Table Topl A and Shel...

Page 6: ...led unit and secure with Table Top A and Shelf B using Flat Washers H 3 Lock Washers H 2 and Allen Bolts H 1 Fully tighten all Allen Bolts from this and all previous steps using Allen Key T 1 Turn the...

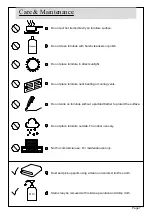
Page 7: ...ace furniture near heating or cooling vents Do not write on furniture without a padded barrier to protect the surface Do not place furniture outside For indoor use only Not for commercial use For resi...

Reviews: