background image

Note

:

Upon opening thoroughly clean all wood surfaces to remove dust and dirt that
may have settled onto finish during shipment. in order to prevent damage during
assembly, please assemble this item with at least two people.

Note:

Turn the cam-bolt screws until they are tight,
the shoulder should be against the surface of
the part.

How to use the cam-tool

Note:

The arrows on the hidden cam-locks should point to the cam-bolts

Page 6

SHOULDER

ARROW

H-1

H-2

ARROW

Summary of Contents for ASHLYN 516570

Page 1: ...OUR PURCHASE IF YOU HAVE ANY QUESTIONS PERTAINING TO THE ASSEMBLY OF THIS FURNITURE PIECE PLEASE CONTACT THE NEAREST COST PLUS WORLD MARKET STORE IF YOU ARE NOT NEAR A STORE PLEASE CALL OUR CUSTOMER SERVICE CALL CENTER TOLL FREE AT 877 967 5362 FOR ASSISTANCE Page 1 ...

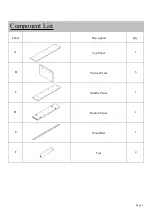
Page 2: ...Label Description Qty A Top Panel 1 B Vertical Panel 6 C Middle Panel 1 D Bottom Panel 1 E Wood Rail 1 F Feet 4 Component List Page 2 ...

Page 3: ...Label Description Qty H 1 Cam bolts 12 H 2 Cam locks 12 H 3 M6 1 1 2 Allen Bolts 12 H 4 M3 1 1 2 Round head wood screw 4 H 5 Ø8 1 5 8 Wood dowel 26 Hardware List Page 3 ...

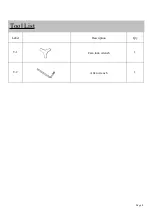
Page 4: ...Label Description Qty T 1 Cam lock wrench 1 T 2 Allen wrench 1 Tool List Page 4 ...

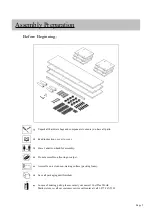
Page 5: ...cover to cover Have 2 adults on hand for assembly Do not assemble on flooring or carpet Assemble on a clean non marring surface packing foam Save all packaging until finished In case of missing parts please contact your nearest Cost Plus World Market store or call our customer service call center at call 1 877 967 5362 Page 5 ...

Page 6: ...in order to prevent damage during assembly please assemble this item with at least two people Note Turn the cam bolt screws until they are tight the shoulder should be against the surface of the part How to use the cam tool Note The arrows on the hidden cam locks should point to the cam bolts Page 6 SHOULDER ARROW H 1 H 2 ARROW ...

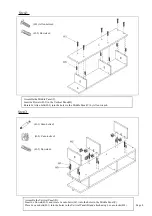
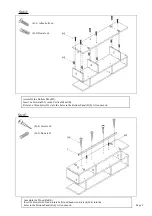
Page 7: ...s x6 Assemble the Vertical Panel B Place Top panel A upside down on padded non marring surface Insert 6x Dowels H 5 and rotate 6x cam bolts H 1 into the holes in the Top panel A Place 6x cam bolts H 1 into the holes in the Vertical Panel B and attach using 6x cam locks H 2 ...

Page 8: ...ert 6x Dowels H 5 in the Vertical Panel B Rotate 6x Allen bolts H 3 into the holes in the Middle Panel C by Allen wrench Assemble the Vertical Panel B Insert 6x Dowels H 5 and rotate 6x cam bolts H 1 into the holes in the Middle Panel C Place 6x cam bolts H 1 into the holes in the Vertical Panel B and attach using 6x cam locks H 2 ...

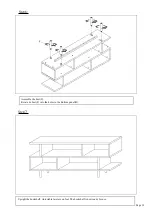
Page 9: ...ble the Bottom Panel D Insert 6x Dowels H 5 in the Vertical Panel B Rotate 6x Allen bolts H 3 into the holes in the Bottom Panel D by Allen wrench Assemble the Wood Rail E Insert 2x Dowels H 5 and rotate 4x Round head wood screws H 4 into the holes in the Bottom Panel D by Allen wrench ...

Page 10: ...Page 10 Step6 Step7 Assemble the Feet F Rotate 4x Feet F into the holes in the Bottom panel D Upright the bookshelf Adjustable levelers on foot The bookshelf is now ready for use ...

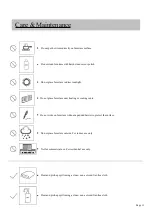
Page 11: ...unlight Do not place furniture near heating or cooling vents Do not write on furniture without a padded barrier to protect the surface Do not place furniture outside For indoor use only Not for commercial use For residential use only Dust and pick up spills using a clean non colored lint free cloth Dust and pick up spills using a clean non colored lint free cloth ...

Reviews: