Wolf Cinema Quick Setup Guide
2
InsTallIng The PrImary lens
Before installing any lens, be sure the projector is off. If the projector has been running, be sure to let it cool down completely. Ensure the
front lens cap is on during installation.
noTe:
Remove the small rear lens cap before installing!! Keep the large front lens cap on.
Electrical Connector:
1.
Line up the male connector on the lens with the female connector on the slide assembly.
Insert Lens:
2.
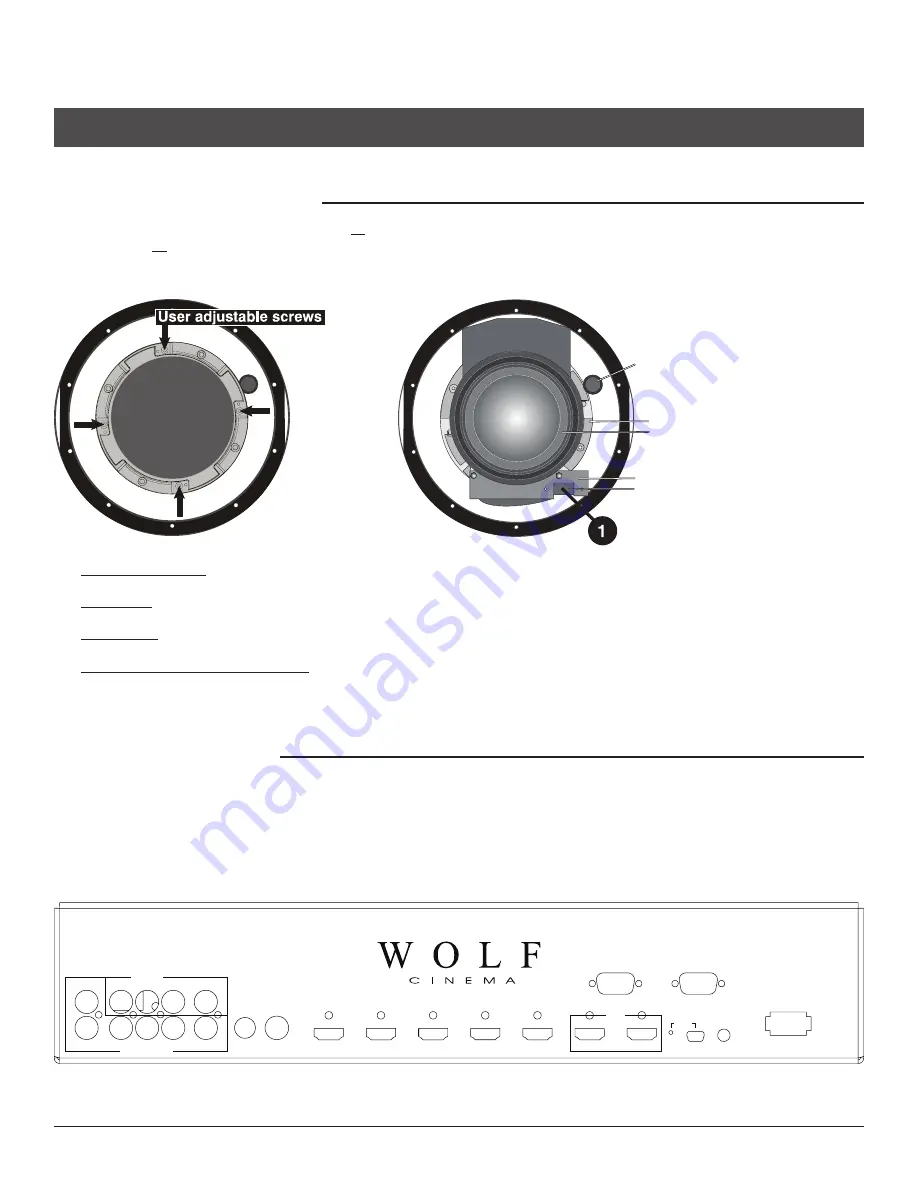
Align the Tabs on the lens plate lock with the slots on the lens retainer ring. The lens should slide in about ½”.
Rotate Lens:
3.
Rotate the lens clockwise until the tabs are tightly secured and the lens release button locks the lens in place.
Secure lock-down screws (optional):
4.
For added stability, secure the adjustment screws provided on the lens-retaining ring.
If you have installed a large zoom lens, one or more of the screws may be inaccessible — simply tighten those that are accessible.
ConneCTIng The sCaler
Connect all sources to the inputs of the Scaler.
1.
Connect a HDMI cable from the video output of the Scaler to input 2(DVI) in the projector.
2.
Connect power to the AC input using the provided power cable. The Scaler will automatically turn on. If a Red LED is shown on the
3.
right side of the front panel, the Scaler is receiving AC power but no signal is detected. If a Blue LED is shown, the Scaler is receiving
AC power and a good video signal is being detected. No LED indicates there is no AC power within the Scaler.
noTe: If RS-232 is being used to control the Scaler, GPIO is not used.
1
2
Service
GPIO
RS-232
AC Input 110-240V, 50/60Hz
IR Control
H
V
Component 2 / RGBHV
Component 1
Video
S-Video
HDMI 1
HDMI 2
HDMI 3
HDMI 4
HDMI 5
Video / Audio
Audio
Y
B-Y
R-Y
Y
B-Y
R-Y
Sync
Output
Lens release
Lens retainer ring
Projection Lens*
Male connector assembly (on lens)
Female floating connector assembly
(on lens mount)
View with Zoom Lens installed


