6
Set up and run the layout
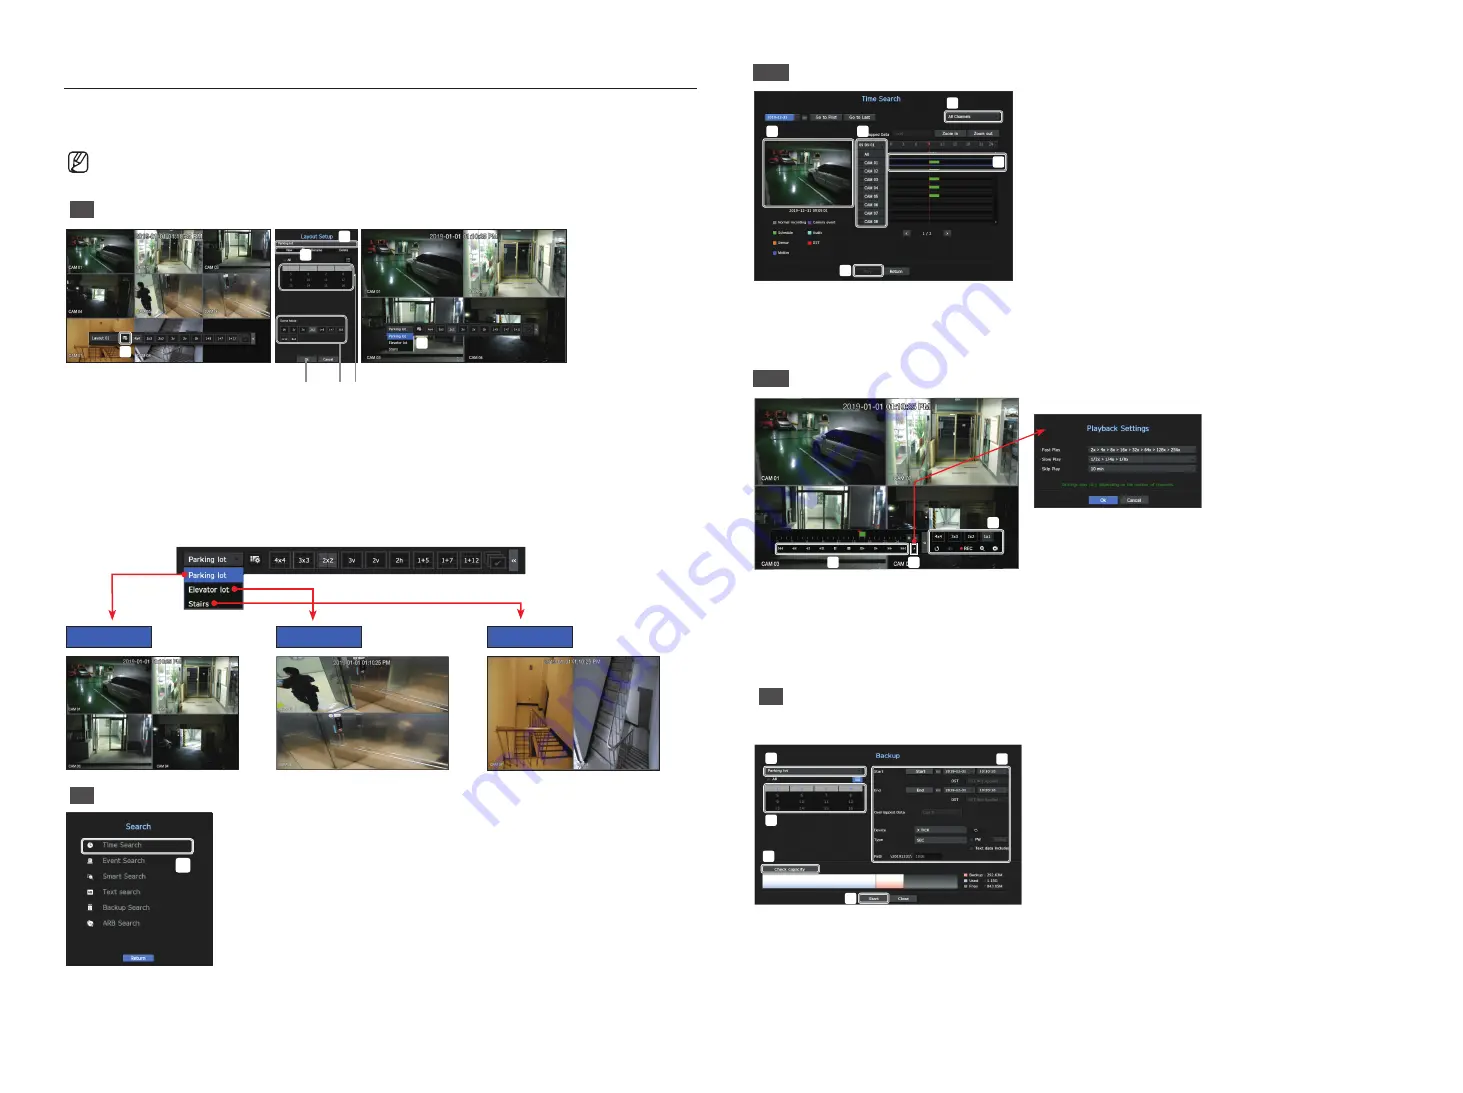
The layout set on the live screen can also be used for time search and can be searched and played according to the
channel order and channel combination set by the user.
`
For more information on how to set each step, refer to the “
User Manual
.”
1
Live channel layout Setup
b
c
Open the channel layout setup page.
b
Click <
New
>.
c
Specify the layout name of the selected channel (ex. Parking lot).
Select the channels you want to add to the layout (ex. 1, 2, 3, 4, etc.).
Decide the split mode to apply (ex. 4-split).
Click <
OK
>.
Select the layout you want to move, and it will be moved immediately (ex. It moves to Parking lot.).
Parking lot
Elevator lot
Stairs
2
Search/Play
In live mode, right-click and select <
Search
>.
Select <
Time Search
>.
2-1
Browse
b
c
The default value is <
All channels
>. Select the desired layout from the live channel groups.
b
Select a channel by the selected group.
c
When moving the time bar, you can see the preview screen in the picture of
.
Press the <
Play
> button to play the video.
2-2
Audio Play
b
c
These are the various functions required for play. Hover over it to view the tooltip.
Refer to the information to adjust the play controls
(Ex.: Skip Backward).
b
You can set the specific functions in
through playback settings
(Ex. Skip play: 10 minutes, 30 minutes, 1 hour, 24 hours, etc.).
c
Displays the functions that operate during split mode and other plays.
3
Backup
Right-click the live screen and select <
Backup
>.
b
c
Select a layout
b
Select a channel.
c
Set the time, device, and format for backup.
Click the <
Capacity check
> button to see if you can back up.
Click the <
Start
> button to proceed with the backup.


