Winmate Military M270TF-MIL User Manual Download Page 47

User Manual 

Chapter 5 

Maintenance 

Military 4K UHD Display


47 


5 Maintenance 

This  chapter  includes  regular  cleaning  and  maintenance  procedures.  Follow  all  the 
recommendations in this chapter in order to ensure long product lifecycle. 

A  4K  high-resolution  panel  and  high  brightness/ultra-wide  field  of  view  technology 
enables you to use the monitor under various lighting conditions and in numerous ways 
(installing  on  the  wall,  using  several  monitors  to  view  an  image,  etc.).  Because  a  color 
filter with wide-color reproduction and LCD materials with high response speed are used, 
the motion picture of the video signal is displayed. 

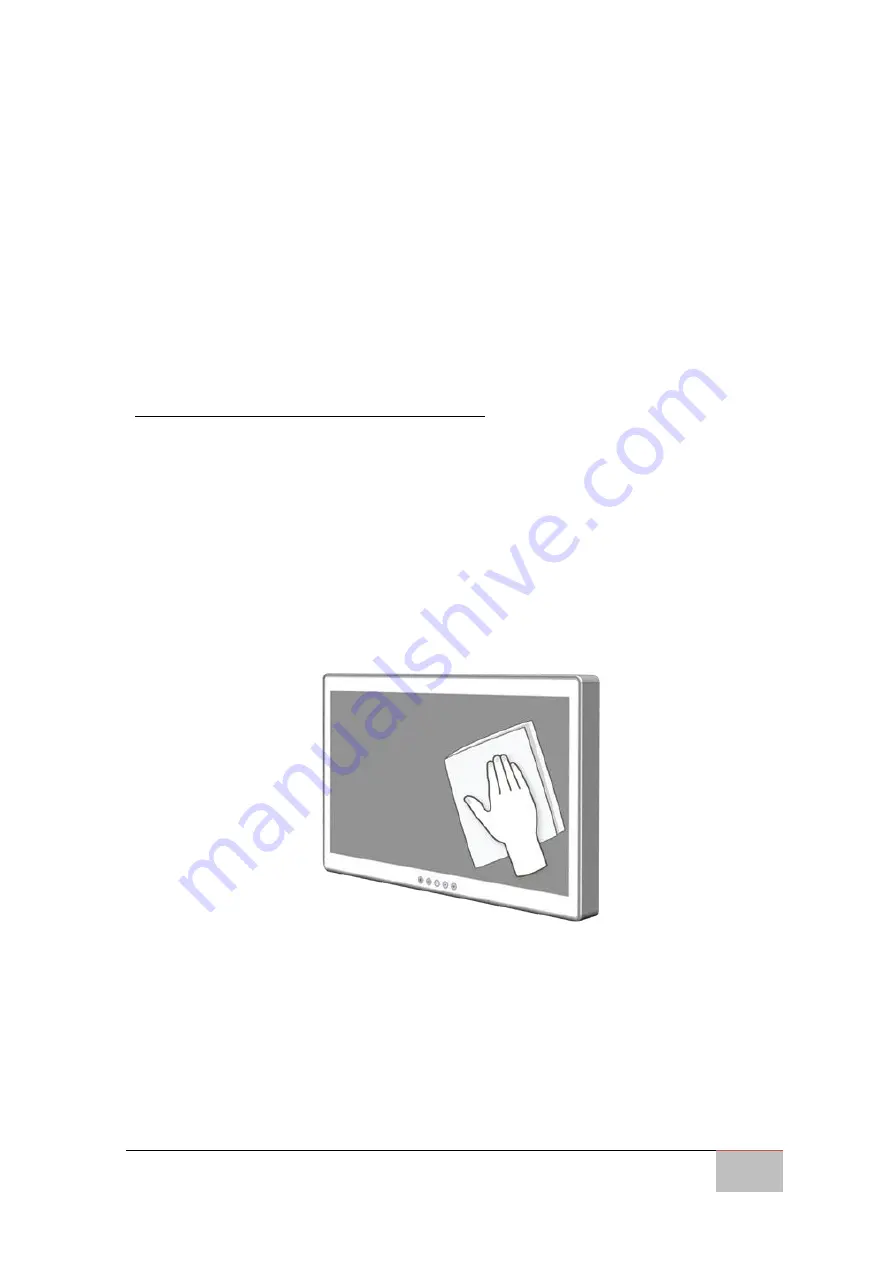
5.1 Cleaning the Display Screen 

The design allows the user to easily wipe liquids and gel off the LCD panel and control 
buttons – ensuring a high standard of disinfection and cleanliness. 

A  material  that  withstands  disinfection  is  used  for  the  front  protection  plate  of  the 
medical  use  LCD  monitor.  The  protection  plate  surface  is  specially  treated  to  reduce 
reflection  of  light.  When  solvents  such  as  benzene  or  thinner,  or  acid,  alkaline  or 
abrasive  detergent  or  chemical  cleaning  cloth  are  used  for  the  protection  plate 
surface/monitor surface, the performance of the monitor may be impaired or the finish 
of the surface may be damaged. 


Take care with respect to the following: 


Clean the protection plate surface/monitor surface with a 50 to 70 v/v% 
concentration of isopropyl alcohol or a 76.9 to 81.4 v/v% concentration of 
ethanol using a swab method. Wipe the protection plate surface gently (wipe 
using less than 1 N force). 


Stubborn stains may be removed with a soft cloth such as a cleaning cloth lightly 
dampened with mild detergent solution using a swab method and then clean 
using the above chemical solution. 

Summary of Contents for Military M270TF-MIL

Page 1: ...4K UHD Display Military Grade User Manual Version 1 0 Document Part Number 91521110100K Model No M270TF MIL M320TF MIL ...

Page 2: ...fied Applications that are described in this manual are for illustration purposes only We make no representation or guarantee that such application will be suitable for the specified use without further testing or modification Warranty Our warranty guarantees that each of its products will be free from material and workmanship defects for a period of one year from the invoice date If the customer ...

Page 3: ...ur customer service center for technical support if you need additional assistance You may need the following information ready before you call Product serial number Detailed description of the problem The exact wording of error messages In addition free technical support is available from our engineers every business day We are always ready to give advice on application requirements or specific i...

Page 4: ...rdware and explains how to avoid the potential problem Une alerte d attention indique un dommage possible à l équipement et explique comment éviter le problème potentiel WARNING AVERTISSEMENT An Electrical Shock Warning indicates the potential harm from electrical hazards and how to avoid the potential problem Un Avertissement de Choc Électrique indique le potentiel de chocs sur des emplacements é...

Page 5: ...tlet if it is not to be used for several days or more To disconnect the AC power cord pull it out by grasping the plug Never pull the cord itself The socket outlet shall be installed near the equipment and shall be easily accessible Do not leave this equipment in an uncontrolled environment where the storage temperature is below 20 C 4 F or above 60 C 140 F It may damage the equipment WARNING AVER...

Page 6: ...g In addition over a long period of use because of the physical characteristics of the liquid crystal display such stuck pixels may appear spontaneously These problems are not a malfunction Do not leave the LCD screen facing the sun as it can damage the LCD screen Take care when you place the unit by a window Do not push or scratch the LCD screen Do not place a heavy object on the LCD screen This ...

Page 7: ...directly will cause the panel damage You should avoid placing the product under direct sunlight Do not place the display in wet environment If the product is close to the wet ground such as grassplot the moisture between panel and glass will make the product malfunction You should avoid placing the product in wet environment ...

Page 8: ...rference This device must accept any interference received including interference that may cause undesired operation This equipment has been tested and found to comply with the limits for a class A digital device pursuant to part 15 of the FCC rules These limits are designed to provide reasonable protection against harmful interference when the equipment is operated in a commercial environment Thi...

Page 9: ... directions Electromagnetic Compatibility Directive 2014 30 EU EN55024 2010 EN 55022 2010 Class B o IEC61000 4 2 2009 o IEC61000 4 3 2006 A1 2007 A2 2010 o IEC61000 4 4 2012 o IEC61000 4 5 2014 o IEC61000 4 6 2013 o IEC61000 4 8 2010 o IEC61000 4 11 2004 EN55022 2010 AC 2011 EN61000 3 2 2014 EN61000 3 3 2013 Low Voltage Directive 2014 35 EU EN 60950 1 2006 A11 2009 A1 2010 A12 2011 A2 2013 ...

Page 10: ...e Military Grade 4K UHD Display provides information for specific user needs and includes Military Grade 4K UHD Display User Manual contains detailed description on how to use the device its components and features NOTE Some pictures in this guide are samples and can differ from actual product Document Revision History Version Date Note 1 0 11 Nov 2016 Initial release ...

Page 11: ...ff 23 2 Getting Started 25 2 1 Powering On 25 2 1 1 Power Considerations 25 2 1 2 Connecting the Power 26 2 2 Connecting Other Devices 28 2 2 1 Removing the Connector Cover 28 2 2 2 Connector Pin Assignment 29 3 Mounting Solutions 34 3 1 Cable Mounting Considerations 34 3 2 Safety Precautions 35 3 3 Mounting Guide 36 3 3 1 VESA Mount 36 4 On Screen Display Control 38 4 1 OSD Control Function Butto...

Page 12: ...4 4 Audio 42 4 4 5 Multi display Settings 43 4 4 6 OSD Setting 44 4 4 7 Advanced 45 5 Maintenance 47 5 1 Cleaning the Display Screen 47 5 2 Cleaning the Casing 48 6 Technical Support 50 6 1 Troubleshooting 50 6 2 Problem Report Form 51 Appendix A Frequency Table 53 ...

Page 13: ...Military 4K UHD Display 13 Introduction This chapter gives you product overview describes features and hardware specification You will find all accessories that come with the Display in the packing list ...

Page 14: ......

Page 15: ...rrors and improve operational efficiencies With the number of display options available knowing which will best suit your needs can be a challenge The Winmate line of 4K monitors implement the latest in technology are making the decision easy 1 1 Product Features Winmate Military 4K UHD Display offers the following features UHD 4K 3840 x 2160 native resolution for video display and other on site a...

Page 16: ...l Separate Sync Composite Sync Sync On Green Digital Separate Sync Composite Sync Sync On Green Synchronization Range 31 5 kHz to 60 0 kHz H 30 Hz to 75 Hz V 31 5 kHz to 60 0 kHz H 30 Hz to 75 Hz V Optimal Resolution and Hz 3840 x 2160 60 Hz 4 4 4 3840 x 2160 60 Hz 4 4 4 Detectable Resolutions Partial List 640 x 480 720 x 400 800 x 600 1024 x 768 1280 x 1024 1600 x 1200 1920 x 1080 1920 x 1200 256...

Page 17: ...Temperature 0 deg C to 50 deg C Humidity up to 95 Storage Temperature 20 deg C to 60 deg C Humidity up to 95 IP Rating Front IP65 Rear IP22 Standards and Certificates Certificates CE FCC Compliance MIL STD 810F G On going MIL STD 416E F On going AC Adaptor Specifications AC IN AC 100V 240V DC OUT DC 24 V 3 33 A Dimensions L W H 137 mm 59 mm 34 mm Net weight Approx 0 45 kg Storage and transport con...

Page 18: ...d below are inside your package If any of these items are missing or damaged contact us immediately Standard factory shipment list Display User Manual Hardcopy VESA Mounting Screws M3 x10 M3 x 12 Power Cord 1 8M AC Adaptor Power Convert Cable VGA cable 1 8M Male to Male Dual Link DVI cable 1 8M Male to Male COM Cable 1 8M Male to Female USB cable for Touch Optional ...

Page 19: ...User Manual Chapter 1 Introduction Military 4K UHD Display 19 1 4 Schematics and Dimensions This section includes mechanical drawing and mechanical dimensions of the Display 1 4 2 Model 27 Unit mm ...

Page 20: ...User Manual Chapter 1 Introduction Military 4K UHD Display 20 1 4 3 Model 32 Unit mm ...

Page 21: ...n includes appearance and input output connectors layout No Description No Description 24V DC In VGA Connector DVI Connector Audio Line In HDMI 1 4 RS 232 for Remote Control HDMI 2 0 USB for Optional Touch Display Port For connector pin assignment refer to Chaper 2 Connecting Other Devices ...

Page 22: ...any changes to the image The table below shows the response after touching the different OSD icons Icon OSD Menu Status Response Displaying Close OSD menu Off Open the Quick menu Displaying Enter Off Open OSD Menu Displaying Move down Decrease value Off Hot Key Brightness Displaying Move up Increase value Off Hot Key Brightness Displaying Power on Off Power off To lock or unlock the key press and ...

Page 23: ...troduction Military 4K UHD Display 23 1 7 Soft Power On and Off This table shows the LED light combinations and their meaning Blue Amber Description OFF OFF Power off ON OFF Power on activate ON ON Searching mode standby mode ...

Page 24: ...r Manual Chapter 2 Getting Started Military 4K UHD Display 24 Getting Started This chapter tells you important information on power supply adapter and precautions tips Pay attention to power considerations ...

Page 25: ...This product must be grounded Use only a grounded AC outlet Install the additional PE ground wire if the local installation regulations require it If you do not use a grounded outlet while using the device you may notice an electrical tingling sensation when the palms of your hands touch the device Ce produit doit être mis à la terre Utiliser seulement un cordon d alimentation avec mise à la terre...

Page 26: ...s section to connect the display to the source of power 2 1 2 1 AC Adaptor Components Item Part Description Function a MAIN POWER indicator Glows green when the AC adaptor power is On OFF when the AC adaptor power is Off b AC IN terminal Connect the AC cord c DC OUT terminal Connect to the DC IN terminal on the monitor ...

Page 27: ...blé ou connecté à la tension maximale de la plage de tension d entrée 1 Connect the AC cord to the AC IN terminal on the AC adaptor Plug cord in firmly all the way 2 Connect the DC OUT terminal of the AC adaptor to the convert cable and connect to DC IN terminal on the monitor 3 Align the notch on the cord connector with the guiding groove and plug it in Tighten the connection by turning the lock ...

Page 28: ...tion of the arrow and remove it WARNING AVERTISSEMENT Do not remove screws other than the two screws fixing the clamp Doing so may cause electric shock Ne pas enlever les vis autres que les deux vis de fixation de la pince Cela pourrait provoquer un choc électrique When using a thick connecting cable that cannot be positioned under the attaching cable clamp or connector cover do not forcefully fix...

Page 29: ... can select the manner in which the images will be displayed Be sure to tighten and thumb screws on the individual video cable A secure connection is important to ensure the best image quality WARNING AVERTISSEMENT Make sure the power is off when connecting and disconnecting the connectors Assurez vous que l alimentation est coupée lors de la connexion et la déconnexion des connecteurs 2 2 1 Power...

Page 30: ...rs with screws Pin Signal Name Pin Signal Name 1 DVI_RX2 2 DVI_RX2 3 GND 4 DVI_RX4 5 DVI_RX4 6 DVI SCL 7 DVI SDA 8 NC 9 DVI_RX1 10 DVI_RX1 11 GND 12 DVI_RX3 13 DVI_RX3 14 5V_DVI 15 DVI_CON_CABLE 16 DVI_CON_HP 17 DVI_RX0 18 DVI_RX0 19 GND 20 DVI_RX5 21 DVI_RX5 22 GND 23 DVI_CLKP 24 DVI_CLKN C1 NC C2 NC C3 NC C4 NC C5 NC Pin Signal Name Pin Signal Name 1 HDMI_RX2 2 GND 3 HDMI_RX2 4 HDMI_RX1 5 GND 6 ...

Page 31: ...e other end to the TFT LCD display Fasten cable connectors with screws Pin Signal Name Pin Signal Name 1 HDMI_RX2 2 GND 3 HDMI_RX2 4 HDMI_RX1 5 GND 6 HDMI_RX1 7 HDMI_RX0 8 GND 9 HDMI_RX0 10 HDMI_RXC 11 GND 12 HDMI_RXC 13 HDMI_CON_CEC 14 NC 15 HDMI_CON_SCL 16 HDMI_CON_SDA 17 GND 18 5V_HDMI 19 HDMI_CON_HP Pin Signal Name Pin Signal Name 1 Lane 0 2 GND 3 Lane 0 4 Lane 1 5 GND 6 Lane 1 7 Lane 2 8 GND ...

Page 32: ...nnector for remote control 2 2 12 USB2 0 Connector for Optional Touch The 4K UHD Military Display has a USB2 0 connector for optional touch Pin Signal Name Pin Signal Name 1 RED 2 GREEN 3 BLUE 4 ID2 RES 5 GND 6 RED_RTN 7 GREEN_RTN 8 BLUE_RTN 9 KEY PWR 10 GND 11 ID0 RES 12 ID1 SDA 13 H Sync 14 V Sync 15 ID3 SCL Pin No Signal name Pin No Signal name 1 AGND 4 AUDIO_IN 2 AUDIO_IN 5 NC 3 NC Pin Signal ...

Page 33: ...Military 4K UHD Display 33 Mounting Solutions This chapter provides mounting guide for all available mounting options Pay attention to cautions and warning to avoid any damages ...

Page 34: ...y hidden behind the device WARNING AVERTISSEMENT Observe all local installation requirements for connection cable type and protection level Suivre tous les règlements locaux d installations de câblage et niveaux de protection WARNING AVERTISSEMENT Turn off the device and disconnect other peripherals before installation Éteindre l appareil et débrancher tous les périphériques avant l installation A...

Page 35: ...wer and networking wires If power wiring and device wiring paths must be crossed make sure the wires are perpendicular at the intersection point Keep the wires separated according to the interface Wires that share similar electrical characteristics must be bundled together Do not bundle input wiring with output wiring Keep them separate When necessary it is strongly advised that you label wiring t...

Page 36: ...s Refer to sub sections below for more details 3 3 1 VESA Mount 4K UHD Military Display supports VESA Mount installation VESA Plate 27 32 100 x 100 mm 200 x 100 mm 100 x 100 mm 200 x 100 mm 300 x 100 mm with customer s bracket Mounting Steps 1 Screw VESA bracket to the fixture ex wall 2 Place the device on VESA bracket 3 Continue with the instructions provided with your VESA compatible wall bracke...

Page 37: ...Military 4K UHD Display 37 On Screen Display Control This chapter provides information about On Screen Display OSD Control interfaces ...

Page 38: ...ons Refer to Chapter 1 OSD Panel for a detailed description of buttons located on OSD Panel and its functions 4 2 OSD Locking Unlocking Touching booth the and buttons simultaneously will either turn ON or OFF the OSD lockout feature 4 3 Hot Keys Touching either the or the button will initiate the brightness control feature 4 4 OSD Menu Navigation This section describes how to navigate the OSD Menu...

Page 39: ...ing on the Display mode previously selected different regions to apply the zoom function are displayed SCHEME The sub menu under SCHEME offers the user six 6 color schemes to choose from Each color scheme can be adjusted individually under the OSD function DISPLAY menu option SCHEME ADJUST The primary colors and secondary colors are adjustable PROFILE Under Profile the sub menu offers the user six...

Page 40: ...usts the color temperature of the entire screen USER 5600 6500 7600 9300 Note Low color temperature makes the screen reddish High color temperature makes the screen bluish COLOR CONTROL Adjusts the level of red green blue yellow magenta and cyan colors RGB Slide Bar Value 0 100 GAMMA Select a display gamma value for best picture quality NATIVE 1 8 2 0 2 2 2 4 D2COM SCHEME ADJUST Select scheme for ...

Page 41: ...e when video source is changed ON OFF H POSITION Controls the horizontal position of the image within the Display area of the LCD Value 0 100 V POSITION Controls the vertical position of the image within the Display area of the LCD Value 0 100 CLOCK Adjust H total Expand the width of the image on the right of the screen Narrow the width of the image on the left Value 0 100 PHASE Adjusts the image ...

Page 42: ... Display 42 4 4 4 Audio The speaker volume for all audio inputs is controlled here Press or to adjust OSD Icon Sub menu Settings Audio VOLUME Adjusts the level of volume MUTE ON OFF AUDIO SOURCE Select the Audio source AUDIO FIBER DIGITAL 1P 2P 3P 4P ...

Page 43: ...se the channel of display source Auto Scan VGA DVI HDMI 2 0 HDMI 1 4 DP SOURCE 3 Only 4P Choose the channel of display source Auto Scan VGA DVI HDMI 2 0 HDMI 1 4 DP SOURCE 4 Only 4P Choose the channel of display source Auto Scan VGA DVI HDMI 2 0 HDMI 1 4 DP 2P LR RATIO Only 2PLR SIZE 0 1 2 3 4 PIP SIZE Only 2P PIP Adjust picture in picture PIP size Value 0 10 PIP POSITION H Only 2P PIP Adjust the ...

Page 44: ...u Settings OSD OSD TURN OFF Set the time of auto close OSD menu Value 0 60 sec OSD POSITION H Adjust the horizontal location where the OSD appears on the screen Value 0 100 OSD POSITION V Adjust the vertical location where the OSD appears on the screen Value 0 100 OSD TRANSPERANCY Adjust the transparency level of OSD Value 0 255 OSD ROTATED Set to rotate the OSD menu ROTATE 0 90 270 MONITOR INFORM...

Page 45: ...e flip image mode 0 90 150 270 Left Right Up Down OVERSCAN Perform over scan function Under scan Over scan RGB YUV RGB YUV RS232 Select the RS232 signal come from local COM or Fiber Local COM Fiber TOUCH Select the Touch signal come from local COM or Fiber Local COM Fiber AMBIENT SENSOR On off IR SENSOR On off FACTORY RESET Resets OSD options back to factory settings EXCEPT FOR CHANGE SECURITY PAS...

Page 46: ... 4K UHD Display 46 Maintenance This chapter provides information on regular cleaning and maintenance procedures Follow all the recommendations included in this chapter in order to ensure long product lifecycle ...

Page 47: ...igh standard of disinfection and cleanliness A material that withstands disinfection is used for the front protection plate of the medical use LCD monitor The protection plate surface is specially treated to reduce reflection of light When solvents such as benzene or thinner or acid alkaline or abrasive detergent or chemical cleaning cloth are used for the protection plate surface monitor surface ...

Page 48: ...ment CAUTION ATTENTION Always turn off the device and disconnect other peripherals before cleaning and maintenance procedures Toujours éteindre l appareil et débrancher tous les périphériques avant que les procédures de nettoyage et d entretien Before Cleaning Make sure the device is turned off Disconnect the power cable from any AC outlet When Cleaning Wipe dust off the outside casing with a clot...

Page 49: ...Military 4K UHD Display 49 Technical Support This chapter includes troubleshooting guide and problem report form ...

Page 50: ...zed Check if the signal cable is firmly seated in the socket Check if the output level matches the input level of your computer Make sure the signal timings of the computer system are within the specification of the monitor If your computer was working with a CRT monitor you should check the current signal timing and turn off your computer before you connect the VGA Cable to this monitor The posit...

Page 51: ..._____________________________________________________________ ________________________________________________________________________ ________________________________________________________________________ ________________________________________________________________________ ________________________________________________________________________ ______________________________________________...

Page 52: ...User Manual Appendix A Frequency Table Military 4K UHD Display 52 Frequency Table This section includes information on supported display frequency Appendix ...

Page 53: ... Frequency DVI VGA DP HDMI 1 4 HDMI 2 0 640 x 480 60 Hz 72 Hz 75 Hz 480P 60 Hz 72 Hz 75 Hz 800 x 600 60 Hz 72 Hz 75 Hz 1024 x 768 60 Hz 72 Hz 75 Hz 720P 60 Hz 72 Hz 75 Hz 1280 x 1024 60 Hz 72 Hz 75 Hz 1600 x 1200 60 Hz 72 Hz 75 Hz 1920 x 1080 60 Hz 72 Hz 75 Hz 1920 x 1200 60 Hz 2560 x 1440 60 Hz 3840 x 2160 30 Hz 60 Hz 4096 x 2160 60 Hz ...

Page 54: ...Winmate Inc 9F No 111 6 Shing De Rd San Chung District Taipei 241 Taiwan R O C Tel 886 2 8511 0288 Fax 886 2 8511 0211 Email sales winmate com tw Official website www winmate com ...

Reviews: