background image

25

Operations

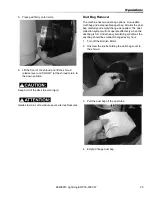
5. Press pad firmly onto Velcro.

6. Lift the front of the shroud and lift the shroud 

release lever and SLOWLY let the shroud return to 
the down position.

Keep hold of the deck to avoid injury!

Gardez la main sur le module pour éviter les blessures.

Dust Bag Removal

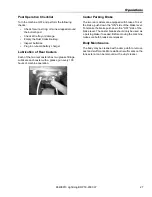
The machine has two dust bag options. A re-usable 
cloth bag and a disposable paper bag. Monitor the dust 
bag carefully and empty/change as needed. The dust 
collection system will not operate effectively when the 
dust bag is full. Under heavy burnishing conditions the 
dust bag should be emptied/changed every hour.

1. Turn off the Burnish Motor.

2. Unscrew the knobs holding the dust bag cover to 

the shroud.

3. Pull the dust bag off the dust tube.

4. Empty/Change dust bag.

86408910 Lightning BDP 50-2000 W

Summary of Contents for 10020430

Page 1: ...86408910 A 07 23 15 Lightning BDP 50 2000 W Burnisher Operating Instructions ENG MODELS 10020430 10020440...

Page 2: ...allow us to serve you better over the lifetime of the product To register your product go to http warranty karcherna com For customer assistance 1 800 444 7654 2 86408910 Lightning BDP 50 2000 W Machi...

Page 3: ...trols 20 Charger Settings 21 Battery Charger Fault Codes 22 Pre Operation Checklist 24 Turning on the Machine 24 Changing Direction 24 Stopping and Turning Off Machine 24 Installing Changing Burnishin...

Page 4: ...machine be sure to keep the KIT INSTRUCTIONS which came with the kit It contains replacement parts numbers needed for ordering future parts NOTE The manual part number is located on the lower right c...

Page 5: ...w any part of the body or clothing to come in contact with these parts while they are moving Do not try to change the pads brushes while the machine is running Do not allow other people to come near t...

Page 6: ...o the machine Do not make unauthorized modifications or alterations to this machine K rcher North America assumes no liabilities for injury or damage resulting from an unauthorized modification or alt...

Page 7: ...ion When using machine go slowly on inclines or slippery surfaces Use care when operating machine in reverse Follow all manufacturers instructions on chemical product containers when handling mixing o...

Page 8: ...du corps ou aucun v tement entrer en contact avec ces pi ces alors qu elles sont en mouvement N essayez pas de changer les patins brosses lorsque la machine est en marche Ne laissez pas d autres pers...

Page 9: ...r des blessures ou endommager la machine N effectuez pas de modifications non autoris es cette machine K rcher North America n assume aucune responsabilit quant aux blessures ou dommages r sultant d u...

Page 10: ...les surfaces inclin es ou glissantes Faites preuve de prudence lors de l utilisation de la machine en marche arri re Suivez toutes les instructions des fabricants figurant sur les contenants de produi...

Page 11: ...ch must be followed for safe operation of equipment Report machine damage or faulty operation immediately Do not use the machine if it is not in proper operating condition Following is information tha...

Page 12: ...onc tionnement s r de l quipement Signaler imm diatement tout dommage subi par la machine ou fonctionnement d fectueux Ne pas utiliser la machine si elle ne fonctionne pas correctement Ci dessous se t...

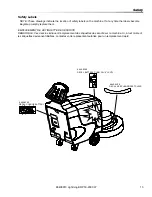
Page 13: ...t sur la machine Si tout moment les tiquettes deviennent illisibles contactez votre repr sentant autoris pour un remplacement rapid 8 640 939 0 DECAL CHARGE BATTERY 8 640 938 0 DECAL BATTERY CONN 36V...

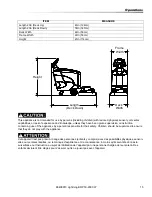
Page 14: ...0 in 51cm Burnish Pad 20 in 51cm Pad Speed 2000 rpm Pad Pressure Adjustable Forward Speed 3 25 mph 5 23 km h Reverse Speed 1 5 mph 2 4 km h Burnish Motor PM 2 5 hp 1 86 kw Transaxle 1 4 hp 186 watt Ba...

Page 15: ...pr vu l usage des personnes enfants y compris avec des possibilit s physiques sensori elles ou mentales r duites ou le manque d exp rience et de connaissance moins qu ils aient t donn s la surveillan...

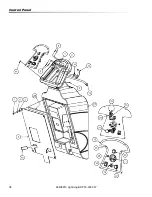
Page 16: ...dings or hillsides for at least 15m 50ft from the center of the test surface Indoor tests are conducted in a semi anechoic or sound deadening room The test surface is a single sheet of floor covering...

Page 17: ...nnect the batteries as shown in the battery connection diagram Incorrect connection of batteries can cause explosion and or serious injury Une connexion incorrecte des piles peut provoquer une explosi...

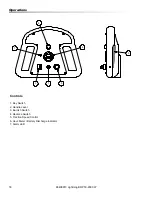
Page 18: ...erations Controls 1 Key Switch 2 Handle Lever 3 Burnish Switch 4 Reverse Switch 5 Traction Speed Control 6 Hour Meter Battery Discharge Indicator 7 Alarm LED 2 4 7 3 1 5 6 86408910 Lightning BDP 50 20...

Page 19: ...Hold down this switch while the handle lever is engaged and the machine will move in reverse Once the reverse switch is released the machine will start moving forward 5 Traction Speed Control Turn the...

Page 20: ...z les tincelles et les flammes nues l cart Gardez les carters ouverts lors du chargement When servicing machine wear protective gloves and goggles Avoid contact with battery acid Portez toujours des l...

Page 21: ...battery damage To determine your battery type see battery label or contact your battery supplier To change charger settings 1 Unplug the charger 2 Peel back the corner of the display label 3 Set the D...

Page 22: ...he charge cycle If problem persists battery pack may be damaged E02 The maximum voltage admissible by the battery has been exceeded The charge cycle was interrupted Restart the charge cycle If problem...

Page 23: ...23 Notes 86408910 Lightning BDP 50 2000 W...

Page 24: ...reverse while the handle levers are engaged hold down the reverse switch The machine will change from forward direction to reverse direction The machine will continue in the reverse direction until th...

Page 25: ...has two dust bag options A re usable cloth bag and a disposable paper bag Monitor the dust bag carefully and empty change as needed The dust collection system will not operate effectively when the du...

Page 26: ...Store machine away from objects that may fall and damage it 3 Never store burnisher near an open flame or heat producing device 4 Make sure burnisher is cleaned properly by wiping machine down with d...

Page 27: ...grease gun every 100 hours of machine operation Caster Parking Brake The two rear casters are equipped with brakes To set the brake push down the ON side of the brake lever To release the brake push...

Page 28: ...Check the electrolyte level in each battery cell before and after charging and after every 50 hours of opera tion Do not charge the batteries unless the fluid is slightly above the battery plates If...

Page 29: ...nt de l eau distill e pour remplir les l ments de la batterie Body Maintenance The body may be cleaned with a damp cloth to remove dust and scuff marks More stubborn scuff marks on the tank exterior c...

Page 30: ...lever key off and key back on to clear 1 Slow Machine Time Out The machine has been left with the key on Turn the key off and then back on again 2 Motor Disconnected The motor has a bad connection Che...

Page 31: ...Handle levers not engaged Engage handle levers Battery lockout Batteries need to be charged Red LED flashing on Dash Check alarm code reference sheet Troubleshoot accordingly Machine exhibits poor bur...

Page 32: ...32 Notes 86408910 Lightning BDP 50 2000 W...

Page 33: ...33 Spare Parts List 1 002 043 0 1 002 044 0 Lightning BDP 50 2000 W Parts 86408910 Lightning BDP 50 2000 W...

Page 34: ...34 Pad Driver 86408910 Lightning BDP 50 2000 W...

Page 35: ...5 86406410 MP155600 2 KNOB FLUTED 1 4 20 16 86406760 MP423900 1 RETAINER BATTERY WELDMENT 17 86406670 MP415300 1 SPRING COMP 18 86407530 NB9267 2 WASHER FLAT 5 16 19 86407460 NB6111 3 WASHER LOCK 5 16...

Page 36: ...36 Charger 86408910 Lightning BDP 50 2000 W...

Page 37: ...NUT KEPS 10 32 10A 86409160 MP782031 1 CHARGER BATT 36V 25A SEALED ASM 10B 86407620 MP482300 1 CHARGER BATT 36V 25A LEAD ACID ASM 11 86409110 MP423101 1 PLATE MOUNT CHARGER 12 86407430 NB6035 3 TIE NY...

Page 38: ...38 Control Panel 86408910 Lightning BDP 50 2000 W...

Page 39: ...HANDLE LEVER 1 8 X1 X 4 13 86407040 MX1025 2 SCREW PAN HD 10 24 X 3 4 14 86407560 NB9510 2 NUT SPIN LOCK 10 24 15 86406920 MP431600 1 PANEL CONTROL TRACTION WLDMNT 16 86406810 1 LABEL PANEL LIGHTNING...

Page 40: ...40 Sub Assemblies 86408910 Lightning BDP 50 2000 W...

Page 41: ...X 3 8 L 10 86407210 NB039704 1 PIN CLEVIS 1 2 X 4 1 2 11 86407170 NB025600 1 PIN PRESTO 3 32 X 1 5 8 SS 12 86406590 MP414300 1 BALL STUD LONG 10MM 13 86407370 NB068900 1 BOLT HEX TAP 1 2 13 X 1 3 4 1...

Page 42: ...42 Wheels 86408910 Lightning BDP 50 2000 W...

Page 43: ...AP HH 5 16 18 X 1 5 86407390 NB3265 4 NUT LOCK 5 16 18 NC 6 86406350 BA003300 2 KEY 3 16 X 1 50 7 86407130 NB018500 2 RING RETAINER 3 4 8 86406540 MP409800 2 WHEEL 8 X 2 DRIVE GREY 9 86407540 NB9302 4...

Page 44: ...44 Connections 1 86408910 Lightning BDP 50 2000 W...

Page 45: ...45 86408910 Lightning BDP 50 2000 W Connections 1...

Page 46: ...06480 MP279700 1 CABEL BATT CONNECTOR L 86406460 MP238200 1 CABLE BATTERY 13 5 M 86406490 MP279800 1 CABLE BATT CONNECTOR N1 86409070 MP223500 3 BATTERY 12V LEAD ACID N2 86409090 MP413600 3 BATTERY 12...

Page 47: ...47 86408910 Lightning BDP 50 2000 W Wiring Diagram...

Page 48: ...580 MP414200 BAG DUST PAPER 3 PACK PAD DRIVER 86406390 MP139800 SKIRT EDGING 6FT 183 CM PAD DRIVER 86409080 MP265100 115V CHARGER FUSE CHARGER 86406660 MP415200 GAS SPRING CHARGER 86406440 MP234700 FU...

Page 49: ...49 Notes 86408910 Lightning BDP 50 2000 W...

Reviews: