


WinBook C Series
User’s Manual
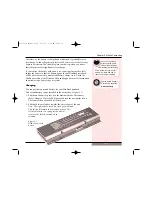
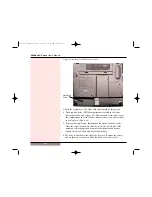
9. Holding the card at a shallow angle, insert the edge connector into
the slot. When the card is fully inserted, the edge connector should
not be visible.
10. Press the card downward until it is flat.
(Figure 4.3)
You should hear
an audible click as the latches of the connector secure the card in
place.
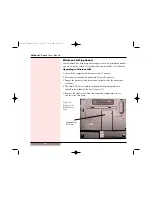
11. Once the module is properly seated, you can replace the cover on
this compartment. Press the cover flat and then slide it into place.
The hole in the cover should align with the screw hole in the
system case.
12. Replace and tighten the compartment cover screw.
13. Line up the battery for insertion into the battery bay channel. Gently
slide the battery towards the center of the unit until an audible click
indicates that the latches have been secured.
14. Turn the unit right side up. Connect your power cord if desired, and
restart the computer. Your WinBook notebook should automatically
register the new memory. If the memory size indicated during the
POST (Power On Self Test) does not match your new memory con-
figuration, retrace the steps
of the installation to be certain
that the SO-DIMM modules are
properly installed.
50
Figure 4.3: Replacing the
Memory Card
Be careful when insert-
ing or removing a SO-
DIMM module. Forcing
a SO-DIMM module in or out
of a socket can damage the sock-
et and/or the SO-DIMM module.
C-Series manual 0728 8/6/03 9:04 AM Page 50