background image

The information contained in this document may alter at any time without previous notice. It is prohib-
ited to copy or spread any parts of this document in any way without prior written allowance. All rights
reserved.
The WilTec Wildanger Technik GmbH cannot be held accountable for any possible mistakes in this
operating manual, nor in the diagrams and figures shown.
Even though, the WilTec Wildanger Technik GmbH has undergone biggest possible efforts to ensure
that the operating manual is complete, faultless and up to date, mistakes cannot be entirely avoided.
If you should find a mistake or wish to make a suggestion for improvement, we look forward to hearing
from you.

Send an e-mail to:

[email protected]

or use our contact form:

https://www.wiltec.de/contacts/

The most recent version of this manual in various languages can be found in our online shop via:

https://www.wiltec.de/docsearch

Our postal address is:

WilTec Wildanger Technik GmbH
Königsbenden 12
52249 Eschweiler
Germany

Do you wish to pick goods up? Our pick-up address is:

WilTec Wildanger Technik GmbH
Königsbenden 28
52249 Eschweiler
Germany

To shorten the waiting time and allow for a rapid on-site transaction, we ask you to call us previously
or placing your order via the webshop.

E-mail: [email protected]
Tel:+49 2403 55592-0
Fax: +49 2403 55592-15

To return orders for exchange, repair or for other purposes, please use the following address. Atten -
tion! To allow for a smooth execution of your complaint or return, it is important to contact our cus -
tomer service team before returning the goods.

Returns Department
WilTec Wildanger Technik GmbH
Königsbenden 28
52249 Eschweiler

E-mail: 

[email protected]

Tel:+49 2403 55592-0
Fax: +49 2403 55592-15

© by WilTec Wildanger Technik GmbH 

Item 61909

Page 2 

http://www.WilTec.de
http://www.aoyue.eu  


02 2021

-1

http://www.teichtip.de

Summary of Contents for 61909

Page 1: ...g instructions and safety information before using for the first time Technical changes reserved Due to further developments illustrations functioning steps and technical data can differ insignific antly Updating the documentation If you have suggestions for improvement or have found any irregularities please contact us ...

Page 2: ...anguages can be found in our online shop via https www wiltec de docsearch Our postal address is WilTec Wildanger Technik GmbH Königsbenden 12 52249 Eschweiler Germany Do you wish to pick goods up Our pick up address is WilTec Wildanger Technik GmbH Königsbenden 28 52249 Eschweiler Germany To shorten the waiting time and allow for a rapid on site transaction we ask you to call us previously or pla...

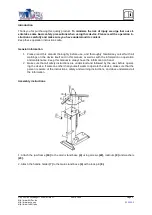
Page 3: ...ormation on operation and maintenance Keep this manual to always have the information on hand 2 Make sure that all safety instructions are understood and followed by the user before operat ing the device If someone other than yourself wants to operate the device make sure that the person is aware of the instructions safety and warning instructions and does understand all the information Assembly i...

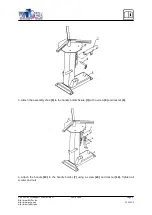
Page 4: ...e 7 with a screw 6 and locknut 9 4 Attach the handle 10 to the handle holder 7 using a screw 24 and locknut 12 Tighten all screws and nuts by WilTec Wildanger Technik GmbH Item 61909 Page 4 http www WilTec de http www aoyue eu 02 2021 1 http www teichtip de ...

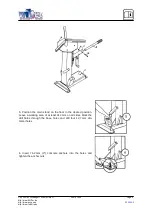
Page 5: ...14 mm on all sides Mark the drill holes through the base holes and drill four 12 7 mm dia meter holes 6 Insert 76 2 mm 3 concrete anchors into the holes and tighten the anchor nuts by WilTec Wildanger Technik GmbH Item 61909 Page 5 http www WilTec de http www aoyue eu 02 2021 1 http www teichtip de ...

Page 6: ...servicing bearing centred wheels use a centre shaft corresponding to the bearing size of the wheel 5 8 or Once the wheel is in place insert the appropriate post into the wheel bearing Maintenance of hub centred wheels uses a large diameter post Insert the post directly into the middle of the arms as soon as the wheel is in place Operation instructions Slide clamps are positioned to the correct whe...

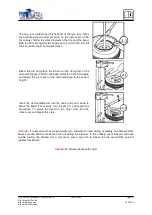
Page 7: ...d tyre using the rod end of the tyre tool The ball end is pushed under the upper bead and placed on the rim see illustration While pushing the lever toward the centre with one hand the tire must be raised with the other while rotating the unit in a circle Disassemble the lower bead in the same way as above The angle of the tool to the centre post can be varied according to operator height or rim d...

Page 8: ...sert the demountable bar into the shoe and pull it down to break the bead If necessary turn the tire 90 and repeat the procedure To break the bead on the other side turn the wheel over and repeat this step Caution It is important that a high quality tyre lubricant is used during assembly and disassembly Make sure the bead is centred on the rim during the process In the unlikely event that you will...

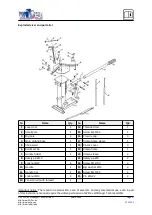
Page 9: ...y pin Ø12 21 Safety pin Ø8 2 9 Locknut M12 5 22 Screw M12 30 4 10 Handle 1 23 Big washer Ø12 4 11 Handle bar 1 24 Screw M10 55 1 12 Locknut M10 4 25 Pin Ø6 22 2 13 Tension rod with thread 1 Important notice The reprint or reproduction even of excerpts and any commercial use even in part of this instructions manual require the written permission of WilTec Wildanger Technik GmbH by WilTec Wildanger ...

Reviews: