3
KEGERATOR
2
USER MANUAL
FERMENTING &
DISPENSING
The WilliamsWarn Kegerator can be
used to both ferment and dispense
fresh beer using WilliamsWarn
brewing technology.
FERMENTING
The WilliamsWarn Kegerator has the
ability to ferment and dispense up to two
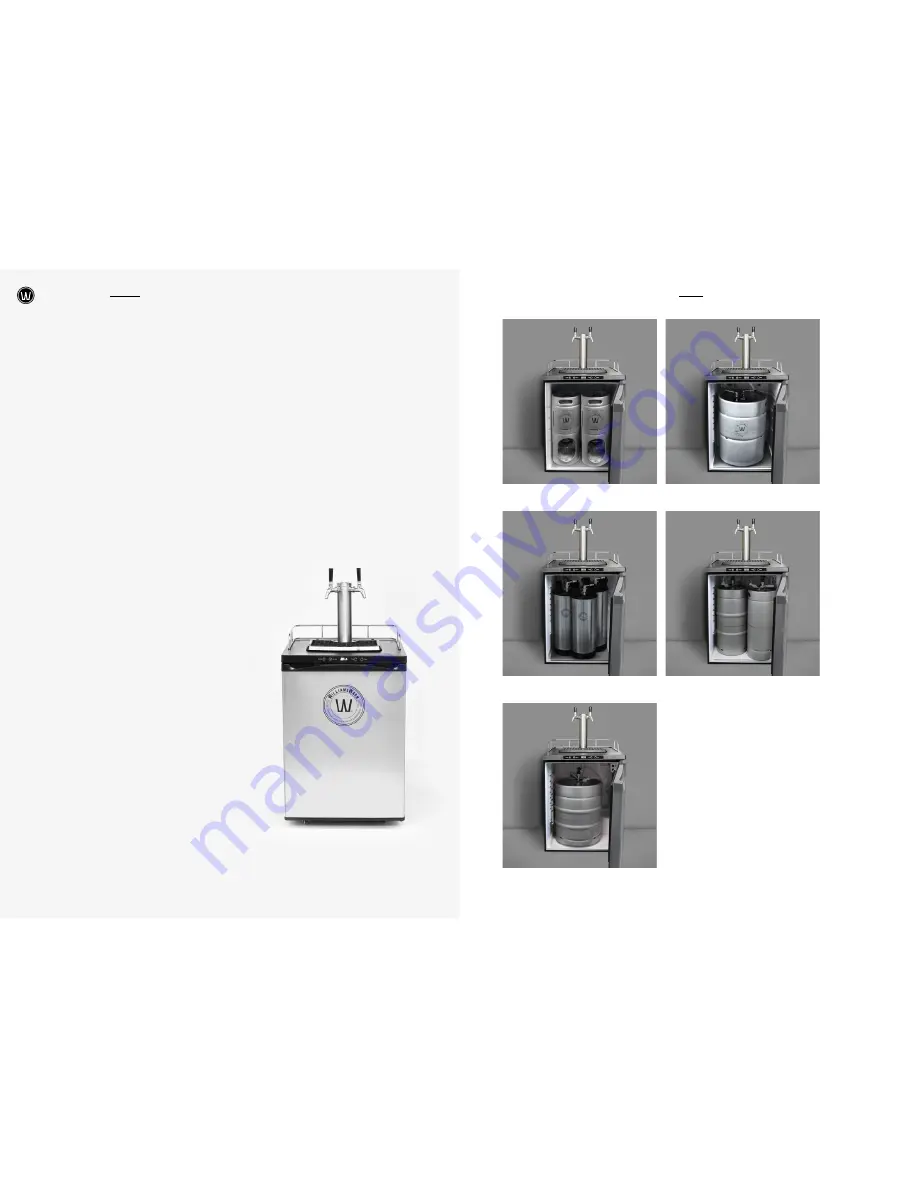
BrewKeg10s™ at one time. The Kegerator
works in conjunction with the heating
belt and temperature controller and the
brewer can set the desired fermentation
temperature. Once fermentation is complete
the brewer can then set the fridge at 1°C
and perform the clarification steps. Once
clarified the brewer can then connect the
BrewKeg10™ to the tap using the fittings
provided and dispense directly from the
BrewKeg10™. See Figure 1.
DISPENSING
The WilliamsWarn Kegerator can dispense
a variety of dispensing keg once the
brewing process is complete. There are
two styles of kegs that are used, the most
common for personal use is a Cornelius
Keg which is available in 9.5 and 19L
(as shown in Figure 3). The other style of
keg which is commonly used in bars is a
D- Sanke keg which is available in 20L,
30L and 50L kegs. The D-Sanke kegs
will require a Coupler and a Liquid
and Gas Adapter, which connects onto
the Gas and Liquid ports (available on
http://www.williamswarn.com/Shop/
Dispensing-Accessories ). See Figures 4 and
5. Additionally a BrewKeg25™ can fit into
the WilliamsWarn Kegerator once it has
finished the brewing process and the
sediment bottle and stand has been
removed. A BrewKeg25™ has the same
connections as a Cornelius Keg.
See Figure 2.
Figure 1: Two BrewKeg10™
Figure 4: One 20L and One 30L D-Sanke Keg
Figure 5: One 50L D-Sanke Keg
Figure 3: Three 19L Cornelius Kegs
Figure 2: One BrewKeg25™
Summary of Contents for kegerator
Page 8: ......


