6
EN
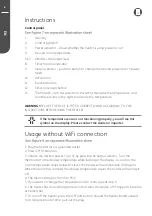
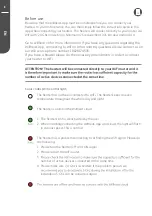
Control panel
1.
Standby
2.
Control light WiFi
3.
Power indicator - shows whether the heater is using power or not
4.
Desired room temperature
5,6,7 Indicates the output level
8.
Timer function indicator
9.
Output selector – push the button to change the desired power level. 3 power
levels.
10.
WiFi button
11.
Function button
12.
Timer activation button
13.
rature, and
turn the selector to the right to increase the temperature
WARNING!
BE SURE THE FOOT IS FITTED CORRECTLY AND ACCORDING TO THE
INSTRUCTIONS BEFORE USING THE HEATER!
Instructions
If the temperature sensor is not functioning properly, you will see this
symbol on the display. Please contact the dealer or importer.
1. Plug the heater into a grounded outlet.
2. Press OFF/ON button.
3. Choose the desired power |, || or |||, by pressing the output selector. Turn the
thermostat to the desired temperature while looking at the display. As soon as the
room temperature drops below this level, the heater will automatically start again.
When the room has reached the desired temperature again, the heater will turn itself
off.
4. The thermostat goes from 5 to 35°C.
5. If you want to change the temperature in the room, repeat step 3.
6. The heater has an overheat protection that turns the device off if any parts become
extremely hot.
7. To turn off the heater, press the OFF/ON button. Should the heater be left unused
for a longer period of time, pull out the plug.
Usage without WiFi connection
Usage without WiFi connection


