Whittier Wood 1143DUETd Assembly Instructions Manual Download Page 3

1143DUETd 6-Drawer Addison Chest 
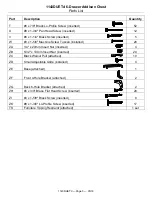
Parts List


1143DUETd 

— Page 3 — 05/18 

Part 

Description 

Quantity 

#8 x 7/8" Black Lo-Profile Screw (inserted) 


52 

#8 x 1-3/4" Pan Head Screw (inserted) 


12 

#8 x 1-1/4" Black Screw (inserted) 


#8 x 1-5/8" Machine Screw Tuscan (installed) 


20 

ZA 

1/4" x 20mm Insert Nut (inserted) 


ZB 

5/32" x 10mm Insert Nut (inserted) 


20 

ZC 

Black Walnut Pull (attached) 


10 

ZD 

Small Adjustable Glide (installed) 


ZE 

Base (attached) 


ZF 

Front 4-Hole Bracket (attached) 


ZG 

Back 6-Hole Bracket (attached) 


ZH 

#6 x 3/4" Brass Flat Head Screw (inserted) 


20 

ZI 

#8 x 1-5/8" Black Screw (inserted) 


ZK 

#8 x 1-3/8" Lo-Profile Screw (inserted) 


17 

TS 

Furniture Tipping Restraint (attached) 

1 set 


Summary of Contents for 1143DUETd

Page 1: ...ase contact us immediately for replacement Drilling sawing sanding or machining wood products can expose you to wood dust a substance known to the state of California to cause cancer Avoid inhaling wo...

Page 2: ...ted 2 E Medium Lower Drawer Box inserted 1 F Large Lower Drawer Box inserted 1 G Left Top Drawer Face installed 1 H Right Top Drawer Face installed 1 I Small Lower Drawer Face installed 2 J Medium Low...

Page 3: ...e Screw Tuscan installed 20 ZA 1 4 x 20mm Insert Nut inserted 4 ZB 5 32 x 10mm Insert Nut inserted 20 ZC Black Walnut Pull attached 10 ZD Small Adjustable Glide installed 4 ZE Base attached 1 ZF Front...

Page 4: ...re 1 2 This piece of furniture includes a drawer interlock system allowing only one lower drawer to be open at a time This is a safety feature to reduce the risk of tip over Do not defeat or remove th...

Page 5: ...h drawer came from to make sure you place them back into their correct positions 5 When removing drawers from furniture featuring the Anti Tip Drawer Interlock System it is important that the drawer b...

Page 6: ...d the front of the case you cannot remove the First Drawer Move the upper arms of the Anti tip Snapper to the unlocked position as shown in Figure 6e You can then remove the First Drawer as shown in S...

Page 7: ...e screws into the corner of the baseboard and floor see the instruction included inside the tipping restraint kit for an alternate installation 7 Decide where you want to place the piece of furniture...

Page 8: ...ntil portion between the Cam Buckle A and the back apron of the item is tight See Figures 8 and 8a If you need to move the piece of furniture reach beneath and locate the buckle which connects the two...

Reviews: