background image

22

OVEN DOOR EXTERIOR

Cleaning Method:

Glass cleaner and paper towels or nonabrasive plastic 
scrubbing pad: Apply glass cleaner to soft cloth or sponge, 
not directly on panel. 

affresh

®

 Kitchen and Appliance Cleaner Part Number 

W10355010 (not included):

See “Assistance or Service” section to order.

OVEN CAVITY

Do not use oven cleaners.

Food spills should be cleaned when oven cools. At high 
temperatures, foods react with porcelain and staining, etching, 
pitting or faint white spots can result.

Cleaning Method:

Self-Cleaning cycle: See “Self-Cleaning Cycle” first.

OVEN RACKS

Cleaning Method:

Self-Cleaning cycle: See “Self-Cleaning Cycle” first. Remove 
racks, or they will discolor and become harder to slide. If this 
happens, a light coating of vegetable oil applied to the rack 
guides will help them slide.

Steel-wool pad.

Oven Light

The ovens light is a standard 40-watt appliance bulb. 

Before replacing, make sure the oven and cooktop are cool and 
the control knobs are off.

To Replace:

1. Unplug range or disconnect power.

2. Turn the glass bulb cover in the back of the oven 

counterclockwise to remove.

3. Turn bulb counterclockwise to remove from socket.

4. Replace bulb, then bulb cover by turning clockwise.

5. Plug in range or reconnect power.

Oven Door

IMPORTANT:

Use two hands to remove oven door(s).

Prior to removing the oven door, prepare a surface where you 
will place it. This surface should be flat and covered with a 
soft blanket.

To avoid oven door glass breakage:

Do not close the oven door if the racks are not fully inserted 
into the oven cavity or when bakeware extends past the front 
edge of an oven rack.

Do not set objects on the glass surface of the oven door.

Do not hit glass surfaces with bakeware or other objects.

Do not wipe down glass surfaces until the oven has 
completely cooled.

For normal range use, it is not suggested to remove the oven 
door. However, if removal is necessary, make sure the oven is off 
and cool. Then, follow these instructions. The oven door is heavy.

To Remove:

1. Open oven door all the way.

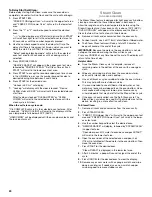
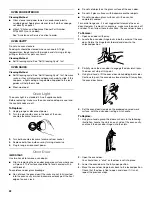
2. Locate the oven door hinge locks in both corners of the oven 

door. Rotate the hinge locks forward and down to the 
unlocked position.

3. Partially close the oven door to engage the door latch locks. 

The door will stop at this point.

4. Using two hands, lift the oven door while holding both sides.

Continue to push the oven door closed and pull it away from 
the oven door frame.

5. Set the oven door(s) aside on the prepared covered work 

surface, with the oven door resting on its handle.

To Replace:

1. Using two hands, grasp the door as shown in the following 

illustration. Locate the slots on each side of the oven cavity, 
and insert the oven door hinges into the slots.

2. Open the oven door.

You should hear a “click” as the door is set into place.

3. Lower the oven door to the fully open position.

4. Move the oven door hinge locks back to the locked position. 

Check that the door is free to open and close. If it is not, 
repeat the previous steps.

Summary of Contents for WGE555S0BB

Page 1: ...it our website at www whirlpool com In Canada call 1 800 807 6777 or visit our website at www whirlpool ca CUISINIÈRE ÉLECTRIQUE À DOUBLE FOUR Guide d utilisation et d entretien Au Canada pour assistance installation ou service composez le 1 800 807 6777 ou visitez notre site Web à www whirlpool ca Table of Contents Table des matières 2 W10600812A ...

Page 2: ...TILISATION DE LA TABLE DE CUISSON 30 Commandes de la table de cuisson 31 Élément à dimension double 31 Zone de réchauffage 32 Vitrocéramique 32 Préparation de conserves à la maison 33 Ustensiles de cuisson 33 COMMANDES ÉLECTRONIQUES DU FOUR 34 Écran 34 Annulation 34 Lampes du four 34 Minuterie de four 34 Économie d énergie 35 Horloge 35 Réglages 35 Commande de la température du four 36 Verrouillag...

Page 3: ...y alert symbol and either the word DANGER or WARNING These words mean follow instructions instructions DANGER WARNING Tip Over Hazard A child or adult can tip the range and be killed Verify the anti tip bracket has been properly installed and engaged per installation instructions Re engage anti tip bracket if range is moved Do not operate range without anti tip bracket installed and engaged Failur...

Page 4: ...f these pans or bowls during cooking may subject wiring or components underneath to damage Protective Liners Do not use aluminum foil to line surface unit drip bowls or oven bottoms except as suggested in the manual Improper installation of these liners may result in a risk of electric shock or fire Glazed Cooking Utensils Only certain types of glass glass ceramic ceramic earthenware or other glaz...

Page 5: ...tronic oven control E Right rear control knob F Right front Rapid Boil element control knob G Hot surface indicator light H Medium indicator I Warm Zone off J Warm Zone on K Cooktop on indicator light A Surface cooking area locator B Left front duel element control knob C Left rear control knob D Electronic oven control E Right rear control knob F Right front Rapid Boil element control knob G Hot ...

Page 6: ...mbines both the inner and outer elements and is recommended for larger cookware To Use Single Element 1 Push in and turn the control knob counterclockwise from the OFF position to the Single zone anywhere between HIGH and LOW 2 Push in and turn knob to OFF when finished To Use Dual Element 1 Push in and turn the control knob clockwise from the OFF position to the Dual zone anywhere between HIGH an...

Page 7: ...oktop could crack the cooktop To avoid damage to the cooktop do not leave a hot lid on the cooktop As the cooktop cools air can become trapped between the lid and the cooktop and the ceramic glass could break when the lid is removed For foods containing sugar in any form clean up all spills and soils as soon as possible Allow the cooktop to cool down slightly Then while wearing oven mitts remove t...

Page 8: ...r base in cookware However when used as a base they can leave permanent marks on the cooktop Cookware material is a factor in how quickly and evenly heat is transferred which affects cooking results A nonstick finish has the same characteristics as its base material For example aluminum cookware with a nonstick finish will take on the properties of aluminum Cookware with nonstick surfaces should n...

Page 9: ...lights will come on when either door is open The oven lights will not come on during the Self Clean cycle Oven Timer The Oven Timer can be set in hours or minutes up to 9 hours and 59 minutes and counts down the set time The Oven Timer does not start or stop the oven A Upper oven settings B Cook time C Start time D Oven display E Number keypad F Upper oven start G Timer set off H Settings I Upper ...

Page 10: ...Press the Clock icon or press START Time Set will display in the upper text area for 5 seconds Once it disappears the time is set Settings The Settings function enables you to personalize audible tones and oven operation to suit your needs After completing your adjustments press CANCEL or wait 30 seconds for the display to show the time of day To change any of the following settings press SETTINGS...

Page 11: ...g and exit Language Change Language Options The Language is factory preset to English but can be changed to French or Spanish 1 Press SETTINGS until LANGUAGE is displayed 2 Press the 1 keypad to select French or press the 2 keypad to select Spanish In French press the 1 keypad to select Spanish or press the 2 keypad to select English In Spanish press the 1 keypad to select English or press the 2 k...

Page 12: ...h do not line the oven bottom with any type of foil liner or cookware For best cooking results do not cover entire rack with foil because air must be able to move freely To catch spills place foil on rack below dish Make sure foil is at least 1 3 cm larger than the dish and that it is turned up at the edges Positioning Racks and Bakeware IMPORTANT To avoid permanent damage to the porcelain finish ...

Page 13: ... be used to determine doneness Oven Vents The oven vents release hot air and moisture from the ovens and should not be blocked or covered Blocking or covering the vents will cause poor air circulation affecting cooking and cleaning results Do not set plastics paper or other items that could melt or burn near the oven vents FUNCTION NUMBER OF RACKS USED RACK POSITION S Convection baking 1 3 Convect...

Page 14: ...ven increase the cook time by 15 minutes When the Set Cooking Time expires the oven s will turn off Broiling Broiling uses direct radiant heat to cook food The lower the temperature the slower the cooking Thicker cuts and unevenly shaped pieces of meat fish and poultry may cook better at lower broiling temperatures For best results use the lower oven and a broiler pan with grid not provided They a...

Page 15: ...sing more than one rack position bakeware cookware on the racks to allow movement of the fan circulated air around the food See the Positioning Racks and Bakeware section If the oven is full extra cooking time may be needed For optimal cooking results do not cover food When roasting poultry and meat use a broiler pan and grid It is not necessary to wait for the oven to preheat unless recommended i...

Page 16: ...ired oven when finished 8 Remove food from the oven Convection Roasting 1 Press CONVECT until CONVECT ROAST is displayed in the lower text area followed by Push START 2 Press START for the desired oven Set temp or will scroll in the lower oven text area followed by Push START 3 Use the number keypad to enter the desired temperature 4 Press START for the desired oven CONVECT ROAST will appear in th...

Page 17: ...e same as before Sabbath Mode was enabled When Sabbath Mode is enabled and activated it can be used for any Bake Timed Bake or Delayed Bake cycle by completing the steps in To Activate Sabbath Mode in this section When Sabbath Mode is activated your range will run under the following conditions All cooking functions on both ovens are disabled except for Bake Timed Bake and Delayed Bake The followi...

Page 18: ...art Time feature is available on the most cycles except Steam Clean and Keep Warm To Set a Cook Time 1 Press the button for any cooking function except Precise Clean Steam Clean or Keep Warm for the desired oven Use the number keypad to enter a temperature other than the one displayed Then press START for the desired oven 2 Press COOK TIME 3 Use the number keypad to enter the length of time to coo...

Page 19: ...f your oven however the time can be changed A recommended clean time will display when you activate the clean cycle You may choose this clean time or select your own Clean times range from 2 hours for light soil and between 3 hours and 4 hours for average to heavy soil The clean time can be set in 5 minute increments Once the oven has completely cooled remove ash with a damp cloth To avoid breakin...

Page 20: ...ove 100 F 38 C OVEN COOLING will appear in the display and the Steam Clean feature will not activate until it cools down Remove all racks and accessories from the oven cavity For best results use 4 oz 118 mL of distilled or filtered water The Steam Clean feature will take a total of 20 minutes A beep will sound at the end of the cycle IMPORTANT Because the water in the oven bottom is hot do not op...

Page 21: ...nt to wear oven mitts while cleaning the cooktop affresh Cooktop Cleaner and Cooktop Cleaning Pads Clean as soon as cooktop has cooled down Rub product into surface with a Cooktop Cleaning Pad Continue rubbing until white film disappears Heavy soil dark streaks specks and discoloration affresh Cooktop Cleaner or nonabrasive cleanser with Cooktop Cleaning Pads Clean as soon as cooktop has cooled do...

Page 22: ...ould be flat and covered with a soft blanket To avoid oven door glass breakage Do not close the oven door if the racks are not fully inserted into the oven cavity or when bakeware extends past the front edge of an oven rack Do not set objects on the glass surface of the oven door Do not hit glass surfaces with bakeware or other objects Do not wipe down glass surfaces until the oven has completely ...

Page 23: ... a delay start been set See Timed Delay Cooking section On some models is the oven control lockout set See Control Lockout section On some models is the Sabbath Mode set See the Sabbath Mode section Oven temperature too high or too low Does the oven temperature calibration need adjustment See Oven Temperature Control section Oven indicator lights flash Do the oven indicator lights flash See the Di...

Page 24: ...ioned properly See Positioning Racks and Bakeware section Is there proper air circulation around bakeware See Positioning Racks and Bakeware section Is the batter evenly distributed in the pan Check that batter is level in the pan Is the proper length of time being used Adjust cooking time Has the oven door been opened while cooking Oven peeking releases oven heat and can result in longer cooking ...

Page 25: ... further assistance you can write to Whirlpool Corporation with any questions or concerns at Whirlpool Brand Home Appliances Customer eXperience Center 553 Benson Road Benton Harbor MI 49022 2692 Please include a daytime phone number in your correspondence Accessories affresh Stainless Steel Cleaner stainless steel models Order Part Number W10355016 Cooktop Care Kit ceramic glass models includes c...

Page 26: ...ice by an authorized Whirlpool servicer is not available 10 The removal and reinstallation of your major appliance if it is installed in an inaccessible location or is not installed in accordance with published installation instructions 11 Major appliances with original model serial numbers that have been removed altered or cannot be easily determined This warranty is void if the factory applied s...

Page 27: ...rité et le mot DANGER ou AVERTISSEMENT Ces mots signifient Risque de basculement Un enfant ou une personne adulte peut faire basculer la cuisinière ce qui peut causer un décès Vérifier que la bride antibasculement est bien installée et engagée conformément aux instructions d installation Réengager la bride antibasculement si la cuisinière a été déplacée Ne pas faire fonctionner la cuisinière si la...

Page 28: ...e foncée Les endroits près des éléments de surface peuvent devenir assez chauds pour causer des brûlures Pendant et après l utilisation ne pas toucher les éléments chauffants et ne pas laisser les vêtements ou autres matériaux inflammables entrer en contact avec ces éléments de surface ou les endroits près des éléments avant qu ils soient suffisamment refroidis Ces endroits comprennent la table de...

Page 29: ... pour causer des brûlures Pendant et après l utilisation ne pas toucher ou laisser des vêtements ou autres matériaux inflammables venir en contact avec les éléments chauds ou les surfaces intérieures chaudes du four avant qu ils aient eu assez de temps pour refroidir D autres surfaces de l appareil peuvent devenir assez chaudes pour causer des brûlures Ces surfaces comprennent les ouvertures de l ...

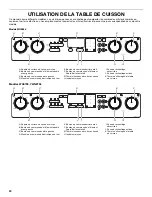
Page 30: ...on de commande arrière droit F Bouton de commande de l élément Rapid Boil avant droit G Témoin lumineux de surface chaude H Indicateur moyen I Zone de réchauffage désactivée J Zone de réchauffage activée K Témoin d allumage de la table de cuisson A Repère de surface de zone de cuisson B Bouton de commande de l élément double avant gauche C Bouton de commande arrière gauche D Module de commande éle...

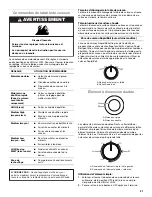
Page 31: ...n double combine l élément interne et l élément externe il est recommandé pour les ustensiles de cuisson de plus grande taille Utilisation de l élément simple 1 Enfoncer et tourner le bouton de commande dans le sens antihoraire de la position OFF arrêt à la zone simple n importe où entre HIGH et LOW 2 Pousser et tourner le bouton à OFF après avoir terminé RÉGLAGE UTILISATION RECOMMANDÉE Éléments d...

Page 32: ...uleur initiale au fur et à mesure que le verre refroidira Le nettoyage de la table de cuisson avant et après chaque utilisation permettra d éviter les taches et d obtenir une meilleure répartition de la chaleur Sur les tables de cuisson avec vitrocéramique de couleur claire les souillures et taches peuvent être plus visibles et nécessiter davantage de nettoyage et de soin L utilisation d un nettoy...

Page 33: ...its pour la préparation de conserves peuvent aussi offrir de l aide Ustensiles de cuisson IMPORTANT Ne pas laisser d ustensile de cuisson vide sur une surface de cuisson un élément ou un brûleur de surface chauds Les ustensiles de cuisson idéaux doivent avoir un fond plat des parois droites un couvercle qui ferme bien et le matériau doit être d épaisseur moyenne à forte Les finis rugueux peuvent é...

Page 34: ...erie de four La minuterie de four peut être réglée en heures ou en minutes jusqu à concurrence de 9 heures et 59 minutes et procède à un compte à rebours de la durée réglée La minuterie de four ne met pas en marche le four et ne l éteint pas A Commandes du four supérieur B Durée de cuisson C Heure de mise en marche D Afficheur du four E Touches numériques F Mise en marche du four supérieur G Régla...

Page 35: ...in AM ou l après midi PM Durée rég s affiche 3 Utiliser le clavier numérique pour entrer l heure 4 Appuyer sur Clock horloge ou appuyer sur START mise en marche Durée rég apparaît dans la zone de texte du four supérieur pendant 5 secondes Lorsque l affichage disparaît cela signifie que l heure est réglée Réglages Les réglages permettent de personnaliser les signaux sonores audibles et le fonctionn...

Page 36: ...er le réglage 3 Appuyer sur START mise en marche ou CANCEL annulation pour enregistrer le réglage et sortir Sabbat Mode Sabbat Le mode Sabbat permet à la cuisinière de fonctionner dans le respect des critères du Sabbat juif Star K pour un programme de cuisson au four une cuisson au four minutée ou une cuisson au four différée Consulter la section Mode Sabbat pour une description complète de cette ...

Page 37: ... L option de préchauffage standard est recommandée pour une cuisson au four sur plusieurs grilles dans le four inférieur Le four supérieur est utilisé uniquement pour une cuisson sur une seule grille Lorsqu on utilise le four inférieur indépendamment du four supérieur le four inférieur utilise par défaut l option de préchauffage rapide cette option doit être employée uniquement pour une cuisson au...

Page 38: ...ts Pour des résultats optimaux lors de la cuisson au four de biscuits sur 2 grilles utiliser la fonction Bake cuisson au four et les positions de grilles 2 et 4 Ustensiles de cuisson L air chaud doit pouvoir circuler autour de l aliment pour le cuire uniformément Laisser 2 5 0 cm entre les ustensiles de cuisson au four et les parois du four ALIMENT POSITION DE LA GRILLE Tous les aliments 1 ALIMENT...

Page 39: ...nt la cuisson au four Ceci est normal Utiliser uniquement 1 grille pour le four supérieur Cuisson au four 1 Appuyer sur le bouton BAKE cuisson au four du four supérieur ou inférieur CUISSON FOUR défile dans la zone de texte supérieure ou inférieure selon le four sélectionné et 350 F 175 C s affiche Rég temp ou défile dans la zone de texte du four sélectionné suivi de Appuyez START 2 Appuyer sur le...

Page 40: ... de gras pour réduire les éclaboussures Entailler le gras résiduel sur les côtés pour éviter que la viande se recroqueville Sélectionner la cuisson au gril HI 550 F 288 C pour la plupart des cuissons au gril Sélectionner LO 450 F 232 C pour la cuisson au gril à basse température d aliments mettant plus de temps à cuire telle la volaille afin d éviter une surcuisson Sortir la grille jusqu à la buté...

Page 41: ...omètre à viande pour déterminer le degré de cuisson des viandes et de la volaille Vérifier la température du porc et de la volaille à 2 ou 3 endroits différents y compris la partie la plus épaisse Avant la cuisson par convection placer la ou les grille s tel qu indiqué à la section Positionnement des grilles et des ustensiles de cuisson En cas d utilisation de plusieurs grilles positionner l usten...

Page 42: ...de Appuyez START 3 Appuyer sur les touches numériques pour entrer la température souhaitée 4 Appuyer sur START mise en marche du four supérieur ou inférieur GRIL CONVECT défile dans la zone de texte du four inférieur suivi de Préchauffage Préchauffage reste affiché dans la zone de texte inférieure jusqu à ce que la température réglée soit atteinte 5 Une fois le programme de préchauffage terminé GR...

Page 43: ...ppuie sur le bouton CANCEL annulation du four sélectionné 5 Placer les aliments dans le four Pour modifier la température du four pendant la cuisson appuyer sur les touches numériques pour entrer la température souhaitée puis appuyer sur START mise en marche 6 Appuyer sur CANCEL annulation pour le four sélectionné une fois terminé 7 Retirer les aliments du four Pour annuler la caractéristique Keep...

Page 44: ...ART mise en marche du four supérieur ou inférieur pendant plus d une 1 seconde pour régler le changement de température Aucun changement de température n apparaît sur l affichage Réglage de la température lorsque le mode Sabbat fonctionne sur les deux fours 1 Appuyer sur la touche BAKE cuisson au four du four souhaité 2 Appuyer sur la touche numérique correspondant au réglage de température souhai...

Page 45: ... Clean nettoyage avec vapeur ou Keep Warm garder au chaud Appuyer sur les touches numériques pour entrer une température autre que celle qui est affichée puis appuyer sur START 2 Appuyer sur START TIME heure de mise en marche 3 Appuyer sur la touche 1 pour sélectionner le four supérieur ou sur 2 pour le four inférieur 4 Appuyer sur les touches numériques pour entrer la durée de mise en marche diff...

Page 46: ... fois Les portes des deux fours se verrouillent lorsque l un des fours est en cours de nettoyage Fonctionnement du programme IMPORTANT Le chauffage et le refroidissement de la porcelaine sur l acier dans le four peuvent causer une décoloration une perte de lustre des fissures minuscules des craquements et des bruits d éclatement Le programme d autonettoyage utilise des températures très élevées br...

Page 47: ...tionné Après 5 secondes Refroid four défile sur l affichage jusqu à ce que la température du four tombe en dessous de 500 F 260 C Déverrouiller s affiche jusqu à ce que la porte du four se déverrouille et l icône de verrouillage s éteigne Nettoyage à la vapeur sur certains modèles La caractéristique Steam Clean nettoyage avec vapeur est conçue pour un nettoyage léger du fond de la cavité du four p...

Page 48: ...ur nettoyer et éliminer les taches de la table de cuisson Utiliser régulièrement le protecteur de table de cuisson pièce numéro 31463A afin d éviter l accumulation de taches les piqûres et les éraflures et pour entretenir la table de cuisson afin de faciliter les nettoyages à venir Ils peuvent être commandés comme accessoires Voir la section Accessoires pour plus de renseignements Le grattoir pour...

Page 49: ...e de piqûres ou de légères taches blanches Méthode de nettoyage Programme d autonettoyage Voir d abord Programme d autonettoyage GRILLES DU FOUR Méthode de nettoyage Programme d autonettoyage Voir d abord Programme d autonettoyage Retirer les grilles sans quoi elles se décoloreront et glisseront plus difficilement Le cas échéant une légère couche d huile végétale appliquée sur les glissières facil...

Page 50: ...âssis de la porte du four 5 Conserver la les porte s du four à part sur la surface de travail couverte en faisant reposer la porte sur sa poignée Réinstallation 1 Saisir la porte avec les deux mains comme indiqué dans l illustration suivante Repérer les encoches situées de chaque côté de la cavité du four et insérer les charnières de la porte du four dans les encoches 2 Ouvrir la porte du four Vou...

Page 51: ...cuisson La cuisinière est elle d aplomb Niveler la cuisinière Voir les Instructions d installation Le four ne fonctionne pas La commande électronique du four est elle bien réglée Voir la section Commandes électroniques du four Une mise en marche différée a t elle été réglée Voir la section Cuisson minutée différée Sur certains modèles le verrouillage des commandes du four est il réglé Voir la sect...

Page 52: ... four et Cuisson au gril Utilise t on un ustensile de cuisson au four approprié Voir la section Ustensiles de cuisson au four Les grilles sont elles en bonne position Voir la section Positionnement des grilles et ustensiles de cuisson Existe t il une circulation d air appropriée autour des ustensiles de cuisson Voir la section Positionnement des grilles et ustensiles de cuisson La pâte est elle di...

Page 53: ...x marchands locaux aux distributeurs de pièces de rechange et aux compagnies de service Les techniciens de service désignés par Whirlpool Canada LP sont formés pour remplir la garantie des produits et fournir un service après la garantie partout au Canada Pour plus d assistance Si vous avez besoin de plus d assistance vous pouvez soumettre par écrit toute question ou préoccupation à Whirlpool Cana...

Page 54: ...iés au transport du gros appareil ménager du domicile pour réparation Ce gros appareil ménager est conçu pour être réparé à domicile et seul le service à domicile est couvert par la présente garantie 8 Les réparations aux pièces ou systèmes résultant d une modification non autorisée faite à l appareil 9 Les frais de transport pour le service d un produit si votre gros appareil est situé dans une r...

Page 55: ...us devrez connaître le numéro de modèle et le numéro de série au complet Vous trouverez ces renseignements sur la plaque signalétique située sur le produit Nom du marchand ______________________________________________ Adresse ________________________________________________________ Numéro de téléphone ___________________________________________ Numéro de modèle____________________________________...

Page 56: ...W10600812A 2013 Whirlpool Used under license in Canada All rights reserved Utilisé sous licence au Canada Tous droits réservés 5 13 Printed in U S A Imprimé aux É U ...

Reviews: