background image

2

INSTALLATION

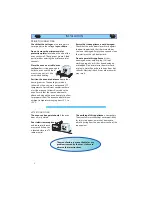
PRIOR TO CONNECTING

Check that the voltage

 on the rating plate 

corresponds to the voltage 

in your home

.

Place the oven on a stable, even 
surface

 that is strong enough to 

hold the oven and the food 
utensils you put in it. Use 
care when handling.

Position the oven at a distance

 from other 

heating sources. The cooling air, which is 
taken in by the oven, must not exceed 35°C 
temperature. For suffi

  cient ventilation there 

must be a space of at least 8-cm above the 
oven. Ensure that the space underneath, 
above and around the oven is empty to allow 
for proper airfl ow. The oven can


operate in an 

ambient temperature ranging from +5°C to 
+35°C.

Ensure that the appliance is not damaged.


Check that the oven door closes fi rmly against 
the door support and that the internal door 
seal is not damaged. Empty the oven and clean 
the interior with a soft, damp cloth.

AFTER CONNECTING

The oven can be operated only

 if the oven 

door is fi rmly closed.

The earthing of this appliance

 is compulsory. 

The manufacturer will accept no responsibility 
for injury to persons, animals or damage to 
objects arising from the non-observance of this 
requirement.

The manufacturers are not liable for any 
problems caused by the user’s failure to 
observe these instructions.

Do not operate this appliance

 if it has 

a damaged mains cord or plug, if it is not 
working properly, or if it has been damaged 
or dropped. Do not immerse the mains cord 
or plug in water. Keep the cord away from hot 
surfaces. Electrical shock, fi re or other hazards 
may result.

Do not remove the microwave inlet 
protection plates

 located on the side of the 

oven cavity wall. They prevent grease & food 
particles from entering the microwave inlet 
channels.

Poor television reception


and radio interference 
may result if the oven 
is located close to a TV, 
radio or aerial.

Summary of Contents for MAX 25

Page 1: ...1 MAX 25 www whirlpool com ...

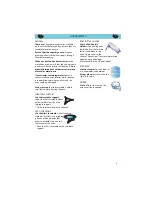
Page 2: ...y the oven and clean the interior with a soft damp cloth AFTER CONNECTING The oven can be operated only if the oven door is firmly closed The earthing of this appliance is compulsory The manufacturer will accept no responsibility for injury to persons animals or damage to objects arising from the non observance of this requirement The manufacturers are not liable for any problems caused by the user...

Page 3: ...can melt if used when heating foods WARNING Only allow children to use the oven without adult supervision after adequate instructions have been given so that the child is able to use the oven in a safe way and understands the hazards of improper use The appliance is not intended for use by young children or infirm persons without supervision Young children should be supervised to ensure that they d...

Page 4: ...quid To prevent this possibility the following steps should be taken 1 Avoid using straight sided containers with narrow necks 2 Stir the liquid before placing the container in the oven and let the teaspoon remain in the container 3 After heating allow standing for a short time stirring again before carefully removing the container from the oven CAREFUL Always refer to a microwave cookbook for det...

Page 5: ...rntable support Fit the turntable support in the oven GLASS TURNTABLE Use the Glass turntable with all cooking methods It collects the dripping juices and food particles that otherwise would stain and soil the interior of the oven Place the Glass turntable on the turntable support Ensure that the utensils you use are oven proof and allow microwaves to pass through them before cooking When you put ...

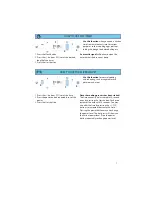
Page 6: ...en the door to cancel the signal Note The oven will only hold the settings for 60 seconds if the door is opened and then closed after the cooking is finished HOW TO USE THE CLOCK 1 4 1 Press the Stop button 2 Press the Clock button 3 seconds until the left hand digit hours flicker 3 Press the buttons to set the hours 4 Press the Clock button again The two right hand digits minutes flicker 5 Press the...

Page 7: ...ress the buttons to set the time 2 Press the power button repeatedly to set the power 3 Press the Start button Once the cooking process has been started The time can easily be increased in 30 second steps by pressing the Start button Each press increases the time with 30 seconds You may also alter the time by pressing the buttons to increase or decrease the time Pressing the power button may also ...

Page 8: ...e food contains egg or cream choose a lower power 750 W Cooking of vegetables fish meat etc 500 W More careful cooking e g high protein sauces cheese and egg dishes and to finish cooking casseroles 350 W Simmering stews melting butter 160 W Defrosting Softening butter cheeses and ice cream 0 W Setting the standing time CHOOSING POWER LEVEL ...

Page 9: ...o TURN food Open the door Turn the food Close the door and restart by pressing the Jet Start button The oven needs to know the net weight of the food If the weight is lesser or greater than recommended weight Follow the procedure for How to use the microwaves and choose 160 W when defrosting If the food is warmer than deep freeze temperature 18 C choose lower weight of the food If the food is cold...

Page 10: ...th small pieces of aluminum foil if they start to become warm e g chicken legs and wing tips Boiled food stews and meat sauces defrost better if stirred during defrosting time When defrosting it is better to under thaw the food slightly and allow the process to finish during standing time Standing time after defrosting always improves the result since the temperature will then be evenly distributed...

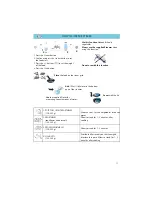
Page 11: ... ROOT VEGETABLES 150 500 g Use even sizes Cut the vetgetables into even pieces Allow to stand for 1 2 minutes after cooking 2 VEGETABLES cauliflower and broccoli 150 500 g 3 FROZEN VEGETABLES 150 500 g Allow to stand for 1 2 minutes 4 FISH FILETS 150 200 g Distribute fillets evenly on the steamgrid Interlace thin parts Allow to stand for 1 2 minutes after cooking Place the food on the steam grid Add...

Page 12: ...the Memo button 2 Press the Start button How to store a setting 1 Set time and power 2 Keep the Memo button pressed for 3 seconds until an acoustic signal is heard and the word End is displayed The setting is now stored You may reprogram the memories as many times as you wish 2 1 Note When the appliance is plugged in or after a power failure your Memo function will have stored 1 minute and 750 W a...

Page 13: ... support and wipe the base of the oven clean This oven is designed to operate with the turntable in place Do not operate the microwave oven when the turntable has been removed for cleaning Use a mild detergent water and a soft cloth to clean the interior surfaces front and rear of the door and the door opening Do not allow grease or food particles to build up around the door For stubborn stains bo...

Page 14: ...needs replacing it should be replaced by the original mains cord which is available via our service organization The mains cord may only be replaced by a trained service technician This is to avoid unnecessary calls for which you will be charged When calling for Service please give the serial number and type number of the oven see Service label Consult your warranty booklet for further advice WARN...

Page 15: ... caused by inappropriate waste handling of this product The symbol on the product or on the documents accompanying the product indicates that this appliance may not be treated as household waste Instead it shall be handed over to the applicable collection point for the recycling of electrical and electronic equipment Disposal must be carried out in accordance with local environmental regulations f...

Page 16: ...the following for this oven Whirlpool Sweden AB Model MAX 25 Supply voltage 230 V 50 Hz Rated Power Input 1300 W Fuse 10 A UK 13 A MW output power 750 W H x W x D Outer dimensions 374 x 392 x 370 Oven compartment 149 x 290 x 290 Test Amount Approx time Power level Container 12 3 1 750 g 9 min 750 W Pyrex 3 220 12 3 2 475 g 5 min 750 W Pyrex 3 827 12 3 3 900 g 15 min 750 W Pyrex 3 838 13 3 500 g 2 ...

Reviews: