21
Ranges with 2 step electronic ignition:
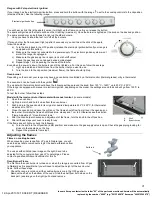
If your range has the electronic ignition button: press and hold the button with the image
next to the cooktop controls to the Hi position
(maximum flame). See the following image.
You will hear a click, this is the
spark’s noise, it will light up the flame, once it is on, release the button.
The spark will ignite and the flame will be on the Hi setting (maximum). Once the burner is lighted, set the knob on the desired position.
The same procedure can be followed to light up the other burners.
1. Once you have finished the test, turn off all the burners.
If for any burner the flame doesn’t light up after 5 seconds or you can’t hear the click of the spark,
follow these steps:
a) Turn the knob back to the OFF position (release the electronic ignition button if your range is
equipped with this button).
b)
Make sure the range is connected to the power supply. The electronic ignition system won’t
work if the range is unplugged.
c) Make sure the gas supply line is open (tank or shutoff valve).
Check the gas lines are not kinked, bended or damaged.
d) Repeat steps 1 or 2 depending the cause of the failure.
Even when the power is down, the burners can still be lighted up. For this case, follow these steps:
1. Light up a match and hold it close from the burner that you want to use.
2. Turn the knob to the Hi position (maximum flame), the flame should light up.
Oven burner
Depending on the model, your range may have an oven burner controlled by a thermal control (thermal grades) or by a thermostat.
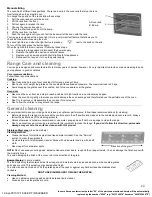
The oven knob can be found with the symbol
.
The model with thermal control should have the following settings around the knob: from 120°C
– 149C° up to 235°C - 250°C.
If the range is equipped with manual or electronic ignition, depending on the model, the settings around the knob will go from 150°C to
250°C.
To test the burner, follow these steps:
Model with thermal control or thermostat with manual control.
(in some models).
1. Open the oven door.
2. Light up a match and hold it close from the oven burner.
3. Push and turn the oven knob to its original or desired temperature 235°C-250°C, for thermostat
models set to 150°C.
4. Close the oven door and open the grill door. The flame should flow from all over the openings on
the burner. Normally the flame should look blue, steady and 1 cm tall. Otherwise see the section
“Flame Adjustment”, “Oven Burner Flame”.
5. After the oven burner checkup and adjustment of the flame, turn the knob to the off position.
6. After all these steps your oven is ready for use.
If the flame doesn’t light up check the following:
a) Turn the knob to the off position (initial position) and make sure the gas supply valve is open. Check the gas piping looking for
kinks or other damage on the line.
b) Repeat the procedure from step 3.
Adjusting the flames
Flame on cooktop burners
When converting your range from LP gas to Natural gas, you will
need to adjust some components to get the best performance from
your appliance.
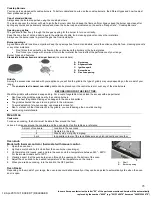
The valves with solid rod (see image on the right) have to be
adjusted for the conversion from gas LP to natural gas. Please
contact a qualified Whirlpool technician for this fix.
Oven Burner Flame
The first time the oven burner is turned on or when the range is converted from LP gas
to Natural gas it is possible that you will need to adjust the height of the oven burner
flame. Follow these steps:
1. Check the range is cold and all the cooktop burners are in the OFF position.
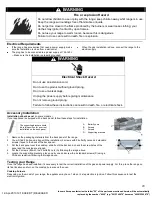
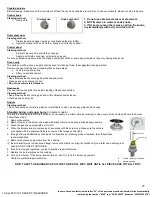
Remove the shelf on the bottom of the oven. Grab the shelf from both sides on the
back part, (see image on the right) pull out and remove.
Electronic ignition button
Solid rod
A.
Shelf
B.
Burner opening
12-Apr-2013 19:18:08 EDT | RELEASED
In some European factories the letter "W" of the part code mentioned herein will be automatically
replaced by the number "4000" (e.g. "W12345678" becomes "400012345678")


