Whirlpool Gold GY397LXU Use And Care Manual Download Page 10

10

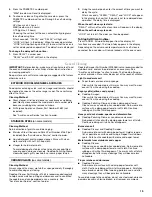
Meat Thermometer

On models without a temperature probe, use a meat 
thermometer to determine doneness of meat, poultry and fish. 
The internal temperature, not appearance, should be used to 
determine doneness. A meat thermometer is not supplied with 
this appliance.

Insert the thermometer into the center of the thickest portion 
of the meat or inner thigh or breast of poultry. The tip of the 
thermometer should not touch fat, bone or gristle.

After reading the thermometer once, push it into the meat 
½" (1.3 cm) more and read again. If the temperature drops, 
cook the meat or poultry longer.

Check all meat, poultry and fish in 2 or 3 different places.

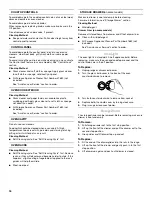
Oven Vent

The oven vent releases hot air and moisture from the oven, and 
should not be blocked or covered. Blocking or covering the vent 
will cause poor air circulation, affecting cooking and cleaning 
results. Do not set plastics, paper or other items that could melt 
or burn near the oven vent.

Baking

The oven automatically regulates the heat levels and both the top 
and bottom burners cycle on and off accordingly during preheat 
and bake to maintain a precise temperature range for optimal 
cooking results.

To Bake or Roast:

Before baking, position the racks according to the “Positioning 
Racks and Bakeware” section. 

1. Press BAKE. “BAKE” and “000” will flash in the display.

2. Press PRESETS 0 on the number pad. 

“350°” (“175°” Celsuis) will appear when PRESETS 0 is first 
pressed. Each additional press of PRESETS 0 will increase 
the temperature in 25° increments, rising to 550°F (275°C) 
and then continuing from 175°F (75°C) upward.

Press the appropriate number pads to select the bake 
temperature. The Bake temperature can be set from 
170°F (75°C) to 550°F (290°C).

3. Press BAKE again or wait 4 seconds. Bake will stop flashing 

and light in the display.

“100°” or the actual temperature will display. The temperature 
will rise in 5° increments until the preset temperature is 
reached.

4. For best results, allow oven to fully preheat.

When the set oven temperature is reached, 1 long beep will 
sound.

To recall the set temperature during preheat, press the BAKE 
pad.

To change the oven temperature during preheat, press BAKE 
twice, then PRESETS 0 or the appropriate number pads until 
the desired temperature is displayed.

To change the oven temperature during cooking, press BAKE, 
then PRESETS 0 or the appropriate number pads until the 
desired temperature is displayed.

5. When cooking is finished, press CANCEL.

Preheating

Preheat temperatures are affected by varying factors such as 
room temperature and peak energy usage times. It is normal for 
the temperature showing on the display and the actual oven 
temperature to differ.

Broiling

Broiling uses direct radiant heat to cook food. Changing the 
temperature when broiling allows more precise control when 
cooking. The lower the temperature, the slower the cooking. 
Thicker cuts and unevenly shaped pieces of meat, fish and 
poultry may cook better at lower broiling temperatures.

For best results, use a broiler pan and grid (provided on some 
models). They are designed to drain juices and help avoid 
spatter and smoke. 

If you would like to purchase a broiler pan, one may be 
ordered. See “Assistance or Service” section to order. Ask for 
Part Number 12500100.

For proper draining, do not cover the grid with foil. The 
bottom of the pan may be lined with aluminum foil for easier 
cleaning.

Trim excess fat to reduce spattering. Slit the remaining fat on 
the edges to avoid curling.

Pull out oven rack to stop position before turning or removing 
food. Use tongs to turn food to avoid the loss of juices. Very 
thin cuts of fish, poultry or meat may not need to be turned.

After broiling, remove the pan from the oven when removing 
the food. Drippings will bake on the pan if left in the heated 
oven, making cleaning more difficult.

Before broiling, position rack according to the Broiling Chart. 
Preheat broil about 4 minutes. Position food on grid in the broiler 
pan, then place it in the center of the oven rack. Close the door.

To Broil:

1. Press BROIL. “BROIL” and “SEt” will flash in the display until 

the door is closed.

2. Press the PRESETS 0 number pad once to set HI Broil or 

twice to set LO Broil. “HI” or “LO” will be displayed.

Stoneware/Baking 
stone

Crisp crusts

Follow manufacturer’s instructions.

Ovenproof 
glassware, ceramic 
glass or ceramic

Brown, crisp 
crusts

May need to reduce baking 
temperatures slightly.

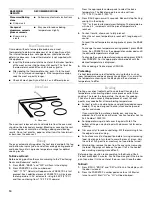
A. Oven vent

BAKEWARE/
RESULTS

RECOMMENDATIONS

A

Summary of Contents for Gold GY397LXU

Page 1: ... whirlpool com In Canada call for assistance installation or service call 1 800 807 6777 or visit our website at www whirlpool ca CUISINIÈRE ÉLECTRIQUE Guided utilisation etd entretien Au Canada pour assistance installation ou service composez le 1 800 807 6777 ou visitez notre site Web à www whirlpool ca Table of Contents Table des matières 2 8113P680 60 ...

Page 2: ...ibasculement 20 UTILISATION DE LA TABLE DE CUISSON 22 Commandes de la table de cuisson 23 Élément à dimension double 23 Vitrocéramique 24 Préparation de conserves à la maison 24 Ustensiles de cuisson 24 COMMANDE ÉLECTRONIQUE DU FOUR 25 Afficheur 26 Cancel annulation 26 Horloge 26 Minuterie 26 Verrouillage du tableau de commande et de la porte du four 27 Commande de la température du four 27 UTILIS...

Page 3: ...ructions instructions DANGER WARNING Tip Over Hazard A child or adult can tip the range and be killed Connect anti tip bracket to rear range foot Reconnect the anti tip bracket if the range is moved See the installation instructions for details Failure to follow these instructions can result in death or serious burns to children and adults Anti Tip Bracket Making sure the anti tip bracket is insta...

Page 4: ...f these pans or bowls during cooking may subject wiring or components underneath to damage Protective Liners Do not use aluminum foil to line surface unit drip bowls or oven bottoms except as suggested in the manual Improper installation of these liners may result in a risk of electric shock or fire Glazed Cooking Utensils Only certain types of glass glass ceramic ceramic earthenware or other glaz...

Page 5: ...p on indicator light C Left front control knob D Left rear control knob E Electronic oven control F Right rear control knob G Right front control knob D C A E F G B B SETTING RECOMMENDED USE Dual Elements Large diameter cookware Large quantities of food Home canning HI High Bring liquid to a boil Medium High Between HI and MED Hold a rapid boil Quickly brown or sear food MED Medium Maintain a slow...

Page 6: ... could melt such as plastic or aluminum foil to touch any part of the entire cooktop To avoid damage to the cooktop do not use the cooktop as a cutting board Use cookware about the same size as the surface cooking area Cookware should not extend more than 1 3 cm outside the area Use flat bottomed cookware for best heat conduction and energy efficiency Cookware with rounded warped ribbed or dented ...

Page 7: ...settings Copper Heats very quickly and evenly Earthenware Follow manufacturer s instructions Use on low heat settings Porcelain enamel on steel or cast iron See stainless steel or cast iron Stainless steel Heats quickly but unevenly A core or base of aluminum or copper on stainless steel provides even heating COOKWARE CHARACTERISTICS A Oven functions B Oven display C Number pad D Cancel E Presets ...

Page 8: ...00 and TIMER will flash in the display 2 Press the appropriate number pads to set the length of time The selected time appears in the display and TIMER continues to flash 3 Press TIMER again or wait 4 seconds Time will begin counting down and TIMER is displayed When the set time ends 1 long beep will sound and TIMER and End will be displayed 4 Press TIMER to clear the display To Cancel 1 Press TIM...

Page 9: ...k below dish Make sure foil is at least 1 3 cm larger than the dish and that it is turned up at the edges PositioningRacksandBakeware IMPORTANT To avoid permanent damage to the porcelain finish do not place food or bakeware directly on the oven door or bottom RACKS Position racks before turning on the oven Do not move racks with bakeware on them Make sure racks are level To move a rack pull it out...

Page 10: ...emperature during preheat press BAKE twice then PRESETS 0 or the appropriate number pads until the desired temperature is displayed To change the oven temperature during cooking press BAKE then PRESETS 0 or the appropriate number pads until the desired temperature is displayed 5 When cooking is finished press CANCEL Preheating Preheat temperatures are affected by varying factors such as room tempe...

Page 11: ...ng Racks and Bakeware section When using more than one rack position bakeware cookware on the racks to allow movement of the fan circulated air around the food See the Positioning Racks and Bakeware section If the oven is full extra cooking time may be needed For optimal cooking results do not cover food with aluminum foil When roasting poultry and meat use a broiler pan and grid It is not necessa...

Page 12: ...ect the oven temperature The selected function will flash The oven temperature can be set from 170 F 75 C to 550 F 290 C 5 Press the selected function pad again or wait 4 seconds The selected function will remain lit in the display and the cooking time will be displayed The actual oven temperature will display during preheat The set temperature will display when preheating is completed When the co...

Page 13: ... food from oven AutomaticShut Off SabbathMode The oven will automatically turn off after 12 hours if you accidentally leave it on This feature can be turned off to enable Sabbath Mode Sabbath Mode can be turned on at any time with or without the oven on Sabbath Mode cannot be turned on if the touchpads are locked out or when the door is locked If the oven is baking when Sabbath Mode is set BAKE wi...

Page 14: ...ever the time can be changed Suggested clean times are 2 hours for light soil and between 3 hours and 4 hours for average to heavy soil Once the oven has completely cooled remove ash with a damp cloth Do not wipe down any of the inside surfaces until the oven has completely cooled down Applying a cool damp cloth to the inner door glass before it has completely cooled could result in the glass brea...

Page 15: ...ll purpose cleaner Rinse with clean water and dry with soft lint free cloth Vinegar for hard water spots To avoid damage to stainless steel do not use soap filled scouring pads abrasive cleaners Cooktop Polishing Creme steel wool pads gritty washcloths or some paper towels CERAMIC GLASS on some models Cleaning Method Always wipe with a clean wet cloth or sponge and dry thoroughly to avoid streakin...

Page 16: ...g Cycle first OVEN RACKS Cleaning Method Self Cleaning cycle See Self Cleaning Cycle first Remove racks or they will discolor and become harder to slide If this happens a light coating of vegetable oil applied to the rack guides will help them slide Steel wool pad STORAGE DRAWER on some models Make sure drawer is cool and empty before cleaning For more information see Storage Drawer section Cleani...

Page 17: ...ing used See Cookware section Is the control knob set to the proper heat level See Cooktop Controls section Is the range level Level the range See the Installation Instructions Oven will not operate Is the electronic oven control set correctly See Electronic Oven Control section Has a delay start been set See Cook Hold section On some models is the Control Lock set See Control Lock section Oven te...

Page 18: ...1 Our consultants provide assistance with Features and specifications on our full line of appliances Installation information Use and maintenance procedures Accessory and repair parts sales Specialized customer assistance Spanish speaking hearing impaired limited vision etc Referrals to local dealers repair parts distributors and service companies Whirlpool designated service technicians are train...

Page 19: ...ice by an authorized Whirlpool servicer is not available 10 The removal and reinstallation of your major appliance if it is installed in an inaccessible location or is not installed in accordance with published installation instructions 11 Major appliances with original model serial numbers that have been removed altered or cannot be easily determined This warranty is void if the factory applied s...

Page 20: ...é et de vous y conformer AVERTISSEMENT DANGER Voici le symbole d alerte de sécurité Ce symbole d alerte de sécurité vous signale les dangers potentiels de décès et de blessures graves à vous et à d autres Tous les messages de sécurité suivront le symbole d alerte de sécurité et le mot DANGER ou AVERTISSEMENT Ces mots signifient Risque de basculement Un enfant ou une personne adulte peut faire basc...

Page 21: ...cée Les endroits près des éléments de surface peuvent devenir assez chauds pour causer des brûlures Pendant et après l utilisation ne pas toucher les éléments chauffants et ne pas laisser les vêtements ou autres matériaux inflammables entrer en contact avec ces éléments de surface ou les endroits près des éléments avant qu ils soient suffisamment refroidis Ces endroits comprennent la table de cuis...

Page 22: ... Les éléments chauffants peuvent être chauds même s ils ont une teinte foncée Les surfaces intérieures d un four deviennent assez chaudes pour causer des brûlures Pendant et après l utilisation ne pas toucher ou laisser des vêtements ou autres matériaux inflammables venir en contact avec les éléments chauds ou les surfaces intérieures chaudes du four avant qu ils aient eu assez de temps pour refro...

Page 23: ...gle simple n importe où entre HI élevé et LO bas 2 Pousser et tourner le bouton à OFF arrêt après avoir terminé Utilisation de l élément double 1 Appuyer sur le bouton de commande et le tourner dans le sens horaire de la position OFF arrêt à la zone Dual double n importe où entre HI et LO 2 Pousser et tourner le bouton à OFF après avoir terminé RÉGLAGE UTILISATION RECOMMANDÉE Éléments doubles Uste...

Page 24: ...nsiles de cuisson à fond plat pour une meilleure transmission de la chaleur et efficacité de l énergie Les ustensiles de cuisson dont le fond est arrondi gauchi nervuré ou entaillé pourraient causer un chauffage inégal et des résultats de cuisson médiocres Déterminer si le fond d un ustensile de cuisson est plat en plaçant le bord d une règle contre la base de l ustensile Lorsque la règle est tour...

Page 25: ...négalement Les meilleurs résultats sont obtenus sur les réglages de chaleur basse à moyenne Cuivre Chauffe très rapidement et de façon uniforme Terre cuite Suivre les instructions du fabricant Utiliser des réglages de température basse Acier émaillé porcelaine ou fonte émaillée Voir acier inoxydable ou fonte Acier inoxydable Chauffe rapidement mais inégalement Un fond ou une base d aluminium ou de...

Page 26: ...ge 1 Appuyer sur CLOCK horloge L heure clignote sur l afficheur 2 Appuyer sur les touches numériques appropriées pour régler l heure Les deux points clignotent 3 Appuyer sur CLOCK ou attendre 4 secondes Les deux points cessent de clignoter Annulation de l affichage de l horloge Si vous ne voulez pas afficher l heure Appuyer sur CANCEL et CLOCK pendant 3 secondes L affichage de l heure disparaît Lo...

Page 27: ...re est automatiquement rétabli Il n est pas nécessaire de régler à nouveau la température du four en cas de panne de courant ou d interruption de l alimentation On peut ajuster la température avec les programmes Bake Convect Bake sur certains modèles et Convect Roast sur certains modèles uniquement Les températures des programmes Broil Warm et Self Clean ne peuvent être ajustées Pour afficher les ...

Page 28: ...ntermittence durant le préchauffage et la cuisson au four pour maintenir une gamme de températures précises et donner des résultats de cuisson optimaux Cuisson au four ou rôtissage Avant la cuisson au four placer les grilles tel qu indiqué à la section Positionnement des grilles et des ustensiles de cuisson 1 Appuyer sur BAKE cuisson au four BAKE et 00 00 clignotent sur l afficheur ALIMENTS POSITI...

Page 29: ... ou service pour commander Demander la pièce n 12500100 Pour un écoulement approprié ne pas couvrir la grille de papier d aluminium Le fond de la lèchefrite peut être garni de papier d aluminium pour en faciliter le nettoyage Enlever l excès de gras pour réduire les éclaboussures Entailler le gras résiduel sur les côtés pour éviter que la viande se recroqueville Sortir la grille jusqu à la butée d...

Page 30: ... Cuissonparconvection surcertainsmodèles Utiliser la fonction Convect convection pour la cuisson au four sur une ou plusieurs grilles Pour la cuisson au four par convection entrer la température de cuisson normale La commande réduira automatiquement la température du four réglée de 25 F 15 C même si la température de cuisson normale est affichée Réglage de la cuisson au four par convection 1 Appuy...

Page 31: ...sque la durée de cuisson s est écoulée Quatre signaux sonores se font entendre BAKE s éteint et HOLD WARM et 170 75 Celsius s affichent Après 1 heure de maintien au chaud Quatre signaux sonores se font entendre End apparaît et l heure réapparaît Pour annuler le programme Cook Hold à tout moment Appuyer sur CANCEL annulation Retirer les aliments du four Réglage du programme Cook Hold différé Le pro...

Page 32: ...ations du fabricant pour le chauffage des bols et plats de service vides Réglage de la fonction Warm 1 Appuyer sur WARM WARM et 00 00 clignotent sur l afficheur 2 Appuyer sur PRESETS 0 ou sur les touches numériques appropriées pour sélectionner une température 170 75 Celsius s allume lors de la première pression sur PRESETS 0 Chaque pression sur PRESETS 0 augmente la température par tranches de 5 ...

Page 33: ...age plus long et dégagent plus de fumée Veiller à ce que la cuisine soit bien aérée pendant le programme d autonettoyage afin d aider à éliminer la chaleur les odeurs et la fumée Ne pas obstruer le ou les évents du four durant le programme d autonettoyage L air doit pouvoir circuler librement Selon votre modèle voir la section Évent du four ou Évents du four Ne pas nettoyer frotter endommager ou d...

Page 34: ...rès 4 secondes le nettoyage du four commence CLEAN s affiche LOCK clignote sur l afficheur une fois que la porte est verrouillée et LOCK reste allumé L afficheur présente le compte à rebours de la durée de nettoyage Pour différer l autonettoyage Avant de différer l autonettoyage s assurer que la porte est complètement fermée sinon elle ne se verrouillera pas et le programme ne commencera pas 1 App...

Page 35: ... éponge propre humide Nettoyer pendant que la table de cuisson est encore tiède Vous pouvez porter des mitaines de four pour ce nettoyage Renversements de matières sucrées gelées confiseries sirop Grattoir pour table de cuisson Nettoyer pendant que la table de cuisson est encore tiède Vous pouvez porter des mitaines de four pour ce nettoyage Crème à polir pour table de cuisson et essuie tout propr...

Page 36: ...ment d huile végétale appliqué sur les glissières des grilles les aidera à mieux glisser Tampon en laine d acier TIROIR DE REMISAGE sur certains modèles Veiller à ce que le tiroir soit froid et vide avant de le nettoyer Pour plus d information voir la section Tiroir de remisage Méthode de nettoyage Détergent doux Intérieur du tiroir sur certains modèles Enlever tous les articles rangés dans le tir...

Page 37: ...umé sur certains modèles Le témoin lumineux de surface chaude reste t il allumé une fois que le s bouton s de commande sont éteints Voir la section Commandes de la table de cuisson Les résultats de cuisson sur la table de cuisson ne sont pas les résultats prévus Utilise t on un ustensile de cuisson approprié Voir la section Ustensiles de cuisson Le bouton de commande est il réglé au niveau de chal...

Page 38: ...uminium pour couvrir le bord de la croûte et ou réduire la température de cuisson ASSISTANCE OU SERVICE Avant de faire un appel pour assistance ou service consulter la section Dépannage Ce guide peut vous faire économiser le coût d une visite de service Si vous avez encore besoin d aide suivre les instructions ci dessous Lors d un appel veuillez connaître la date d achat le numéro de modèle et le ...

Page 39: ...l autorisé n est pas disponible 10 La dépose et la réinstallation de votre gros appareil si celui ci est installé dans un endroit inaccessible ou n est pas installé conformément aux instructions d installation fournies 11 Les gros appareils ménagers dont les numéros de série et de modèle originaux ont été enlevés modifiés ou qui ne peuvent pas être facilement identifiés La présente garantie est nu...

Page 40: ...Tous droits réservés Registered Trademark TM Trademark of Whirlpool U S A Whirlpool Canada LP Licensee in Canada Marque déposée TM Marque de commerce de Whirlpool U S A emploi sous licence par Whirlpool Canada LP au Canada 11 07 Printed in U S A Imprimé aux É U ...

Reviews: