background image

Summary of Contents for GI1500XHW6

Page 1: ...1 5681 for installation and service call 1 800 807 6777 or visit our website at www whirlpool com or www whirlpoolappliances ca MACHINE AGIA _ONS Au Canada pour assistance composez le 1 800 461 5681 pour installation ou service le 1 800 807 6777 ou visitez notre site web h www whirlpoola pplia nces ca Table of Contents Table des matieres 2 2217406A ...

Page 2: ... MACHINE GLAQONS 21 Fonctionnement de la machine a glagons 21 Utilisation des commandes 21 ENTRETIEN DE LA MACHINE GLAQONS 21 Nettoyage 21 Precautions a prendre avant les vacances ou dem6nagement 24 DI_PAN NAG E 24 Fonctionnement de la machine glagons 24 Production de glagons 25 Qualite des glagons 25 Problemes de plomberie 25 ASSISTANCE OU SERVICE 26 GARANTIE 27 ICEMAKER SAFETY Your safety and th...

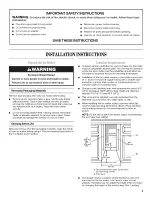
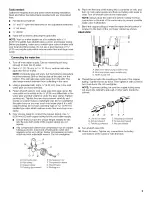
Page 3: ...sing it See the cleaning instructions in the Ice Maker Care section To ensure proper ventilation for your ice maker the front side must be completely unobstructed The unit may be closed in on the top and 3 sides but the installation should allow the ice maker to be pulled forward for servicing if necessary Installation of the ice maker requires a cold water supply inlet of 1 4 6 35 mm OD soft copp...

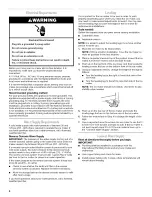
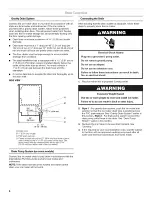
Page 4: ...s less than 40 to 60 psi 276 414 kPa Check to see whether the sediment filter in the reverse osmosis system is blocked Replace the filter if necessary Allow the storage tank on the reverse osmosis system to refill after heavy usage If you have questions about your water pressure call a licensed qualified plumber It is important for the ice maker to be level in order to work properly Depending upon...

Page 5: ... type or 3 le 4 76 mm saddle type valve which reduces water flow and clogs more easily 5 Now you are ready to connect the copper tubing Use 1 4 6 35 mm OD soft copper tubing for the cold water supply Ensure that you have the proper length needed for the job Be sure both ends of the copper tubing are cut square Slip compression sleeve and compression nut on copper tubing as shown Insert end of tubi...

Page 6: ... should also be centered from left to right 7_ 18 56 cm from either side of the ice maker Drain Pump System on some models Connect the ice maker drain to your drain in accordance with the International Plumbing Code and any local codes and ordinances NOTE If the drain hose becomes twisted and water cannot drain your ice maker will not work Connecting the Drain After ensuring that the drain system ...

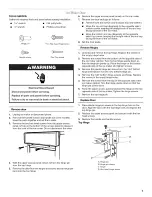
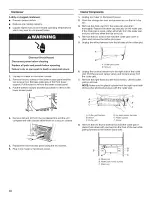
Page 7: ...et the door aside Reverse Hinges 1 Unscrew and remove the top hinge Replace the screws in the empty hinge holes 2 Remove the screws from the bottom of the opposite side of the ice maker cabinet Turn the top hinge upside down so that the hinge pin points up Place the hinge on the bottom opposite side of the ice maker and tighten screws 3 Remove the plastic hinge pin sleeve from the old bottom hinge...

Page 8: ...owing in your ice maker You may hear air being forced over the condenser by the condenser fan During the harvest cycle you may hear a thud when the ice sheet slides from the evaporator onto the cutter grid When you first start the ice maker you may hear water running continuously The ice maker is programmed to run a rinse cycle before it begins to make ice ICEMAKERUSE When you first start your ice...

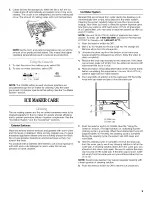
Page 9: ...your water is With hard water of 15 to 20 grains gal 4 to 5 grains liter you may need to clean the system as often as every 6 months NOTE Use one 16 oz 473 mL bottle of approved ice maker cleaner To order call 1 800 442 9991 and ask for Part Number 8171307 In Canada call 1 800 807 6777 1 Push the selector switch to OFR 2 Wait 5 to 10 minutes for the ice to fall into the storage bin Remove all ice ...

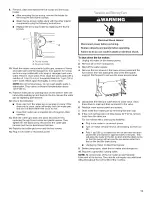
Page 10: ...in door and remove any ice that is in the bin 3 Remove the drain cap from the water pan and drain thoroughly Replace the drain cap securely on the water pan If the drain cap is loose water will empty from the water pan and you will have either thin ice or no ice 4 Remove the two screws that hold the cutter grid cover in place and remove the cutter grid cover 5 Unplug the wiring harness from the le...

Page 11: ... and the ice level sensor harness 14 Replace the cutter grid cover and the two screws 15 Plug in ice maker or reconnect power Electrical Shock Hazard Disconnect power before servicing Replace all parts and panels before operating Failure to do so can result in death or electrical shock To shut down the ice maker 1 Unplug ice maker or disconnect power 2 Remove all ice from storage bin 3 Shut off th...

Page 12: ...aker This is normal operation Water is added once per ice making cycle Is the water in the reservoir overflowing This is normal This overflow helps to purge minerals that were removed from the water during the ice making process Is there a whooshing sound Check the following things Make sure that the water supply is hooked up and turned on Make sure that the drain cap is tight Is there ice between...

Page 13: ...s Whirlpool designated service technicians are trained to fulfill the product warranty and provide after warranty service anywhere in the United States To locate the Whirlpool designated service company in your area you can also look in your telephone directory Yellow Pages For further assistance If you need further assistance you can write to Whirlpool Corporation with any questions or concerns a...

Page 14: ...r installation or installation not in accordance with local electrical or plumbing codes or use of product not approved by Whirlpool 4 Pickup and delivery This product is designed to be repaired on site 5 Repairs to parts or systems resulting from unauthorized modifications made to the appliance 6 Replacement parts or repair labor costs for units operated outside the United Sates or Canada WHIRLPO...

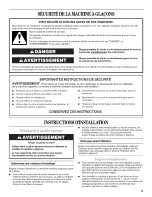
Page 15: ... entretien Replacer pieces et panneaux avant de faire la remise en marche CONSERVEZ CES iNSTRUCTiONS INSTRUCTIONS D INSTALLATION Risque du poids excessif Utiliser deux ou plus de personnes pour d_placer et installer la machine a gla ons Le non respect de cette instruction peut causer une blessure au dos ou d autre blessure Enl_vement des mat_riaux d emballage Enlever le ruban adhesif et la colle d...

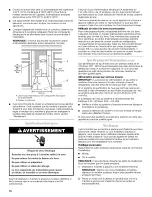
Page 16: ...limentation en eau froide avec une pression entre 30 et 120 Ib po 2 207 827 kPa est necessaire pour faire fonctionner le distributeur d eau et la machine a glagons 8i vous avez des questions au sujet de la pression de votre eau appeler un plombier qualifie agree Alimentation en eau par osmose inverse IMPORTANT La pression de I alimentation en eau entre le systeme d osmose inverse et la valve d arr...

Page 17: ...e la machine gla ons REMARQUE Un conduit horizontal fonctionnera mais on doit observer le procede suivant Percer par le dessus de la canalisation et non pas par le dessous Ainsi I eau ne risquera pas d arroser la perceuse Ceci emp_che egalement les sediments qu on trouve normalement dans I eau de s accumuler dans le robinet d arr_t 3 _ I aide d une perceuse electrique reliee la terre percer un tro...

Page 18: ...ur Les tuyaux de vidange doivent avoir une pente de 1 pour chaque 48 2 54 cm pour chaque 122 cm de Iongueur ou une pente de V4 pour chaque 12 6 35 mm 30 48 cm et ne comporter aucun point bas oQ I eau pourrait stagner Les drains de vidange de plancher doivent _tre suffisamment grands pour recevoir I eau de vidange provenant de toutes sources L installation ideale a un tuyau de rejet I egout avec un...

Page 19: ...mpe de vidange precedemment dans cette section 3 Verifier a nouveau la machine gla ons pour s assurer qu elle est bien d aplomb Voir la section Reglage de I aplomb 4 Si le code sanitaire local I exige sceller la machine sur le plancher a I aide d un produit de calfeutrage approuve une fois que les raccordements d eau et d electricite ont ete faits OUTILLAGE NI_CESSAIRE Rassembler les outils et pie...

Page 20: ...axe de la charniere C Charniere D Vis de charniere _ t_te hexagonale B C D Charni_re inf_rieure j _ D A Visde charniere _ t te hexagonale B Douille de I axe de la charniere C Charniere D Axe Inversion du Ioquet de porte 1 Oter les bouchons de trous du c6te oppose de la porte et les mettre de c6t 2 Oter les vis du Ioquet de porte magnetique et les reinstaller du c6te oppose de la porte 3 Pousser le...

Page 21: ...matiquement des que le bac est plein et elle se remet en marche Iorsqu il faut plus de gla ons Le bac h gla ons n est pas refrigere et la glace fondra un peu Le degre de fonte depend de la temperature de la piece REMARQUE Selon les variations de temperatures de la piece et de I eau la quantite de glace produite et entreposee variera Ceci signifie que les temperatures de fonctionnement plus elevees...

Page 22: ...icateur s eteint apres 45 minutes environ le cycle de nettoyage est termin Pendant le cycle de nettoyage le systeme se nettoie et se rince 8 Lorsque le programme de nettoyage est termine retirer le capuchon de vidange du bac eau pour voir s il reste encore un residu de solution de nettoyage dans le bac eau Si la solution de nettoyage se vidange du bac eau recommencer le cycle de nettoyage Veiller ...

Page 23: ...n plastique F Vis Retirer les deux vis ailette du bac eau en place Appuyer avec une main sur I avant du bac tout en tirant vers I avant sur le c6te arriere inferieur A Vis de serrage B Support de perle _ glace 10 Laver les composants interieurs grille de coupe I exterieur des tuyaux et le bac eau le bac d entreposage des glagons le joint etanche de la porte et la pelle glagons avec de I eau tiede ...

Page 24: ...ons et dans la pompe Debrancher la machine gla _ons ou deconnecter la source de courant electrique 9 Avant d utiliser I appareil de nouveau nettoyer la machine gla _ons et le bac a gla _ons 10 Brancher la machine a glagons a une prise a 3 alveoles reliee la terre REMARQUE Tousles composants de la machine gla _ons ont re _uune lubrification permanente I usine Aucune autre lubrification ne devrait e...

Page 25: ...une accumulation de tartre dans la machine gla_ons S il y a une accumulation blanche de tartre dans le systeme d eau ou de congelation de la machine gla ons il faut nettoyer I appareil Voir Nettoyage Le capuchon de vidange est il bien en place Si le capuchon de vidange est desserre I eau s ecoulera du bac eau et la glace sera mince ou il n y aura pas de glace Resserrer le capuchon de vidange s il ...

Page 26: ...change FSP dans votre region telephonez nous ou au centre de service autorise le plus proche Telephoner sans frais au Centre d interaction avec la clientele de Whirlpool Canada LP 1 800 461 5681 Du lundi au vendredi de 8 h 00 a 18 h 00 HNE Samedi de 8 h 30 a 16 h 30 HNE Nos consultants fournissent I assistance pour Caracteristiques et specifications de notre gamme complete d appareils electromenag...

Page 27: ...ive ou installation non conforme aux codes Iocaux d electricite ou de plomberie ou I utilisation d un produit non approuve par Whirlpool 4 La prise en charge et la livraison Ce produit est con _u pour _tre repare a domicile 5 Les reparations de pieces ou systemes imputables h des modifications non autorisees effectuees a I appareil 6 Le coQt des pieces de rechange ou de la main d oeuvre de reparat...

Page 28: ... Tous droits reserves Registered Trademark TM Trademark of Whirlpool U S A Whirlpool Canada LP Licensee in Canada Marque deposee TM Marque de commerce de Whirlpool U S A emploi licencie par Whirlpool Canada LP au Canada 3 05 Printed in U S A Imprime aux E U ...

Reviews: