Whirlpool GH9184XL Use & Care Manual Download Page 6

6

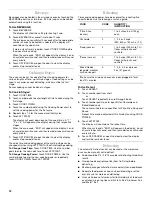
To Turn Off:

The turntable can be turned off (except during an auto function). 
This is helpful when cooking with plates that are larger than the 
turntable or when cooking with two 10 in. (25 cm) plates that are 
side-by-side.

1. Touch TURNTABLE ON/OFF.

A turntable-off icon will appear in the display, as well as a 
prompt to enter the cook time.

2. Touch number pads to enter length of time to cook.

3. Touch JET START.

For optimal results, halfway through cook time turn plate(s) so 
the food in the front is in the back.

4. Touch OFF/CANCEL (or CANCEL/OFF) or open the door to 

clear the display and/or stop reminder tones.

Turntable will automatically be turned back on, and the 
turntable-off icon will disappear.

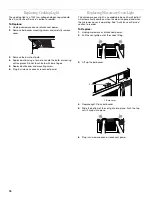
Designed Cooking Rack

The cooking rack is ideal for two-level cooking. It provides extra 
cavity space for cooking two or more containers at the same 
time. Insert the rack securely into the rack supports on the side 
walls of the oven. See “Assistance or Service” section to reorder 
rack.

Rack will become hot. Always use oven mitts or pot holders 
when handling.

Do not allow the rack to touch the inside cavity walls, ceiling 
or floor.

Do not use metal cookware, utensils, or a browning dish with 
the rack.

Do not let food container on rack touch the top or sides of the 
oven.

Do not place popcorn bags on rack.

The rack is designed specifically for this oven. Do not use it in 
any other oven.

Do not cook food directly on the rack. Always use a 
microwave-safe container.

Use the rack only when cooking on two levels. Do not store it 
in the oven. Damage to the oven could result if someone 
accidentally turns on the oven.

MICROWAVE OVEN 

CONTROL

Display

When power is first supplied to the microwave oven, a “:” will 
blink on the display. Touch OFF/CANCEL to stop the blinking.

Any other time a “:” blinks on the display, a power failure 
occurred. Touch OFF/CANCEL and reset the clock if needed.

When the microwave oven is in use, the display shows cooking 
power, quantities, weights and/or prompts.

If “RETRY” blinks on the display for one second, an invalid value 
was entered. Retry your entry.

When the microwave oven is not in use, the display shows the 
time of day or Timer countdown.

1. Proper use

1

Summary of Contents for GH9184XL

Page 1: ...INATION Use CareGuide For questions about features operation performance parts accessories or service call 1 800 253 1301 or visit our website at www whirlpool com Table of Contents 2 4619 652 61532 8184733 Model GH9184XL ...

Page 2: ...arning Mode 8 MICROWAVE OVEN USE 8 Food Characteristics 8 Cooking Guidelines 9 Cookware and Dinnerware 9 Aluminum Foil and Metal 9 Inverter Microwave System 10 Cooking Power 10 Cooking 10 6th Sense System Cooking 11 Pre Set Cooking 11 Beverage 12 Cooking in Stages 12 Reheating 12 Defrosting 12 Soften 13 Melt 13 Kids Menu 14 Warm Hold 14 MICROWAVE OVEN CARE 15 General Cleaning 15 Replacing Filters ...

Page 3: ...s Some products such as whole eggs in the shell and sealed containers for example closed glass jars may explode and should not be heated in the microwave oven Use the microwave oven only for its intended use as described in this manual Do not use corrosive chemicals or vapors in the microwave oven This type of oven is specifically designed to heat cook or dry food It is not designed for industrial...

Page 4: ...urn off the pad and touch electrical parts involving a risk of electric shock Do not use paper products when appliance is operat ed in the PAN BROWN mode on models with this feature Do not store any materials other than manufacturer s recommended accessories in this oven when not in use Do not cover racks or any other part of the oven with metal foil This will cause overheating of the oven Do not ...

Page 5: ...DING INSTRUCTIONS For all cord connected appliances The microwave oven must be grounded In the event of an electrical short circuit grounding reduces the risk of electric shock by providing an escape wire for the electric current The microwave oven is equipped with a cord having a grounding wire with a grounding plug The plug must be plugged into an outlet that is properly installed and grounded W...

Page 6: ...ack will become hot Always use oven mitts or pot holders when handling Do not allow the rack to touch the inside cavity walls ceiling or floor Do not use metal cookware utensils or a browning dish with the rack Do not let food container on rack touch the top or sides of the oven Do not place popcorn bags on rack The rack is designed specifically for this oven Do not use it in any other oven Do not...

Page 7: ...ing begins the JET COOK controls return to their normal numerical pad function Off Cancel The OFF CANCEL pad stops most functions except for the Timer Control Lock and Demo Learning Mode The microwave oven will also turn off when the door is opened Close the door and touch JET START to resume the cycle Clock This is a 12 hour clock and does not show a m or p m To Set Before setting make sure the m...

Page 8: ...rowave oven and Timer are off To Turn On Off Touch and hold TIMER OFF for five seconds until two tones sound and d appears on the display Repeat to turn off and remove d from the display MICROWAVE OVEN USE A magnetron in the oven produces microwaves which reflect off the metal floor walls and ceiling and pass through the turntable and appropriate cookware to the food Microwaves are attracted to an...

Page 9: ...ng chart as a guide then test before using To Test Cookware or Dinnerware for Microwave Use 1 Put cookware or dinnerware in oven with 1 cup 250 mL of water beside it 2 Cook at 100 cooking power for 1 minute Do not use cookware or dinnerware if it becomes hot and the water stays cool AluminumFoilandMetal Always use oven mitts or pot holders when removing dishes from the microwave oven Aluminum foil...

Page 10: ... the cook time When the cycle ends END will appear in the display 4 end of cycle tones will sound and then reminder tones will sound every minute 6 Touch OFF CANCEL or open the door to clear the display and or stop reminder tones Cooking To Use 1 Touch COOK TIME 2 Touch the number pads to set a length of time to cook Touch COOK POWER to set a cooking power other than 100 Touch the number pad s usi...

Page 11: ...e adjusted at this time by touching COOK POWER 4 Touch JET START The display will count down the cook time When the cycle ends END will appear in the display 4 end of cycle tones will sound and then reminder tones will sound every minute 5 Touch OFF CANCEL or open the door to clear the display and or stop reminder tones FOOD SERVING SIZE INSTRUCTIONS Popcorn 3 5 oz 100 g 3 oz 85 g 1 75 oz 50 g Pop...

Page 12: ...g cooking To Change Cook Time Touch COOK TIME Use the number pads to enter the new cook time Touch JET START To Change Cooking Power Touch COOK POWER Use the number pads to enter the new cooking power or repeatedly touch COOK POWER Touch JET START Reheating Times and cooking power have been preset for reheating five specific foods Use the following chart as a guide To Use Reheat 1 Touch REHEAT 2 T...

Page 13: ...To Soften 1 Touch SOFTEN The display will alternate between showing SOFTN and PAD 2 Touch SOFTEN repeatedly to scroll through the Soften menu items or Touch number pad to select Soften menu item 3 Enter quantity of food items using the prompts on the display or the quantities from the chart above Only pads valid for the selected food class will give a response Doneness may be adjusted at this time...

Page 14: ...en the cycle ends END will appear on the display 4 end of cycle tones will sound and then reminder tones will sound every minute for 15 minutes WarmHold Hot cooked food can be kept warm in the microwave oven Warm Hold can be used by itself or can be programmed to follow a cooking cycle Opening the door during Warm Hold will cancel the function To Use Put hot cooked food in the oven Cover plates of...

Page 15: ... sponge not directly on panel TURNTABLE Do not operate the microwave without the turntable in place Mild cleanser and scouring pad Dishwasher ReplacingFilters The grease filters should be removed and cleaned at least once a month The charcoal filter cannot be washed and should be replaced every six to twelve months Do not operate the microwave oven without the filters in place See Assistance or Se...

Page 16: ...b cover and mounting screw 6 Plug in microwave oven or reconnect power ReplacingMicrowaveOvenLight The microwave oven light is a candelabra base 30 watt bulb It will automatically come on when the door is opened and when the microwave oven is operating See Assistance or Service section to reorder To Replace 1 Unplug microwave or disconnect power 2 Pull the vent grille out of the snaps fitting 3 Li...

Page 17: ...g properly Turntable rotates both directions This is normal and depends on motor rotation at beginning of cycle Display shows messages Is the display showing There has been a power failure or the clock time has been turned off See Display section to clear display See Clock section to reset the clock or to turn it on Is the display showing a letter followed by a number See Display section to clear ...

Page 18: ...ne of appliances Installation information Use and maintenance procedures Accessory and repair parts sales Specialized customer assistance Spanish speaking hearing impaired limited vision etc Referrals to local dealers repair parts distributors and service companies Whirlpool designated service technicians are trained to fulfill the product warranty and provide after warranty service anywhere in th...

Page 19: ...19 Notes ...
Page 20: ...LIABLE FOR INCIDENTAL OR CONSEQUENTIAL DAMAGES Some states do not allow the exclusion or limitation of incidental or consequential damages so this exclusion or limitation may not apply to you This warranty gives you specific legal rights and you may also have other rights which may vary from state to state Outside the 50 United States this warranty does not apply Contact your authorized Whirlpool ...

Reviews: