background image

WHIRLPOOL

®


MICROWAVE HOOD COMBINATION WARRANTY

FULL ONE-YEAR WARRANTY

For one year from the date of purchase, when this appliance is operated and maintained according to instructions attached to or 

furnished with the product, Whirlpool Corporation will pay for FSP

®


replacement parts and repair labor to correct defects in materials or 

workmanship. Service must be provided by a Whirlpool designated service company.

LIMITED FOUR-YEAR WARRANTY

From the second through fifth year from the date of purchase, when this appliance is operated and maintained according to instructions 

attached to or furnished with the product, Whirlpool Corporation will pay for FSP

®


replacement parts for the microwave magnetron tube 

if defective in materials or workmanship.

Whirlpool Corporation will not pay for:

1. Service calls to correct the installation of your appliance, to instruct you how to use your appliance, to replace house fuses or 

correct house wiring, or to replace owner-accessible light bulbs and filters.

2. Repairs when your appliance is used in other than normal, single-family household use. 

3. Pickup and delivery. Your appliance is designed to be repaired in the home.

4. Damage resulting from accident, alteration, misuse, abuse, fire, flood, improper installation, acts of God or use of products not 

approved by Whirlpool Corporation.

5. Repairs to parts or systems resulting from unauthorized modifications made to the appliance.

6. Replacement parts or repair labor costs for units operated outside the United States.

7. Any labor costs during the limited warranty period.

WHIRLPOOL CORPORATION SHALL NOT BE LIABLE FOR INCIDENTAL OR CONSEQUENTIAL DAMAGES.

Some states do not allow the ex clusion or limitation of incidental or consequential damages, so this ex clusion or limitation may not 
apply to you. This warranty gives you specific legal rights and you may also have other rights which may vary from state to state.

Outside the 50 United States, this warranty does not apply. Contact your authorized Whirlpool dealer to determine if another 
warranty applies.

If you need service, first see the “Troubleshooting” section of this book. After checking “Troubleshooting,” additional help can be found 
by checking the “Assistance or Service” section or by calling the Whirlpool Customer Interaction Center, 1-800-253-1301 (toll-free), 
from anywhere in the U.S.A.

5/00

Keep this book and your sales slip together for future 
reference. You must provide proof of purchase or installation 
date for in-warranty service.

Write down the following information about your appliance to 
better help you obtain assistance or service if you ever need it. 
You will need to know your complete model number and serial 
number. You can find this information on the model and serial 
number label/plate, located on your appliance as shown in the 
“Parts and Features” section.

Dealer name____________________________________________________

Address ________________________________________________________

Phone number __________________________________________________

Model number __________________________________________________

Serial number __________________________________________________

Purchase date __________________________________________________

4619-652-60183/8184020

© 2001 Whirlpool Corporation.
All rights reserved.

® Registered Trademark/TM Trademark of Whirlpool, U.S.A.

® Tupperware


is a Registered Trademark of Dart Industries Inc. (Tupperware Worldwide)

® Styrofoam is a Registered Trademark of The Dow Chemical Company.

5/01

Printed in China

Summary of Contents for GH8155XJ

Page 1: ...INATION Use CareGuide For questions about features operation performance parts accessories or service call 1 800 253 1301 or visit our website at www whirlpool com Table of Contents 2 MODEL GH8155XJ 4619 652 60183 8184020 ...

Page 2: ... Demo Learning Mode 9 BEFORE USING 9 Food Characteristics 9 Cooking Guidelines 10 Cookware and Dinnerware 10 Aluminum Foil and Metal 11 Cooking Power 11 MICROWAVE OVEN USE 12 Cooking 12 Sensor Cooking 12 Pre Set Cooking 13 Cooking in Stages 13 Reheating 13 Defrosting 14 Steaming 14 Simmering 15 Warm Hold 15 MICROWAVE OVEN CARE 16 General Cleaning 16 Replacing Filters 16 Replacing Cooktop Light 17 ...

Page 3: ...s Some products such as whole eggs in the shell and sealed containers for example closed glass jars may explode and should not be heated in the microwave oven Use the microwave oven only for its intended use as described in this manual Do not use corrosive chemicals or vapors in the microwave oven This type of oven is specifically designed to heat cook or dry food It is not designed for industrial...

Page 4: ...burn off the pad and touch electrical parts involving a risk of electric shock Do not use paper products when appliance is operat ed in the PAN BROWN mode on models with this feature Do not store any materials other than manufacturer s recommended accessories in this oven when not in use Do not cover racks or any other part of the oven with metal foil This will cause overheating of the oven Do not...

Page 5: ... an outlet that is properly installed and grounded WARNING Improper use of the grounding plug can result in a risk of electric shock Consult a qualified electrician or serviceman if the grounding instructions are not completely understood or if doubt exists as to whether the microwave oven is properly grounded For a permanently connected appliance This appliance must be connected to a grounded met...

Page 6: ...optimal results halfway through cook time turn plate s so the food in the front is in the back 4 Touch OFF CANCEL or CANCEL OFF or open the door to clear the display and or stop reminder tones Turntable will be turned back on DesignedCookingRack The cooking rack is ideal for two level cooking It provides ex tra cavity space for cooking two or more containers at the same time Insert the rack secure...

Page 7: ... includes one or more of the following cooking power cook time and food quantity or weight See the code charts in the Cooking and Reheating sections for additional information Start Enter The START ENTER pad begins any function If not touched within 5 seconds after touching a pad START will appear on the display as a reminder If not touched within 5 minutes after touching a pad the display will re...

Page 8: ...r stop the microwave oven When the Timer is in use the microwave oven can also operate To see the time countdown for five seconds when the microwave oven is in use touch TIMER SET To Set 1 Touch TIMER SET If no action is taken after one minute the display will return to the time of day mode 2 Touch the number pads to set the length of time 3 Touch TIMER SET or START ENTER If not touched within fiv...

Page 9: ...and after heating Use of a wooden stir stick placed in the cup or bowl during heating may help to avoid this The turntable must be in place and correct side up when oven is in use Do not use if turntable is chipped or broken See Assistance or Service section to reorder Baby bottles and baby food jars should not be heated in the oven Clothes flowers fruit herbs wood gourds paper including brown pap...

Page 10: ... to cook by the natural conduction of heat even after the microwave cycle ends The length of standing time depends on the volume and density of the food CookwareandDinnerware Cookware and dinnerware must fit on the turntable Always use oven mitts or pot holders when handling because any dish may become hot from heat transferred from the food Do not use cookware and dinnerware with gold or silver t...

Page 11: ...ength of time to cook 2 Touch COOK POWER 3 Touch the number pad using the Cooking Power chart or Touch COOK POWER repeatedly to scroll through powers 4 Touch START ENTER The display will countdown the cook time When the cycle ends END will appear in the display 4 end of cycle tones will sound and then reminder tones will sound every minute 5 Touch OFF CANCEL or open the door to clear the display a...

Page 12: ...hen reminder tones will sound every minute 2 Touch OFF CANCEL or open the door to clear the display and or stop reminder tones The cook time ex cept POPCORN can be changed for twenty seconds after touching a pad To Change Cook Time Touch COOK POWER repeatedly to scroll through MORE LESS or NORML time FOOD SERVING SIZE INSTRUCTIONS Baked Potatoes 1 to 4 medium 10 to 13 oz 264 to 369 g each Pierce e...

Page 13: ...nd cooking power of the cycling stage can be changed after touching START ENTER without interrupting cooking To Change Cook Time Touch COOK TIME Use the number pads to enter the new cook time Touch START ENTER To Change Cooking Power Touch COOK POWER Use the number pads to enter the new cooking power or repeatedly touch COOK POWER Touch START ENTER Reheating Times and cooking power have been prese...

Page 14: ...l appear in the display 4 end of cycle tones will sound and then reminder tones will sound every minute 5 Touch OFF CANCEL or open the door to clear the display and or stop reminder tones To Defrost Manually 1 Touch the number pads to set a length of time to defrost 2 Touch COOK POWER 3 Touch 3 4 Touch START ENTER The display will count down the defrost time When the cycle ends END will appear in ...

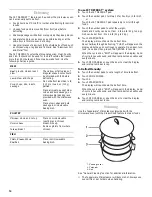
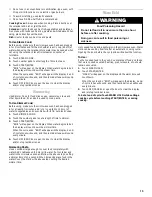
Page 15: ...ic wrap 1 Touch SIMMER COOK 2 Touch the number pads to set a length of time to simmer 3 Touch START ENTER BOIL will appear on the display When water begins to boil the display will count down the simmer time When the cycle ends END will appear in the display 4 end of cycle tones will sound and then reminder tones will sound every minute 4 Touch OFF CANCEL or open the door to clear the display and ...

Page 16: ...with 1 tablespoon 15 mL of either lemon juice or vinegar for 2 to 5 minutes in oven OVEN DOOR EXTERIOR Glass cleaner and paper towels or non abrasive plastic scrubbing pad Apply glass cleaner to soft cloth or sponge not directly on panel THE TUPPERWARE MICROSTEAMER Soft brush if necessary to clean holes Dishwasher The Tupperware Microsteamer is dishwasher safe Stubborn Stains To remove stains such...

Page 17: ...ance or Service section to reorder To Replace 1 Unplug microwave oven or disconnect power 2 Remove the bulb cover mounting screws 1 Mounting screw 3 Replace light Close bulb cover Replace mounting screws 4 Plug in microwave oven or reconnect power ReplacingMicrowaveOvenLight The microwave oven light is a candelabra base 30 watt bulb It will automatically come on when the door is opened and when th...

Page 18: ...operly Turntable rotates both directions This is normal and depends on motor rotation at beginning of cycle Display shows messages Is the display showing There has been a power failure or the clock time has been turned off See Display section to clear display See Clock section to reset the clock or to turn it on Is the display showing a letter followed by a number See Display section to clear If i...

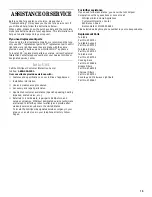
Page 19: ... our full line of appliances Installation information Use and maintenance procedures Accessory and repair parts sales Specialized customer assistance Spanish speaking hearing impaired limited vision etc Referrals to local dealers repair parts distributors and service companies Whirlpool designated service technicians are trained to fulfill the product warranty and provide after warranty service an...

Page 20: ...es do not allow the ex clusion or limitation of incidental or consequential damages so this ex clusion or limitation may not apply to you This warranty gives you specific legal rights and you may also have other rights which may vary from state to state Outside the 50 United States this warranty does not apply Contact your authorized Whirlpool dealer to determine if another warranty applies If you...

Reviews: