background image

S E R V I C E

Whirlpool Europe

10.05.1995 / Page 7

Customer Service

Doc. No: 4812 714 10519

Grill

Use the GRILL button to select grill operation. Set the cooking time with timer knob and start with the
START button.
NOTE: - When the Crisp or Grill function is selected, grill indicator 1 is lit. When cooking is started, grill

indicator 2 blinks.

Timer

The TIMER button starts the independent timer. The timer is initiated to 5 s, the timer symbol is dis-
played (not blinking). Display of the timer is toggled with the same button. (If the timer has been started
there is a display time out of 3 s). The timer is set with the timer knob and started with the START but-
ton. 3 seconds after the timer has been started, the function that was already activated is displayed, and
the timer symbol blinks. If the oven is in stand-by, the timer display continues (without blink). The possi-
ble time that can be set ranges from 5 s to 9 hours and 59 minutes. Eight fast beeps indicates that the
timer has counted down to zero. If the timer has been started, it can be turned off by turning the time to
zero, or by pressing the STOP button when the timer is displayed.

Stage

Two stages may be stored. The following functions are excluded:

- the Independent Timer

- Auto Defrost

- Auto Reheat

- Beverage

- Auto Defrost-Reheat

- Auto Crisp Reheat

- Auto Crisp Cook

Stage is used according  to the following (starting from stand by):

a) Press STAGE. The "1" symbol is displayed. Initiate MW 750W, 5s.

b) Select function (if other than MW), power, time etc. for stage 1. (Grill selects grill mode, not combina-

tion)

c) Press STAGE. The setting above is stored in stage 1. The "2" symbol is displayed. Initiate MW 750W,

0s (shows clearly that a new stage is displayed).

d) Select function etc. for stage 2.

e) Press STAGE. Stage 2 is stored, and stage 1 is displayed. The "1" symbol is displayed. START may be

pressed directly instead.

Memories

Programming:

Select function, time, power etc. to be stored. Then press a memory button (2 s) until storage is con-
firmed by a beep. The timer may be stored if it has not been started and no other function is active in the
background (stand-by).

Summary of Contents for AVM 215 BL

Page 1: ... data 3 Text Legend 4 Spare part list 9 Exploded view 10 Circuit diagram 11 Wiring diagram 12 Service Manual Microwave oven AVM 215 BL AVM 215 BL This documentation is only intended for qualified technicians who are aware of the respec tive safety regulations Date 10 05 1995 Subject to modification Document No 4812 714 10519 ...

Page 2: ...ke sure that each replacement part you use conforms to the manufacturer s specifications Do not start a repair if you have any doubt as to your ability to complete it CAUTION MICROWAVE RADIATION PERSONNEL SHOULD NOT BE EXPOSED TO THE MICROWAVE ENERGY WHICH MAY RADIATE FROM THE MAGNETRON WAVEGUIDE OR ANTENNA IF THEY ARE IMPROPERLY USED OR CONNECTED ALL INPUT AND OUTPUT MICROWAVE CONNECTIONS WAVEGUI...

Page 3: ...m Depth 395 mm Cavity volume 34 l Turntable diameter 360 mm Weight Net 23 Kg Packed 26 Kg Electrical Voltage 220 240 V Frequency 50 Hz Power consumption 2850 W Power consump CH DK 2300 W Power consump 12 6 A Power consump CH DK 10 A Fuse Eu 16 A Fuse CH DK 10 A UK 13 A Power Output power 950 60 W Microwave frequency 2450 MHz Grill Quarzgrill 1200 W Timer Digital 90 min Accessories Grill grid Space...

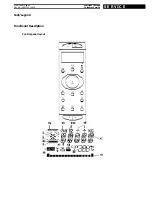
Page 4: ...S E R V I C E 10 05 1995 Page 4 Whirlpool Europe Doc No 4812 714 10519 Customer Service Text Legend Functional Description Control panel layout ...

Page 5: ...hen the timer operates in the background o The process power bar indicates how far the process has advanced when using the auto functions 1000W MW is indicated by a rolling bar Calibration Before the oven can be operated a calibration must be performed To start a calibration make sure that a cross and a glass turn table are mounted in the oven A weight of 200 g must be placed on the centre of the ...

Page 6: ...nob After a while the display shows the estimated reheat time which is decreased during operation The process bar indicates how far the process has advanced Auto Crisp Reheat Press the AUTO CRISP REHEAT button Select food class by repeatedly pressing this button Adjust doneness with the timer knob Start by pressing the START button After a while the display shows the estimated reheat time which is...

Page 7: ...s indicates that the timer has counted down to zero If the timer has been started it can be turned off by turning the time to zero or by pressing the STOP button when the timer is displayed Stage Two stages may be stored The following functions are excluded the Independent Timer Auto Defrost Auto Reheat Beverage Auto Defrost Reheat Auto Crisp Reheat Auto Crisp Cook Stage is used according to the f...

Page 8: ...sion Every time a new cooking sessions started the time for the process is being measured Changing between MW combination and grill does not reset this timer A certain part of the measured time is added to the remaining running time when ADD is pressed The Add time is kept for 1 minute after the oven has entered stand by If ADD is pressed within this time the add time and the function and power th...

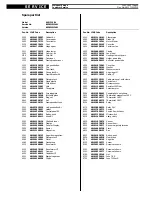
Page 9: ...9 145 78168 Transformer HT 412 1 4819 462 48431 Damper 420 0 4819 121 48016 Capacitor HT 420 1 4819 404 78839 Bracket capacitor 420 2 4819 492 68558 Clip fix Pos No 12NC Code Description 421 0 4819 121 18162 Filter mains 426 0 4819 218 38039 Diode HV 442 0 4819 361 18361 Motor Blower 442 1 4819 462 58145 Cover fan 442 2 4819 462 58146 Container fan 442 3 4819 466 98922 Casing 443 0 4819 515 28224 ...

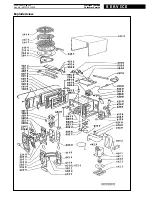
Page 10: ...S E R V I C E 10 05 1995 Page 10 Whirlpool Europe Doc No 4812 714 10519 Customer Service Exploded view ...

Page 11: ...S E R V I C E Whirlpool Europe 10 05 1995 Page 11 Customer Service Doc No 4812 714 10519 Circuit diagram ...

Page 12: ......

Page 13: ......

Reviews: