background image

3

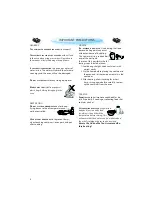
IMPORTANT SAFETY INSTRUCTIONS

D

O


NOT


HE

A

T

OR


USE


FL

AMMA

BLE


MA

TERI

A

LS


 in or near 

the oven. Fumes can create a fire hazard or ex-
plosion.

D

O


NOT


USE


YOUR


M

ICRO

WA

VE


 oven for drying tex-

tiles, paper, spices, herbs, wood, flowers, fruit or 
other combustible materials. Fire could result.

D

O


NOT


OVER

-

COOK


FOOD

 Fire could result.

D

O


NOT


LE

A

VE


THE


OVEN


UN

A

TTENDED

 especially 

when using paper, plastic or other combustible 
materials in the cooking process. Paper can char 
or burn and some plastics can melt if used when 
heating foods.

I

F


MA

TERI

A

L


INSIDE

 / 

OUTSIDE


THE


OVEN


SHOULD


IG

-

NITE


OR


S

M

OKE


IS


OBSERVED

 keep oven door clo-

sed and turn the oven off. Disconnect the power 
cord or shut off power at the fuse or circuit brea-
ker panel.

READ CAREFULLY AND KEEP FOR FUTURE REFERENCE

O

NLY


ALLOW


CHILDREN


to use the appliance under 

adult supervision and after adequate instructions 
have been given, so that the child is able to use 
the appliance in a safe way and understands the 
hazards of improper use.

T

HIS


APPLIANCE


IS


NOT


INTENDED


FOR


 use by persons 

(including children) with reduced physical, sensory 
or mental capabilities, unless used under the 
supervision of a person responsible for their safety. 

W

ARNING

!

A

CCESSIBLE


PARTS


MAY


BECOME


HOT


 during use, young 

children should be kept away.

D

O


NOT


USE


YOUR


MICROWAVE


 oven for 

heating anything in airtight sealed 
containers. The pressure increa-
ses and may cause damage when 
opening or may explode.

EGGS

D

O


NOT


USE


YOUR


M

ICRO

WA

VE


 oven for cooking or 

reheating whole eggs with or without  shell 
since they may explode even after mi-
crowave heating has ended.

T

HE


DOOR


SEALS


AND


THE


DOOR


SEAL


AREAS


 must be re-

gularly inspected for damage. If these areas are da-
maged the appliance should not be operated until it 
has been repaired by a trained service technician.

D

O


NOT


USE


 corrosive chemicals or vapors in this 

appliance. This type of oven is specifically desig-
ned to heat or cook food. It is not designed for in-
dustrial or laboratory use.

Summary of Contents for AMW 7031

Page 1: ...HELYEZÉS RÖVID KEZDÉSI ÚTMUTATÓ INSTALACE NÁVOD VE ZKRATCE INSTALACJA SKRÓCONA INSTRUKCJA OBSŁUGI УСТАНОВКА КРАТКОЕ СПРАВОЧНОЕ РУКОВОДСТВО INŠTALÁCIA ÚVODNÁ PRÍRUČKA INSTALLATION DÉMARRAGE RAPIDE AUFSTELLUNG KURZANLEITUNG INSTALLAZIONE GUIDA RAPIDA INICIO RÁPIDO PARA LA INSTALACIÓN INSTALAÇÃO GUIA DE INICIAÇÃO RÁPIDA INSTALLATION SNABBGUIDE AMW 7031 AMW 742 ...

Page 2: ...rd or plug if it is not working properly or if it has been damaged or dropped Do not im merse the mains cord or plug in water Keep the cord away from hot surfaces Electrical shock fire or other hazards may result DO NOT REMOVE THE MICROWAVE INLET PROTECTION PLATES located on the side of the oven cavity wall They prevent grease food parti cles from entering the micro wave inlet channels ENSURE the ...

Page 3: ...that the child is able to use the appliance in a safe way and understands the hazards of improper use THIS APPLIANCE IS NOT INTENDED FOR use by persons including children with reduced physical sensory or mental capabilities unless used under the supervision of a person responsible for their safety WARNING ACCESSIBLE PARTS MAY BECOME HOT during use young children should be kept away DO NOT USE YOUR...

Page 4: ...ent this possibility the fol lowing steps should be taken 1 Avoid using straight sided containers with narrow necks 2 Stir the liquid before placing the container in the oven and let the teaspoon remain in the container 3 After heating allow standing for a short time stirring again before carefully removi ng the container from the oven CAREFUL ALWAYS REFER to a microwave cookbook for de tails Espe...

Page 5: ... metal or metal parts ALWAYS ENSURE that the turntable is able to turn freely before starting the oven CRISP HANDLE USE THE SUPPLIED SPECIAL CRISP HAN DLE to remove the hot Crisp plate from the oven CRISP PLATE PLACE THE FOOD DIRECTLY ON THE CRISP PLATE Always use the Glass turnta ble as support when using the Crisp plate DO NOT PLACE ANY UTENSILS on the Crisp plate since it will quickly become ve...

Page 6: ... or altered during the first 20 seconds of operation WHEN USING SOME OF THE AUTO FUNCTIONS the oven may stop depending on the chosen program and food class and prompt you to STIR FOOD or TURN FOOD STIR OR TURN FOOD AUTO FUNCTIONS ONLY THIS IS DONE BY SELECTING A DONENESS LEVEL with the buttons right after you have pressed the Start button NOTE THE OVEN CONTINUES AUTOMATICALLY AFTER 1 MIN if the fo...

Page 7: ...0 C HOT and the current cavity temperature is displayed Be careful not to touch the cavity inside when re moving food Use oven mittens IF THE TEMPERATURE IS LESS THAN 50 C the 24 hour clock is displayed PRESS THE BACK BUTTON to temporarily view the 24 hour clock when HOT is dis played THE COOLING PROCEDURE can be in terrupted without any harm to the oven by opening the door FOOD CLASSES AUTO FUNCT...

Page 8: ...l Setting is shown USE THE BUTTONS to choose one of the following settings to adjust Clock Sound ECO Brightness PRESS THE STOP BUTTON TO EXIT the settings function and save all your changes when you are done PRESS THE OK BUTTON The left right hand digits hours flicker PRESS THE BUTTONS to set the hours PRESS THE OK BUTTON The two right hand digits minutes flicker PRESS THE BUTTONS to set the minut...

Page 9: ...TTON again to confirm the change WHEN ECO IS ON the display will automatically turn off after a while to save energy It will automatically light up again when a button is pre ssed or the door is opened At cooking end cavity lamp switches off af ter 30 seconds WHEN OFF IS SET the display will not turn off and the 24 h clock will al ways be visible At cooking end cavity lamp switches off after 3 min...

Page 10: ... set the desired length of the timer PRESS THE OK BUTTON AN ACOUSTIC SIGNAL will be heard when the timer has finished to count down PRESSING THE STOP BUTTON before the timer has finished will reset the ti mer to zero CHANGING SETTINGS BRIGHTNESS PRESS THE OK BUTTON PRESS THE BUTTONS to set the level of brightness suitable to your preference PRESS THE OK BUTTON again to confirm your selection ...

Page 11: ...creases the time with 30 seconds You may also alter the time by pressing the buttons to increase or decrease the time BY PRESSING THE BUTTON you may return to where you can change cooking time and power level Both can be altered with the buttons during cooking MICROWAVES ONLY POWER SUGGESTED USE 1000 W REHEATING OF BEVERAGES water clear soups coffee tea or other food with a high water con tent If ...

Page 12: ...other dough based food It is also good for frying ba con and eggs sausages hambur gers etc THE OVEN AUTOMATICALLY use Microwaves and Grill in order to heat the Crisp plate This way the Crisp plate will rapidly reach its working tem perature and begin to brown and crisp the food ENSURE that the Crisp plate is correctly placed in the middle of the Glass turntable THE OVEN AND THE CRISP PLATE become ...

Page 13: ...wave power level when using the Grill Combi is limited to a factory pre set level USE THIS FUNCTION TO brown the sur face of foods placed on the wire rack TURN FOOD during cooking ENSURE THAT THE UTENSILS used are heat resistant and ovenproof before gril ling with them DO NOT USE PLASTIC utensils when grilling They will melt Items of wood or paper are not suitable either USE THIS FUNCTION TO cook ...

Page 14: ...st ties THE SHAPE OF THE PACKAGE alters the defros ting time Shallow packets defrost more quickly than a deep block SEPARATE PIECES as they begin to defrost Individual slices defrost more easily SHIELD AREAS OF FOOD with small pieces of aluminum foil if they start to become warm e g chicken legs and wing tips BOILED FOOD STEWS AND MEAT SAUCES defrost better if stirred during defrosting time WHEN D...

Page 15: ... select food class FOOD and food class is displayed PRESS THE OK BUTTON to confirm your selection You will automatically be taken to the next setting PRESS THE BUTTONS to set the weight PRESS THE OK BUTTON to confirm your selection PRESS THE START BUTTON USE THIS FUNCTION when reheating ready made food either frozen chilled or room tempered PLACE FOOD onto a microwave safe heat proof dinner plate ...

Page 16: ...e to each other PLASTIC FOIL should be scored or pricked with a fork to relieve the pressure and to prevent bur sting as steam builds up du ring cooking 1 2 MINUTES STANDING TIME ALWAYS IMPROVES the result especially for frozen food AUTO REHEAT FOOD HINTS DINNER PLATE 250g 500g PREPARE FOOD in line with recommendations above Heat under cover SOUP 200g 800g REHEAT UNCOVERED in separate bowls or in ...

Page 17: ...FOOD and food class is displayed PRESS THE OK BUTTON to confirm your selection You will automatically be taken to the next setting PRESS THE BUTTONS to set the weight PRESS THE OK BUTTON to confirm your selection PRESS THE START BUTTON USE THIS FUNCTION for defrosting Meat Poultry Fish Vegetables and Bread Jet Defrost should only be used if the net weight is between 100 g 2 5 kg ALWAYS PLACE THE F...

Page 18: ...microwaves and choose 160 W when defrosting JET DEFROST FOOD HINTS MEAT 100g 2 0Kg Minced meat cutlets steaks or roasts TURN FOOD when oven prompts POULTRY 100g 2 5Kg Chicken whole pieces or fillets TURN FOOD when oven prompts FISH 100g 1 5Kg Whole steaks or fillets TURN FOOD when oven prompts VEGETABLES 100g 1 5Kg Mixed vegetables peas broccoli etc TURN FOOD when oven prompts BREAD 100g 1 0Kg Loa...

Page 19: ...ckly reheat your food from frozen to serving temperature AUTO CRISP IS USED ONLY for frozen ready made food FOOD HINTS FRENCH FRIES 200g 500g SPREAD OUT THE FRIES in an even layer on the crispplate Sprinkle with salt if desired STIR FOOD when oven prompts PIZZA thin crust 200g 600g FOR PIZZAS with thin crust PAN PIZZA 300g 800g FOR PIZZAS with thick crust CHICKEN WINGS 200g 500g FOR CHICKEN NUGGET...

Page 20: ...repeatedly until you find the Auto Cook function PRESS THE OK BUTTON to confirm your selection You will automatically be taken to the next setting PRESS THE BUTTONS to select food class FOOD and food class is displayed PRESS THE OK BUTTON to confirm your selection You will automatically be taken to the next setting PRESS THE BUTTONS to set the weight PRESS THE OK BUTTON to confirm your selection P...

Page 21: ...he oven beeps Please be aware that the oven dish and food are hot TURN FOOD when oven prompts FRESH VEGETABLES 200g 800g CUT VEGETABLES into even size pieces Add 2 4 table spoons water and cover Stir when oven beeps STIR FOOD when oven prompts FROZEN VEGETABLES 200g 800g COOK UNDER COVER Stir when oven beeps STIR FOOD when oven prompts CANNED VEGETABLES 200g 600g COOK IN A MICROWAVE SAFE dish with...

Page 22: ...TERGENT water and a soft cloth to clean the interior surfaces front and rear of the door and the door opening DO NOT ALLOW GREASE or food particles to build up around the door DO NOT USE STEAM CLEANING APPLIANCES when cleaning your microwave oven ADDING SOME LEMON JUICE to a cup of water placing this on the turntable and boiling for a few minu tes can eliminate odors inside the oven FOR STUBBORN S...

Page 23: ...C ING it should be replaced by the original mains cord which is available via our service organization The mains cord may only be replaced by a trained service technician SERVICE ONLY TO BE CARRIED OUT BY A TRAINED SERVICE TECHNICIAN It is hazardous for anyone other than a trained person to carry out any service or repair operation which involves the removal of any cover which gives protection aga...

Page 24: ...s product THE SYMBOL on the product or on the documents accom panying the product indica tes that this appliance may not be treated as household was te Instead it shall be handed over to the applicable collec tion point for the recycling of electrical and electronic equipment DISPOSAL must be carried out in accordance with lo cal environmental regulati ons for waste disposal FOR MORE DETAILED INFO...

Reviews: