background image

7

The Ice Dispenser

The dispensing system will not operate when the freezer door is 
open. Ice dispenses from the ice maker storage bin in the freezer 
when the dispenser lever is pressed.

NOTE: Some models dispense both cubed and crushed ice. 
Before dispensing ice, select which type of ice you prefer. 
For crushed ice, cubes are crushed before being dispensed. This 
may cause a slight delay when dispensing crushed ice. Noise 
from the ice crusher is normal, and pieces of ice may vary in size. 
When changing from crush to cube, a few ounces of crushed ice 
will be dispensed along with the first cubes.

To Dispense Ice:

1. Press the button to select the desired type of ice.

2. Press a sturdy glass against the ice dispenser lever. Hold the 

glass close to the dispenser opening so ice does not fall 
outside of the glass. 
IMPORTANT: You do not need to apply a lot of pressure to the 
lever in order to activate the ice dispenser. Pressing hard will 
not make the ice dispense faster or in greater quantities.

3. Remove the glass to stop dispensing.

The Dispenser Light

Style 1: The dispenser light can be turned on by pressing the ON 
button.
Style 2:  When you use the dispenser, the lever will automatically 
turn the light on. If you want the light to be on continuously, you 
may choose either ON or NIGHT LIGHT. 
ON: Press the LIGHT button to turn on the dispenser light. 
NIGHT LIGHT: Press the LIGHT button a second time to select 
the Night Light. The dispenser light will automatically adjust to 
become brighter as the room brightens, dimmer as the room 
darkens.

OFF: Press the LIGHT button a third time to turn off the dispenser 
light.
The dispenser lights are LEDs which should not need to be 
changed. If it appears that your dispenser lights are not working, 
be sure that the light sensor is not blocked (in Night Light mode). 
See “Troubleshooting” for more information. 

The Dispenser Lock (on some models)

Your dispenser can be turned off for easy cleaning or to prevent 
unintentional dispensing by small children and pets. 
NOTE: The lock feature does not shut off power to the product, to 
the ice maker, or to the dispenser light. It simply deactivates the 
dispenser levers. The ice and water dispensers will not work.
Style 1: Press the LOCK button to lock the dispenser. Press the 
UNLOCK button to unlock the dispenser. 

Style 2: Press and hold the LOCK OUT button to lock the 
dispenser. Press and hold the LOCK OUT button a second time to 
unlock the dispenser. 

Ice Maker and Storage Bin

Turning the Ice Maker On/Off

To turn ON the ice maker, simply lower the wire shutoff arm.
To manually turn off the ice maker, lift the wire shutoff arm to the 
OFF (arm up) position and listen for the click.
NOTE: Your ice maker has an automatic shutoff. As ice is made, 
the ice cubes will fill the ice storage bin, and the ice cubes will 
raise the wire shutoff arm to the OFF (arm up) position. Do not 
force the wire shutoff arm up or down.

REMEMBER:

Allow 24 hours to produce the first batch of ice. Discard the 
first three batches of ice produced.

The quality of your ice will be only as good as the quality of the 
water supplied to your ice maker. Avoid connecting the ice 
maker to a softened water supply. Water softener chemicals 
(such as salt) can damage parts of the ice maker and lead to 
poor quality ice. If a softened water supply cannot be avoided, 
make sure the water softener is operating properly and is well 
maintained.

Do not use anything sharp to break up the ice in the storage 
bin. This can cause damage to the ice container and the 
dispenser mechanism.

Do not store anything on top of or in the ice maker or storage 
bin.

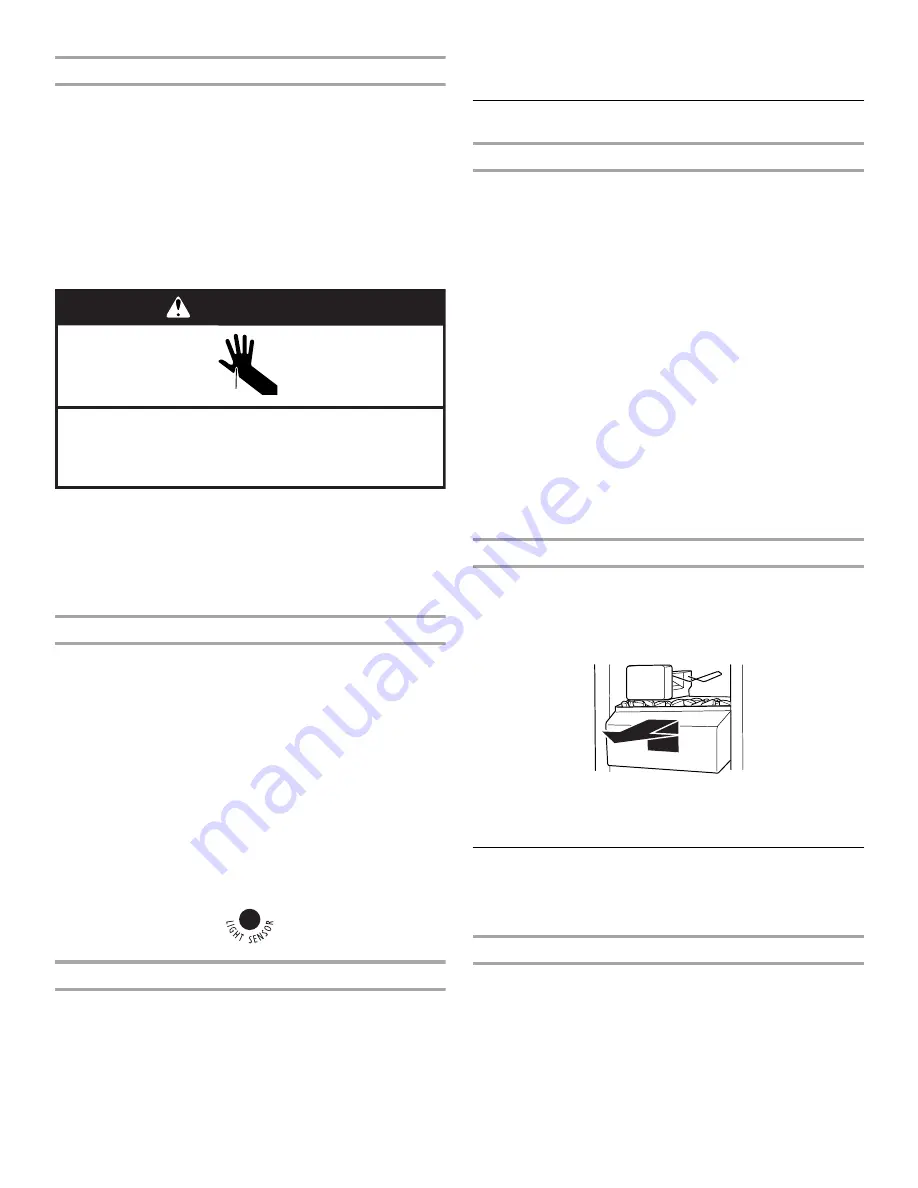
Removing and Replacing Ice Storage Bin

1. Pull the covering panel up from the bottom and then slide it 

back toward the rear.

2. Lift the wire shutoff arm so it clicks into the OFF (up) position. 

Ice can still be dispensed, but no more can be made.

3. Lift up the front of the storage bin and pull it out. 

4. Replace the bin by pushing it in all the way or the dispenser 

will not work. Push the wire shutoff arm down to the ON 
position to restart ice production. Make sure the door is 
closed tightly.

Water Filtration System

NOTE: Do not use with water that is microbiologically unsafe 
or of unknown quality without adequate disinfection before or 
after the system. 

Water Filter Status Light (on some models)

The filter status light will help you know when to change your 
water filter. The light will change from green to yellow. This tells 
you that it is almost time to change the filter. It is recommended 
that you replace the filter when the status light changes to red OR 
water flow to your water dispenser or ice maker decreases 
noticeably. 
After changing the filter, reset the filter status light by pressing the 
button. The status light will change from red to green when the 
system is reset.

Cut Hazard

Use a sturdy glass when dispensing ice.

Failure to do so can result in cuts.

WARNING

Summary of Contents for 2315209

Page 1: ...partment Dealer name____________________________________________________ Serial number __________________________________________________ Address ________________________________________________________ Phone number__________________________________________________ Model number __________________________________________________ Purchase date __________________________________________________ Acces...

Page 2: ...ad and obey all safety messages This is the safety alert symbol This symbol alerts you to potential hazards that can kill or hurt you and others All safety messages will follow the safety alert symbol and either the word DANGER or WARNING These words mean follow instructions instructions DANGER WARNING IMPORTANT SAFETY INSTRUCTIONS WARNING To reduce the risk of fire electric shock or injury when u...

Page 3: ...tat Refrigerator or Freezer Control depending on the model to OFF and then disconnect the refrigerator from the electrical source When you are finished reconnect the refrigerator to the electrical source and reset the control Thermostat Refrigerator or Freezer Control depending on the model to the desired setting WARNING Excessive Weight Hazard Use two or more people to move and install refrigerat...

Page 4: ...d qualified plumber ConnectWater Supply Read all directions before you begin IMPORTANT If you turn the refrigerator on before the water line is connected turn the ice maker OFF Connect to Water Line 1 Unplug refrigerator or disconnect power 2 Turn OFF main water supply Turn ON nearest faucet long enough to clear line of water 3 Locate a 12 70 mm to 1 3 18 cm vertical cold water pipe near the refri...

Page 5: ...f the copper tubing NOTE Tighten the nut by hand Then tighten it with a wrench two more turns Do not overtighten 4 Turn shutoff valve ON 5 Check for leaks Tighten any nuts or connections including connections at the valve that leak Style 3 1 Unplug refrigerator or disconnect power 2 Remove and discard the shipping tape and the black nylon plug from the gray coiled water tubing on the rear of the r...

Page 6: ...comes preset at the lowest meat setting To store meat Set the control to one of the three MEAT settings to store meat at its optimal storage temperature To store vegetables Set the control to VEG to store vegetables at their optimal storage temperatures NOTE If food starts to freeze move the control to the left less cold Remember to wait 24 hours between adjustments CrisperHumidityControl onsomemo...

Page 7: ...button to lock the dispenser Press and hold the LOCK OUT button a second time to unlock the dispenser IceMakerandStorageBin Turning the Ice Maker On Off To turn ON the ice maker simply lower the wire shutoff arm To manually turn off the ice maker lift the wire shutoff arm to the OFF arm up position and listen for the click NOTE Your ice maker has an automatic shutoff As ice is made the ice cubes w...

Page 8: ...r harsh cleaners such as window sprays scouring cleansers flammable fluids cleaning waxes concentrated detergents bleaches or cleansers containing petroleum products on plastic parts interior and door liners or gaskets Do not use paper towels scouring pads or other harsh cleaning tools 1 Unplug refrigerator or disconnect power 2 Hand wash rinse and dry removable parts and interior surfaces thoroug...

Page 9: ...imize performance Rattling flow of refrigerant water line or from items placed on top of the refrigerator Sizzling Gurgling water dripping on the heater during defrost cycle Popping contraction expansion of inside walls especially during initial cool down Water running may be heard when water melts during the defrost cycle and runs into the drain pan Creaking Cracking occurs as ice is being ejecte...

Page 10: ...ter shutoff valve fully open Kink in the water source line A kink in the line can reduce water flow Straighten the water source line Reverse osmosis water filtration system connected to your cold water supply This can decrease water pressure See Water Supply Requirements Questions remain regarding water pressure Call a licensed qualified plumber Off taste odor or gray color in the ice New plumbing...

Page 11: ... either the Installation Instructions or the Use Care Guide Water is leaking from the dispenser NOTE One or two drops of water after dispensing is normal Glass not being held under the dispenser long enough Hold the glass under the dispenser 2 to 3 seconds after releasing the dispenser lever New installation Flush the water system See Water and Ice Dispensers Recently changed water filter Flush th...

Page 12: ...number Refer to the Warranty section for the Manufacturer s limited warranty Application Guidelines Water Supply Parameters Tested and certified by NSF International against NSF ANSI Standard 42 for the reduction of Chlorine Taste and Odor Particulate Class II and against NSF ANSI Standard 53 for the reduction of Mercury Benzene Toxaphene O dichlorobenzene and Carbofuran Substance Reduction Aesthe...

Page 13: ...er to the Warranty section for the Manufacturer s limited warranty Application Guidelines Water Supply Parameters Tested and certified by NSF International against NSF ANSI Standard 42 for the reduction of Chlorine Taste and Odor Particulate Class II and against NSF ANSI Standard 53 for the reduction of Mercury Benzene Toxaphene O dichlorobenzene and Carbofuran Substance Reduction Aesthetic Effect...

Page 14: ...aired in the home 8 Repairs to parts or systems resulting from unauthorized modifications made to the appliance 9 Expenses for travel and transportation for product service in remote locations 10 The removal and reinstallation of your appliance if it is installed in an inaccessible location or is not installed in accordance with published installation instructions DISCLAIMER OF IMPLIED WARRANTIES ...

Page 15: ...formación acerca de su electrodoméstico para ayudarle a obtener asistencia o servicio técnico si alguna vez llegara a necesitarlo Deberá tener a mano el número completo del modelo y de la serie Puede encontrar esta información en la etiqueta con el número de modelo y de serie que está ubicada en la pared interior del compartimiento del refrigerador Nombre del distribuidor _________________________...

Page 16: ...tención sobre peligros potenciales que pueden ocasionar la muerte o una lesión a usted y a los demás Todos los mensajes de seguridad irán a continuación del símbolo de advertencia de seguridad y de la palabra PELIGRO o ADVERTENCIA Estas palabras significan Para reducir el riesgo de incendio choque eléctrico o lesiones personales al usar su refrigerador siga estas precauciones básicas ADVERTENCIA I...

Page 17: ...ongelador dependiendo del modelo en la posición OFF Apagado y luego desconecte el refrigerador de la fuente de energía Cuando haya terminado reconecte el refrigerador a la fuente de energía eléctrica y vuelva a poner el control del termostato del refrigerador o del congelador dependiendo del modelo en la posición deseada ADVERTENCIA Peligro de Peso Excesivo Use dos o más personas para mover e inst...

Page 18: ...r la conexión del agua ponga la fábrica de hielo en la posición apagado OFF Conexión a la línea de agua 1 Desenchufe el refrigerador o desconecte el suministro de energía 2 CIERRE el suministro principal de agua ABRA la llave de agua más cercana el tiempo suficiente para que la tubería de agua se vacíe totalmente 3 Busque una tubería vertical de agua fría de a 1 12 70 mm a 3 18 cm cercana al refri...

Page 19: ...uerca a mano Luego apriétela dos vueltas con una llave de tuercas No apriete demasiado 4 ABRA la válvula de cierre 5 Revise si hay fugas Apriete aquellas tuercas o conexiones que tengan fugas incluidas las conexiones en la válvula Estilo 3 1 Desenchufe el refrigerador o desconecte el suministro de energía 2 Quite y deseche la cinta de empaque y el tapón de nailon negro de la tubería gris de agua e...

Page 20: ... frío Controles deslizables Deslice el control un ajuste hacia la derecha para hacer el compartimiento más frío Deslice el control un ajuste hacia la izquierda para hacerlo menos frío Si necesita regular las temperaturas en el refrigerador o en el congelador utilice como guía los ajustes que se enumeran en la tabla siguiente Espere por lo menos 24 horas entre ajustes Controldetemperaturadelcajónco...

Page 21: ...posición de hielo picado a la posición de hielo en cubos caen unas onzas de hielo picado junto con los primeros cubos Para despachar hielo 1 Oprima el botón del tipo de hielo que desee 2 Oprima con un vaso resistente la barra del despachador de hielo Sostenga el vaso junto al orificio del despachador para que el hielo no caiga fuera del vaso IMPORTANTE No necesita aplicar mucha presión a la barra ...

Page 22: ... hacia abajo a la posición ON encendido para reiniciar la producción de hielo Cerciórese de que la puerta esté bien cerrada Sistemadefiltracióndeagua NOTA No use agua que no sea microbiológicamente segura o que sea de calidad desconocida sin desinfectarla adecuadamente antes o después del sistema Luz de estado del filtro de agua en algunos modelos La luz de estado del filtro de agua le ayudará a s...

Page 23: ...y detergente suave con agua tibia 4 No es necesaria una limpieza rutinaria del condensador en ambientes de funcionamiento normal en el hogar Si el ambiente es particularmente grasoso o polvoriento o si hay bastante tránsito de mascotas en el hogar el condensador deberá limpiarse cada dos o tres meses para asegurar la máxima eficacia Si necesita limpiar el condensador Quite la rejilla de la base Us...

Page 24: ...sempeño Vibraciones flujo de líquido refrigerante tubería de agua o artículos guardados arriba del refrigerador Chisporroteos Gorgoteos agua goteando en el calentador durante el ciclo de descongelación Estallido contracción expansión de la paredes interiores especialmente durante el enfriamiento inicial Agua corriendo puede escucharse cuando el hielo se derrite durante el ciclo de descongelación y...

Page 25: ... fría Esto puede hacer que disminuya la presión de agua Vea Requisitos del suministro de agua en el libro de las Instrucciones de instalación o en el Manual de uso y cuidado Los cubos de hielo son huecos o pequeños NOTA Esto es una indicación de baja presión de agua No está abierta por completo la válvula de cierre de agua Abra completamente la válvula de cierre de agua Hay un estrechamiento en la...

Page 26: ...ctado un sistema de filtración de agua de ósmosis inversa al suministro de agua fría Vea Requisitos del suministro de agua en las Instrucciones de instalación o en el Manual de uso y cuidado Hay fugas de agua del despachador NOTA Es normal que caigan una o dos gotas de agua después de despachar agua No se ha puesto el vaso debajo del despachador el tiempo suficiente Sostenga el vaso debajo del des...

Page 27: ... dirección y número telefónico del fabricante Refiérase a la sección Garantía para verificar la garantía limitada del fabricante Pautas de aplicación Parámetros para el suministro de agua Comprobado y certificado por NSF International según la norma 42 NSF ANSI para la reducción de cloro sabor y olor y clase de partículas II y según la norma 53 NSF ANSI para la reducción de mercurio benceno toxafe...

Page 28: ...número telefónico del fabricante Refiérase a la sección Garantía para verificar la garantía limitada del fabricante Pautas de aplicación Parámetros para el suministro de agua Comprobado y certificado por NSF International según la norma 42 NSF ANSI para la reducción de cloro sabor y olor y clase de partículas II y según la norma 53 NSF ANSI para la reducción de mercurio benceno toxafeno ortodiclor...

Page 29: ...méstico principal está diseñado para ser reparado en el hogar 8 Reparaciones de piezas o sistemas como resultado de modificaciones no autorizadas que se hayan efectuado en el electrodoméstico 9 Gastos de viaje y transporte para obtener servicio del producto en lugares remotos 10 La remoción e instalación de su electrodoméstico si estuviera instalado en un lugar inaccesible o si no estuviera instal...

Page 30: ...te d achat ou d installation Inscrivez les renseignements suivants au sujet de votre appareil ménager pour vous aider à obtenir assistance ou service en cas de besoin Vous devrez connaître le numéro de modèle et le numéro de série au complet Vous trouverez ces renseignements sur la plaque signalétique située sur la paroi interne du compartiment de réfrigération Nom du marchand ____________________...

Page 31: ...té Ce symbole d alerte de sécurité vous signale les dangers potentiels de décès et de blessures graves à vous et à d autres Tous les messages de sécurité suivront le symbole d alerte de sécurité et le mot DANGER ou AVERTISSEMENT Ces mots signifient AVERTISSEMENT réfrigérateur prendre quelques précautions fondamentales y compris les suivantes Pour réduire les risques d incendie de choc électrique o...

Page 32: ... plus de personnes pour déplacer et installer le réfrigérateur Le non respect de cette instruction peut causer une blessure au dos ou d autre blessure Déplacement de votre réfrigérateur Votre réfrigérateur est lourd Lors du déplacement du réfrigérateur pour le nettoyage ou le service veiller à protéger l le plancher Toujours tirer le réfrigérateur tout droit lors du déplacement Ne pas incliner le ...

Page 33: ...7 kPa Si un système de purification de l eau par osmose inverse est raccordé à votre alimentation en eau froide la pression de l eau au système doit être d un minimum de 40 à 60 lb po 276 414 kPa Si la pression de l eau au système d osmose inverse est inférieure à 40 60 lb po2 276 414 kPa Vérifier pour voir si le filtre à sédiment du système d osmose inverse est bloqué et le remplacer si nécessair...

Page 34: ...e à glaçons est équipée d un filtre à eau incorporé Si la qualité de l eau distribuée localement nécessite un deuxième filtre à eau installer ce dernier dans la canalisation d eau de 6 35 mm au niveau de l un des raccords du tuyau On peut obtenir un tel filtre à eau chez le marchand d appareils électroménagers le plus proche Style 2 1 Débrancher le réfrigérateur ou déconnecter la source de courant...

Page 35: ... vers la droite dans le sens horaire pour rendre le compartiment plus froid Tourner la commande vers la gauche dans le sens antihoraire pour le rendre moins froid Commandes à glissière Glisser la commande d un degré vers la droite pour rendre le compartiment plus froid Glisser la commande d un degré vers la gauche pour le rendre moins froid S il est nécessaire d ajuster les températures dans le ré...

Page 36: ...stribués Cette action peut causer un court délai lors de la distribution de glace concassée Le bruit du broyeur de glaçons est normal et la dimension des morceaux de glace peut varier Lorsqu on change de concassée à glaçons quelques onces de glace concassée seront distribuées avec les premiers glaçons Distribution de glace 1 Appuyer sur le bouton pour sélectionner le type de glace désiré 2 Appuyer...

Page 37: ... bien fermée Systèmedefiltrationdel eau REMARQUE Ne pas utiliser pour le filtrage d une eau microbiologiquement polluée ou de qualité inconnue en l absence d un dispositif de désinfection adéquat avant ou après le système Témoin lumineux de l état du filtre à eau sur certains modèles Le témoin lumineux de l état du filtre à eau vous aidera à savoir quand changer le filtre à eau Le témoin lumineux ...

Page 38: ...s des conditions de fonctionnement normales Si l environnement est particulièrement graisseux poussiéreux ou s il y a des animaux domestiques dans la maison le condenseur devrait être nettoyé tous les deux ou trois mois pour assurer une efficacité maximum Si vous avez besoin de nettoyer le condenseur Retirer la grille de la base Utiliser un aspirateur à brosse douce pour nettoyer la grille les end...

Page 39: ... liquide réfrigérant mouvement des conduites d eau ou d objets posés sur le dessus du réfrigérateur Grésillement gargouillement de l eau tombe sur l élément de chauffage durant le programme de dégivrage Bruit d éclatement contraction expansion des parois internes particulièrement lors du refroidissement initial Bruit d écoulement d eau peut être entendu lorsque la glace fond lors du programme de d...

Page 40: ...tre canalisation d eau froide Ceci peut diminuer la pression de l eau Voir Spécifications de l alimentation en eau soit dans les instructions d installation soit dans le Guide d utilisation et d entretien Les glaçons sont creux ou petits REMARQUE Cela indique une faible pression de l eau La valve de la canalisation d eau n est elle pas complètement ouverte Ouvrir la valve d eau complètement La can...

Page 41: ...rateur Le filtre peut être obstrué ou installé incorrectement Un système de filtration de l eau à osmose inverse est il connecté à votre canalisation d eau froide Voir Spécifications de l alimentation en eau soit dans les instructions d installation soit dans le Guide d utilisation et d entretien De l eau suinte du distributeur REMARQUE Il est normal de constater une ou deux gouttes d eau après la...

Page 42: ...le système Consulter la section Assistance ou service pour obtenir le nom l adresse et le numéro de téléphone du fabricant Consulter la section Garantie pour voir la garantie limitée du fabricant Directives d application Paramètres d approvisionnement en eau Produit testé et certifié par NSF International en vertu de la norme NSF ANSI 42 réduction du goût et de l odeur du chlore et particules de c...

Page 43: ...ter la section Assistance ou service pour obtenir le nom l adresse et le numéro de téléphone du fabricant Consulter la section Garantie pour la garantie limitée du fabricant Directives d application Paramètres d approvisionnement en eau Produit testé et certifié par NSF International en vertu de la norme NSF ANSI 42 réduction du goût et de l odeur du chlore et particules de classe II et en vertu d...

Page 44: ...celui ci est installé dans un endroit inaccessible ou n est pas installé conformément aux instructions d installation fournies CLAUSE D EXONÉRATION DE RESPONSABILITÉ AU TITRE DES GARANTIES IMPLICITES LIMITATION DES RECOURS LE SEUL ET EXCLUSIF RECOURS DU CLIENT DANS LE CADRE DE LA PRÉSENTE GARANTIE LIMITÉE CONSISTE EN LA RÉPARATION PRÉVUE CI DESSUS LES GARANTIES IMPLICITES Y COMPRIS LES GARANTIES A...

Reviews: