14
CHECKING OUT THE DMX FEATURES
With the Mix Engine and DMX Surface both powered up and connected
to the built-in Ethernet switch, on a stand-alone DMX all three green LEDs
on the Engine’s front panel (Figure 2-5 on page 13) will be lit. The Surface
should appear as shown in Figure 1-1 on page 5, but without any meter
displays since there’s no audio connected to the console yet!
Note: Figure 4-2, on page 46, identifies each fader channel control
and Figure 4-4, on page 49, identifies each monitor control.
On Fader Channel 3, with the channel turned off, rotate the Channel
Encoder. That channel’s display switches to show a list of source names
with one name highlighted (Figure 2-6). The name shown above the white
line (Blade01 in Figure 2-6) lists the name of the system device with that
highlighted source (Blade01 is the default name for the PR&E Mix Engine).
Figure 2-6 Selecting a Channel Source
Rotate the encoder clockwise to move the highlighting down the
alphanumeric list of names. Rotate the encoder counter-clockwise (CCW)
to move the highlighting up through the names. The names wrap to
present a continuous list. NoSource, which appears at the top of the list, is
a good way to identify when the names have wrapped around.
Every physical input on the DMX Engine has a signal name of up to eight
characters. The default names all start with BL, for Blade, followed by that
Blade’s ID number (1 is the default ID number for the PR&E Mix Engine).
The default names end with a signal number, like S02, to identify the
physical connection on the Mix Engine and optional Razor I/O Interface.
All DMX inputs are set for stereo—except for Analog Input 1, which is
set as dual mono, with BL01MIC1 and BL01MIC2 set as its source names.
The remaining Analog inputs are: BL001S02; BL001S03; and BL001S04.
The four AES inputs’ default names are BL001S05 thru BL001S08. These
numbers match the jack numbers listed on the Mix Engine’s rear panel.
Analog input 1 is designed to jumper to MICS OUT so the two mic
preamps can be used without having to change any settings. If the built-in
mic preamps are not used, Analog Input 1 can be reset to a stereo input
using PR&E Navigator (see page 38, Changing the Signal Type section).
After the Mix Engine’s physical input signal names you’ll see the internal
signals within the DMX. Many, if not most, of these signals are typically
not set as “visible” on fader channels, but on a new console all signals are
set as visible to ease installing and configuring the DMX. Setting signal
visibility is covered in the Visibilities Page Tab section starting on page 29.
Rotate the channel 3 encoder until BL001S02 is highlighted as shown in
Figure 2-6. Press once on the channel encoder to select that signal. This is
called “clicking” the encoder–just like clicking a PC mouse button. The
highlighted signal is now connected to that fader channel and BL001S02 is
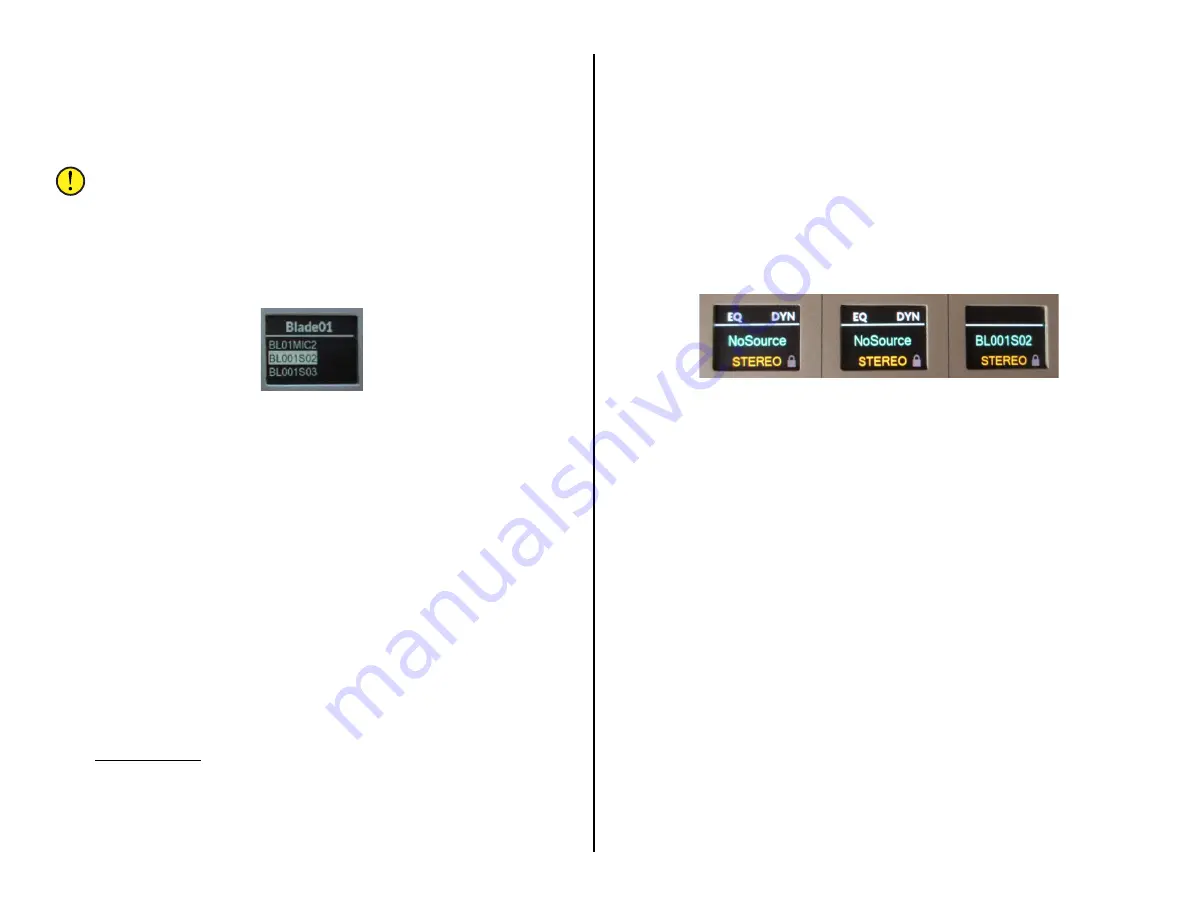
shown, in green, in the middle of the channel 3’s display (Figure 2-7).
Note that in the normal displays the space above the white line is used
to show when cue, equalization, and dynamics are active on that channel.
When cue is active, CUE is shown in the middle of this area. Icons for the
High Pass and/or Low Pass Filters are shown when they’re active. EQ (for
Equalization) and DYN (for Dynamics) are shown when they’re active on a
channel. From the factory, mic processing is loaded into channels 1 and 2,
and is turned on, hence the EQ and DYN indications on those two fader
channels.
Figure 2-7 Displays for Channels 1, 2, and 3
Below the source name, in orange, is the channel’s mode setting. The
default setting for every channel is STEREO (mono signals like mics are fed
to both left and right channels by default).
To either side of the mode name are icons to indicate source status. On
the right side a lock icon indicates that source’s LIO status (logic control
status) by color when the channel is turned on. On the left side—if the
channel source is identified as a mic, there’s a mic icon which turns red
while that channel is turned on.
Advanced Channel Features
Each channel has three Advanced Channel Features: Mode, Pan, and
EQ & Dynamics, which are accessed by “double-clicking” or quickly
pressing twice on the channel encoder. The advanced features are all
unlocked when the DMX ships from the factory.
“Double-click” the channel 3 encoder (tap it twice quickly). Mode now
appears above the white line. Rotating the encoder, while Mode is shown
in the display, steps through the four audio modes (Right, Left, Mono, and
Stereo). Make sure STEREO is shown then double-click the encoder again.
Now Pan is shown above the white line. Rotating the encoder now pans
or balances the signal to the left or right of center. Readjust the encoder
so CENTER is shown then double-click the encoder again.
The displays on channels 1 -8 switch to show the EQ & Dynamics
control screens. The initial display screens set whether EQ & Dynamics are
turned on (set In) or off (set Out) on that channel. Additional screens are


