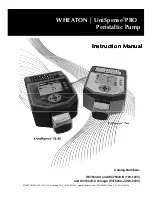
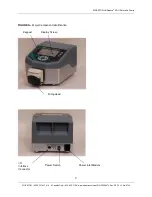
Wheaton UniSpense ELITE Instruction Manual Download Page 13

WHEATON UniSpense

®

 PRO Peristaltic Pump 


WHEATON  | 800.225.1437 (U.S. & Canada Only) | 856.825.1100 | www.wheatonsci.com| P/N 50099073 Rev. 2/2/10 Lit. No.8734 


13 


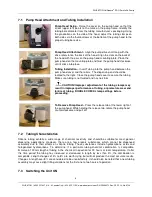
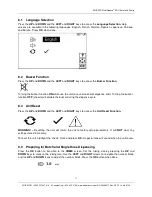
10.2  Priming the Tubing 

Use  the 

UP 

and 

DOWN 

buttons  to  select  the 

PRIME 

icon.  The  PRIME  button  on  the  keypad  now 

becomes active. Push and HOLD the prime button on the keypad to run the pump motor and purge any 
air from the tubing. RELEASE the prime button to stop the motor.  


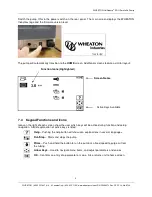
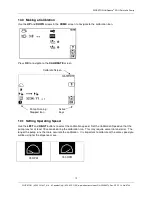
10.3  Calibration Dispense 

Use the 

UP 

and 

DOWN 

button to navigate the 

Calibration Dispense

 icon: 


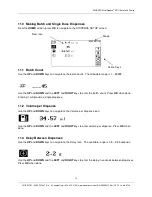
Prepare to measure a dispense by using a graduated cylinder, electronic scale, or other device that can 
accurately  measure  volume.  Press  the 

START  /  STOP 

button  to  begin  a

  calibration dispense. 

For 

best results, the pump should run for a minimum of 15 seconds.  The longer the run time the more 
accurate the calibration.   
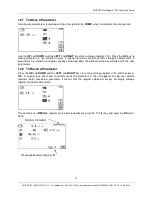


Press the 

START / STOP 

button to end the calibration dispense. 
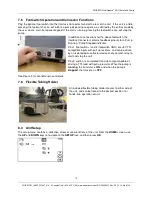
 

Use the 

UP 

and 

DOWN 

buttons and the 

LEFT 

and 

RIGHT 

buttons to enter the measured volume: 


Press 

OK

 to enter the volume and complete the calibration procedure. Press 

OK

 again to return to the 

HOME 

screen. 


Summary of Contents for UniSpense ELITE

Page 1: ...heatonsci com P N 50099073 Rev 2 2 10 Lit No 8734 Catalog Numbers W375040 A and W375040 B 100 120V and W375040 C through W375040 J 220 240V WHEATON UniSpense PRO Peristaltic Pump Instruction Manual In...

Page 2: ...tch Operation and Connector Functions 7 6 Flexible Tubing Holder 8 0 Unit Setup 8 1 Language Selection 8 2 Buzzer Function 8 3 Unit Reset 9 0 Preparing for Batch and Single Dose Dispensing 10 0 Making...

Page 3: ...s of identifying such a problem by calling Customer Service at 800 225 1437 U S Puerto Rico and Canada or Internationally at 856 825 1100 and then providing the Model Serial and Catalog Number of the...

Page 4: ...ain long hair 6 Wear safety goggles Wear safety goggles at all times Everyday eyeglasses only have impact resistant lenses they are NOT safety glasses 7 Don t Overreach Keep proper footing and balance...

Page 5: ...te Ranges For Various Tubing Sizes 3 2 0mm ID 0 5 mL sec and 1 0 mL sec 3 0mm ID 1 0 mL sec and 2 0 mL sec 6 0mm ID 3 5 mL sec and 7 1 mL sec 8 0mm ID 5 6 mL sec and 11 2 mL sec Vertical Head Height A...

Page 6: ...hed Retain packaging until all parts and unit functionality are confirmed Components Supplied UniSpense PRO peristaltic pump Pump Head Line Cord supplied to fit your local electrical outlet specificat...

Page 7: ...e selected set ups can be stored in memory and quickly retrieved for later use Selections stored in memory are preserved even after powering the unit down Pump speed is selectable at 75 and 150 RPM A...

Page 8: ...kinks CAUTION Improper adjustment of the tubing clamps may result in improper performance of tubing or premature wear and failure of tubing DOUBLE CHECK clamp settings before proceeding To Remove Pump...

Page 9: ...pad Functions and Icons Icons on the right of each screen show the user which keys will be active during function and setup navigation A brief explanation of active keys is listed Help Pushing the hel...

Page 10: ...or a Pump Running Pump Stopped indicator Pins 1 footswitch and 2 footswitch GND are 5V TTL compatible inputs with pull up resistors and can be driven by an isolated open collector device or dry contac...

Page 11: ...ispense alert Turning the buzzer function OFF shown will disable the buzzer during the dispense cycle 8 3 Unit Reset Press the UP and DOWN and the LEFT and RIGHT keys to access the Unit Reset Function...

Page 12: ...ate to the CALIBRATE screen 10 1 Setting Operating Speed Use the LEFT and RIGHT buttons to select the calibration speed Set the Calibration Speed so that the pump runs for at least 15 seconds during t...

Page 13: ...e Use the UP and DOWN button to navigate the Calibration Dispense icon Prepare to measure a dispense by using a graduated cylinder electronic scale or other device that can accurately measure volume P...

Page 14: ...nd DOWN and the LEFT and RIGHT keys to enter the batch count Press OK when done Entering 1 will provide a single dispense 11 2 Volume per Dispense Use the UP and DOWN keys to navigate to the Volume pe...

Page 15: ...and RIGHT keys to enter the dispense volume Press OK when done Press the Start Stop button to resume batch dispensing 11 6 To Run Additional Batches with the Same Settings Press the Start Stop button...

Page 16: ...storage of parameters If parameters are stored in a register already containing data the old data will be overwritten with the new parameters 12 2 To Recall a Parameter Press the UP and DOWN and the...

Page 17: ...n of the tubing assembly for excessive wear and leaks Many service problems can often be cured by simply replacing a worn tubing assembly To insure high accuracy the pump rotor and tubing clamping mec...

Page 18: ...pump motor speed as required Cause Motor control board defective Remedy Replace defective board Cause START Key not pressed Remedy See Unit Features and Component Identification for keypad and displa...

Page 19: ...Thickness mismatch with pump head used Remedy Tubing wall weight should match pump head specifications Inaccurate Volume Delivery Cause Tubing assembly worn Remedy Replace tubing assembly Cause Pump...

Page 20: ...IS DISCONNECTED FROM THE AC POWER SOURCE 1 Disconnect the cord set from the AC power source 2 Remove the fuse drawer by using a small flat screwdriver to lift the tab 3 Replace with new fuses 108 120...

Page 21: ...p WHEATON 800 225 1437 U S Canada Only 856 825 1100 www wheatonsci com P N 50099073 Rev 2 2 10 Lit No 8734 21 FIGURE A Major Component Identification Display Screen Keypad Pump Head I O Interface Conn...

Page 22: ...STAR 6 INT TOOTH 17 1 50099063 STF 6 32 X 1 4 ALUMINUM 18 2 WI056864 FUSE 5X20MM 2 0AT 250V 120V 18 2 WI056862 FUSE 5X20MM 1 0AT 250V FIGURES C THRU E Upper Housing Assembly Main Assembly and Wiring D...

Page 23: ...WHEATON UniSpense PRO Peristaltic Pump WHEATON 800 225 1437 U S Canada Only 856 825 1100 www wheatonsci com P N 50099073 Rev 2 2 10 Lit No 8734 23...

Page 24: ...WHEATON UniSpense PRO Peristaltic Pump WHEATON 800 225 1437 U S Canada Only 856 825 1100 www wheatonsci com P N 50099073 Rev 2 2 10 Lit No 8734 24...

Page 25: ...WHEATON UniSpense PRO Peristaltic Pump WHEATON 800 225 1437 U S Canada Only 856 825 1100 www wheatonsci com P N 50099073 Rev 2 2 10 Lit No 8734 25...

Page 26: ...WHEATON UniSpense PRO Peristaltic Pump WHEATON 800 225 1437 U S Canada Only 856 825 1100 www wheatonsci com P N 50099073 Rev 2 2 10 Lit No 8734 26...

Page 27: ...WHEATON UniSpense PRO Peristaltic Pump WHEATON 800 225 1437 U S Canada Only 856 825 1100 www wheatonsci com P N 50099073 Rev 2 2 10 Lit No 8734 27...

Page 28: ...arations of Conformity and WEEE Statement WEEE STATEMENT This UniSpense PRO peristaltic pump is not to be discarded in typical trash outlets This unit is to be discarded according to WEEE guidelines e...

Page 29: ...quirements specified by the appropriate EU Directive with respect to the design and construction of the commercialized version This declaration is invalid if modifications are performed on the device...

Reviews: