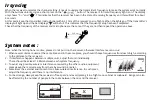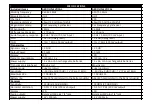
Receiver connection
Quick setup
1 - Fix both of the antennae to the rear panel of the receiver.
2 - Connect the device to the external audio equipment (amplifier / mixer etc).
3 - Do not turn on the power of the audio device (such as external amplifier).
4 - Turn on the power of the receiver, then turn on the power of the transmitter (mic)
For Transmitter and receiver frequency pairing, please refer to the ‘pair frequency’
section of this manual.
5 - Look at the receiver LCD. Speak into the microphone and the AF signal bar changes.
This indicates that the wireless microphone is working properly. Turn on the power of other external
devices, adjust the volumes, and start performing!
Important order for switching on : Receiver - preamplifier - power amplifier.
Before starting the first time, please turn down all volumes to minimum. For shutdown always
turn the system off in this order : Amplifier - Preamp - Receiver.
6 - If there is a possible fault please see the troubleshooting guide in this user manual or contact your
Wharfedale Pro retailer or distributor.
Turn the receiver power button to “ON”. The LCD shows frequency after it lights about 1 second.
The receiver enters the ready state.
Turn the receiver power button to “OFF”. The receiver shows “OFF” and the power supply is turned off after 1 second.
If you are not using the receiver for a long time, unplug the power adapter from the AC outlet.
Always turn off external amplification when turning on or off source devices.
Insert the antennae into the receiver base and turn the antennae plugs to the
right until they are tight. Position the antennae so that they are perpendicular
to the ground.
Connect the power output plug of the supplied power adapter into the power
socket of the receiver.
Use an unbalanced 6.35 mm audio cable to connect the unit to the amplifier,
or for better results, use the balanced XLR line output socket to connect other
audio equipment with balanced inputs.


