background image


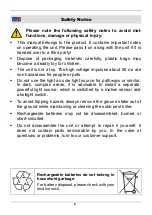
Safety Notes


Please note the following safety notes to avoid mal-
functions, damage or physical injury: 

ƒ

  This manual belongs to the product. It contains important notes 

on operating the unit. Please pass it on along with the unit if it is 
handed over to a third party! 

ƒ

  Dispose of packaging materials carefully; plastic bags may 

become a deadly toy for children. 

ƒ

  The unit is not a toy. The high voltage impulses about 50 mJ are 

non hazardous for people or pets. 

ƒ

  Do not use the light as sole light source for pathways or similar. 

In dark, complex areas, it is advisable to install a separate,  
powerful light source, which is switched by a motion sensor and 
a twilight switch. 

ƒ

  To avoid tripping hazard, always remove the ground stake out of 

the ground while maintaining or cleaning the solar pest killer. 

ƒ

  Rechargeable batteries may not be disassembled, burned or 

short-circuited. 

ƒ

  Do not disassemble the unit or attempt to repair it yourself. It 

does not contain parts serviceable by you. In the case of  
questions or problems, turn to our customer support. 


Rechargeable batteries do not belong in 
household garbage. 

For battery disposal, please check with your 
local council.


Summary of Contents for 36 16 42

Page 1: ...Westfalia Bedienungsanleitung Nr 107243...

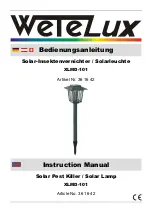
Page 2: ...Solar Insektenvernichter Solarleuchte XLMD 101 Artikel Nr 36 16 42 Solar Pest Killer Solar Lamp XLMD 101 Article No 36 16 42 Bedienungsanleitung Instruction Manual...

Page 3: ...tely and help prevent misunderstandings and possible damage Mit dem Solar Insektenvernichter eliminieren Sie l stige Insekten aus Ihrer Umgebung Mit der Solarleuchte k nnen Sie nur durch Sonnenenergie...

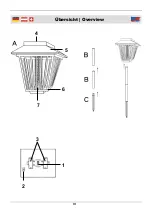
Page 4: ...III bersicht Overview 4 6 5 7 2 3 1...

Page 5: ...C Bodenpfeiler Ground Stake 1 LEDs LEDs 2 EIN AUS Schalter Licht Insektenkiller ON OFF Switch Light Insect Killer 3 Akkufach Battery Compartment 4 Solarmodul Solar Module 5 Abdeckung Cover 6 Au engitt...

Page 6: ...Page10 Troubleshooting Page10 Changing the Batteries Page11 Technical Data Page12 Sicherheitshinweise Seite 2 Montage Seite 3 Bedienung Seite 3 Wartung Seite 4 Reinigung Seite 4 Fehlerbehebung Seite 4...

Page 7: ...Stellen empfiehlt es sich eine separate und ausreichend helle Lichtquelle zu installieren welche z B ber einen D mmerungs schalter mit Bewegungsmelder gesteuert wird Um Stolpergefahren zu vermeiden ne...

Page 8: ...ul ab Bedenken Sie dass fremde Lichtquellen die Leuchte evtl vor ber gehend abschalten Deshalb positionieren Sie den Solar Insekten vernichter nicht in der N he von Hausnummernbeleuchtung Wand leuchte...

Page 9: ...st nde regelm ig Zum ffnen des Au engitters 6 lesen Sie bitte das Kapitel Akkuwechsel Fehlerbehebung Sollte der Solar Insektenvernichter noch nicht ausreichend hell sein dauert es ca einen vollen Sonn...

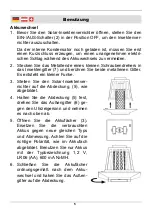
Page 10: ...nd ber hren Sie beide metallenen Gitter Es entsteht ein kleiner Funke 3 Stellen Sie den Solar Insektenver nichter auf die Abdeckung 5 wie abgebildet 4 Halten Sie die Abdeckung 5 fest drehen Sie das Au...

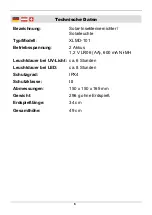
Page 11: ...yp Modell XLMD 101 Betriebsspannung 2 Akkus 1 2 V LR06 AA 600 mA Ni MH Leuchtdauer bei UV Licht ca 6 Stunden Leuchtdauer bei LED ca 8 Stunden Schutzgrad IPX4 Schutzklasse III Abmessungen 150 x 150 x 1...

Page 12: ...7...

Page 13: ...as sole light source for pathways or similar In dark complex areas it is advisable to install a separate powerful light source which is switched by a motion sensor and a twilight switch To avoid tripp...

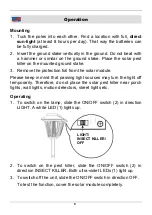
Page 14: ...otection foil from the solar module Please keep in mind that passing light sources may turn the light off temporarily Therefore do not place the solar pest killer near porch lights wall lights motion...

Page 15: ...loth Clean pest residues regularly To open the external grille 6 please read the chapter Changing the Batteries Troubleshooting If the solar pest killer does not shine bright it will take approximatel...

Page 16: ...allic grilles You will see a small spark 3 Turn the solar pest killer upside down on the cover 5 as shown 4 Hold the cover 5 tight and turn the external grille 6 counter clockwise to remove the extern...

Page 17: ...ating Voltage 2 Batteries 1 2 V LR06 AA 600 mA Ni MH Illumination Time with UV approx 6 hours Illumination Time with LED approx 8 hours Degree of Protection IPX4 Protection Class III Dimensions 150 x...

Page 18: ...2006 A1 A2 EN 61547 2009 Hagen den 29 Dezember 2009 Thomas Klingbeil Qualit tsbeauftragter We the Westfalia Werkzeugcompany Werkzeugstra e 1 D 58093 Hagen declare by our own responsibility that the pr...

Page 19: ...Internet www westfalia net Kundenbetreuung Customer Services Werter Kunde bitte helfen Sie mit Abfall zu vermeiden Sollten Sie sich einmal von diesem Artikel trennen wollen so bedenken Sie bitte dass...

Reviews: