


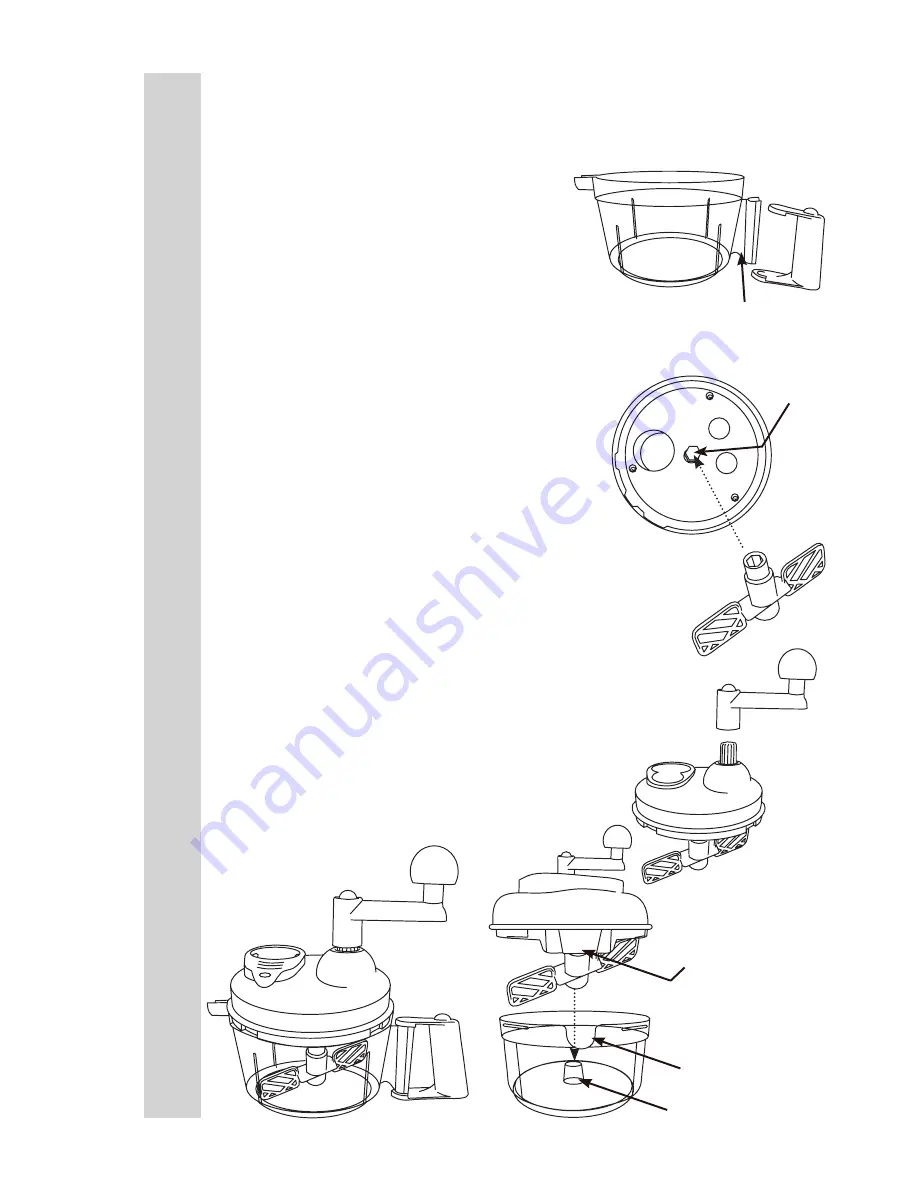
MIXER/CHOPPER ASSEMBLY
1. Attach the Removable Handle to the Mixing
Container. Align the bottom of the Removable
Handle with the “C” shaped handle of the
Mixing Container. Pull up and over on the
Removable Handle to snap the Handle onto
the Mixing Container (
FIGURE A)
. Test to
make certain the Removable Handle is snug
into position on the Mixing Container.
2. Beater Attachment or the 3 Blade
Chopper Attachment: From the underside
of the Mixing Lid, align the slot of the
Beater Attachment or the 3 Blade Chopper
Attachment with the post in the Mixing Lid.
The Attachment should fit snugly onto the
post (
FIGURE B
).
3. Align the grooves in the Mixing Handle
with the splines on the Mixing Lid. Push the
Mixing Handle firmly down (
FIGURE C
).
4. Line up the spout shield on the Mixing Lid
with the Spout on the Mixing Container, turn
the Mixing Lid slightly to the right to misalign
the spout shield. Place the Mixing Lid on
the Mixing Container and turn the Mixing
Lid clockwise to lock the Mixing Lid onto the
Mixing Container. The Attachment should
be on the Attachment Hub (
FIGURE D).
5. The Mixer/Chopper is now ready to use
(
FIGURE E
).
FIGURE B
Beater
Attachment
Slots for Mixer
& Whisk
Attachments
Underside of
Mixing Lid
FIGURE A
Removable
Handle
Mixing Container
“C” handle
FIGURE C
Splines
Mixing Lid
Mixing Handle
FIGURE D
Attachment Hub
Spout Shield
FIGURE E
Spout
6
ENGLISH INSTRUCTIONS


