22
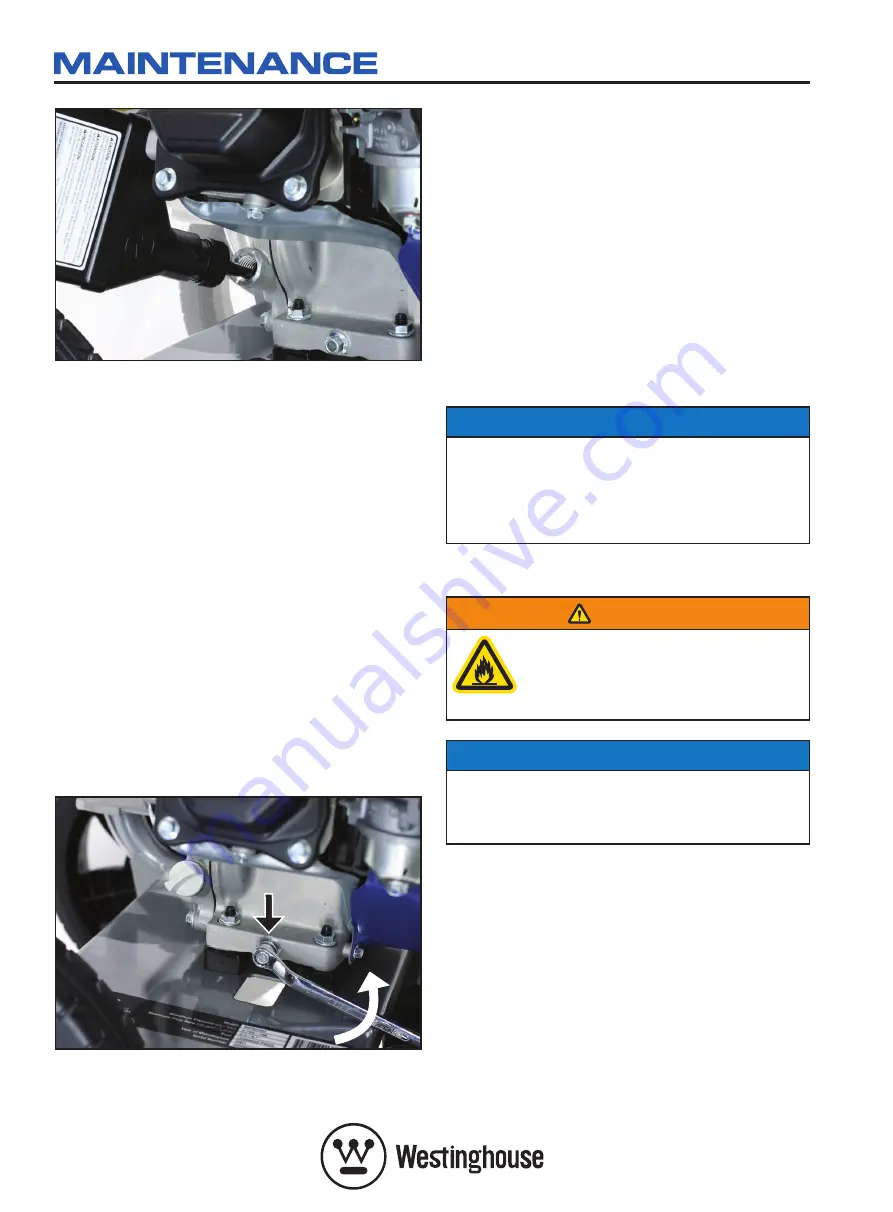
Figure 26 – Adding Engine Oil
8. Continue to add oil until the oil is at the correct
level. See Checking Engine Oil. A simple visual
guide is to observe the oil level relative to the
bottom lip of the oil filler neck in the engine (into
which the oil plug & dipstick is screwed). If the oil
reaches the bottom lip, then it’s at the high level.
If the oil is above the bottom lip and flows out of
the hole, then it’s too full and the excess must be
drained out.
Changing Engine Oil
Tools required –
10 mm spanner and oil drain pan.
1. Stop engine if running.
2. Let engine cool for several minutes to allow the
crankcase pressure to equalise.
3. Place oil pan or suitable container underneath the
cut-out in the chassis baseplate located below the
oil drain plug.
4. Use a rag to thoroughly clean around the oil drain
plug and also the oil fill plug & dipstick.
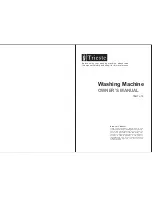
Figure 27 – Removing the Oil Drain Plug
5. Remove the oil drain plug (see Figure 27). Once
removed, place the oil drain plug on a clean
surface.
6. Remove the oil fill plug & dipstick so that the oil
can flow more easily from the oil drain port.
7. Allow oil to drain completely. Tilting the pressure
washer slightly towards the oil drain hole will help
to empty the crankcase.
8. Replace and tighten oil drain plug.
9. Fill crankcase with oil following the steps outlined
in Adding Engine Oil.
10. Dispose of used engine oil properly.
An alternative and superior method for draining is to
use an oil extractor vacuum pump to remove the used
oil via the oil fill plug hole.
NOTICE
Never dispose of used engine oil by dumping the oil
into a sewer, on the ground, or into groundwater or
waterways. Always be environmentally responsible.
Follow the guidelines of the government agencies
for proper disposal of hazardous materials. Consult
local authorities or reclamation facility.
AIR FILTER
WARNING
Never use fuel or other flammable
solvents to clean the air filter. Use only
household detergent and warm water
or alternatively a non-flammable
solvent.
NOTICE
Do not operate the pressure washer with a
damaged or missing air filter element. This will allow
dirt to enter the engine and cause accelerated wear,
thereby shortening the life of the engine.
The air filter should be cleaned after every 50 hours
of use and replaced after every 100 hours of use
(or every year, whichever occurs first). These
maintenance intervals should be reduced if the
pressure washer is operated in a dusty environment.
Cleaning the Air Filter Elements
1. Turn off the pressure washer and let it cool for
several minutes if it has been running.
2. Move the pressure washer to a level surface.
3. Unscrew the wing nut holding the air filter cover in
place and remove the cover (see Figure 28).


