21
Operation
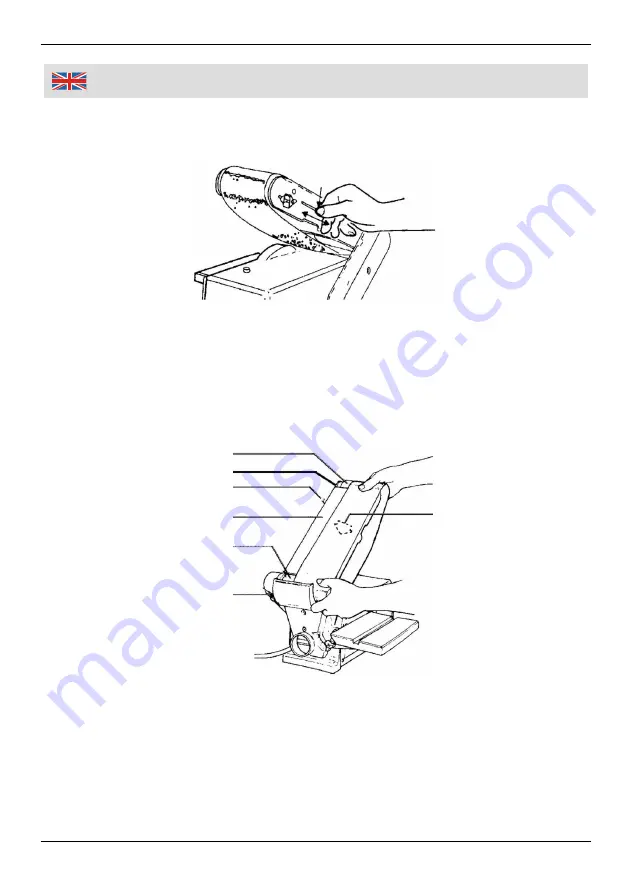
2. Flip the belt tensioner (66) to the right, to slacken the sanding belt.
3. Remove the worn sanding belt. Place the new sanding belt over both rollers
(65, 13) in such a way that the arrow on the back points, in the same way as
in the picture, towards the rear roller and that the belt runs over the middle of
both rollers.
4. Flip the belt tensioner (66) to the left to tighten the sanding belt. Tighten the
stop screw (56) after setting the belt sander (4) to the desired position.
5. Insert the power plug into a wall socket and run the machine briefly. Use the
button
I
to turn the machine ON and the button
O
to turn the machine OFF.
If the sanding belt does not run straight, it can be adjusted with the locking
knob (1).
If the sanding belt creeps towards the sanding disc, turn the locking knob (1)
a quarter turn to the right and recheck.
If the sanding belt creeps away from the sanding disc, turn the locking knob a
quarter turn to the left and recheck.
Locking Knob (1)
Belt Tensioner (66)
Belt Sander (4)
Rear Drive Pulley (65)
Stop Screw (56)
Directional
Arrow on the
Belt
Front Drive Pulley (65)


